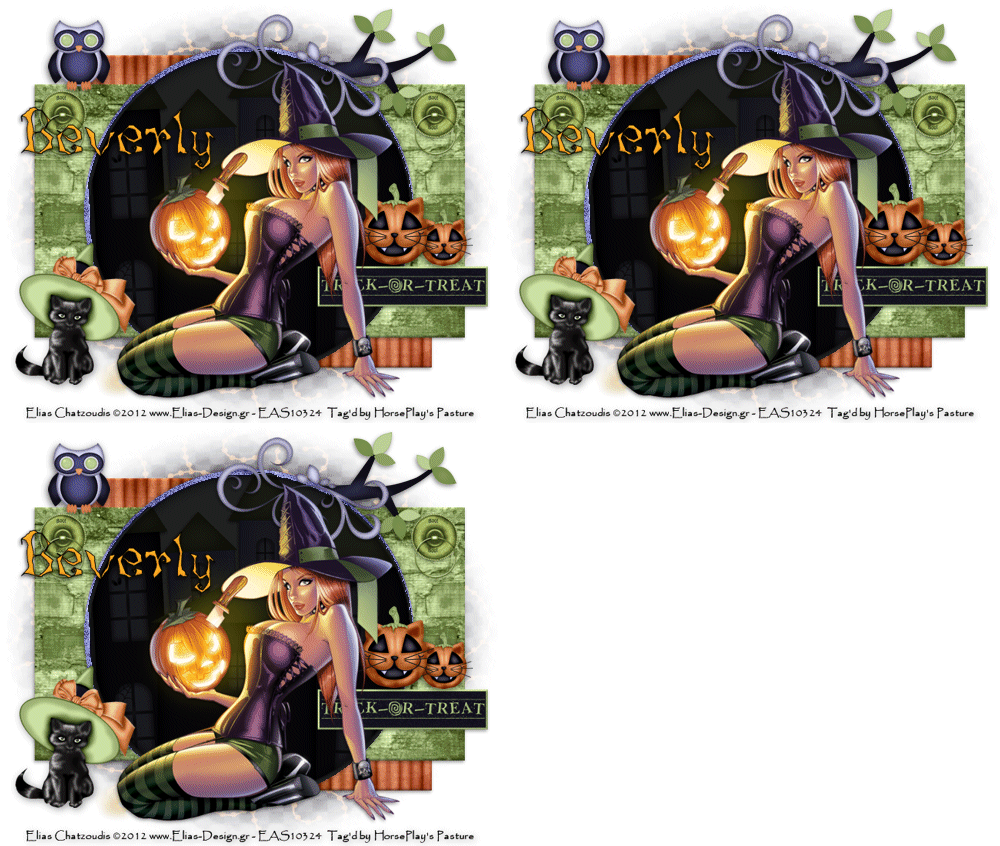
Supplies
1 tube of choice – I used the wonderful artwork of Elias Chatzoudis
which can be purchased from his art shop here. You must have a license to use.
Font of choice - I used Lunacy More here
Weescotlass Mask 208 here
Templates by Rosey Template 78 here.
Scroll down, on the left hand side her templates are in bulk downloads.
Plug Ins used:
DSB Flux – Bright Noise
Animation Shop
“Halloween” is a tagger size scrap kit created by Nette of Nette’s
NightOwl Works and can be purchased from Lollipopsn Gumdrops. You can visit her blog here.
This tutorial was written assuming you have a working knowledge of PSP.
~♥~ Let’s get started ~♥~
Open up the template.
Shift + D.
Close out the original.
Open up Raster 5 layer.
Delete the top 9 layers, Pixel Word Art layer, Bottom Left and Right
Purple circle layers.
Highlight Orange Fritillary Rectangles Layer.
Click anywhere outside of it with your Magic Wand.
Selections/Invert
New Raster layer.
Copy and paste Paper 7 Into Selection.
Deselect.
Delete the template layer.
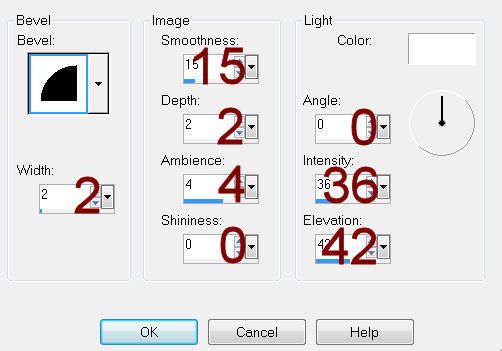
Give it a slight Inner Bevel:

Highlight Green Rectangle Box Layer.
Click on it with your Magic Wand.
New Raster layer.
Copy and paste Paper 5 Into Selection.
Duplicate
Mirror
Deselect.
Make your Selection Tool active set on Rectangle.
Section off the right hand side of the paper you just mirrored.
Tap the delete key.
Deselect.
Merge Visible both paper layers.
Delete the template layer.
Give it the same slight Inner Bevel.
Highlight Black Circle Layer.
Click on it with your Magic Wand.
New Raster layer.
Copy and paste Paper 3 Into Selection.
Deselect.
Delete the template layer.
Adjust/Add Remove Noise/Add Noise:
Uniform and Monochrome checked
Noise: 48%
OK
Give it the same slight Inner Bevel.
Highlight Orange Circle layer.
Click on it with your Magic Wand.
New Raster layer.
Flood fill with #202020.
Copy and paste House as a new layer.
Resize 50%
Position over the black circle – see my tag for reference.
Change the Properties to Multiply.
Selections/Invert
Tap the delete key.
Deselect.
Delete the template layer.
Copy and paste your tube as a new layer.
Move into position.
Duplicate 2x’s for a total of 3 layers.
Rename them Tube 1, Tube 2, Tube 3.
Make your Freehand Selection Tool active set on Point to Point.
Section off each the area of the eyes, nose, and mouth that looks like
the inside of the pumpkin.
Highlight Tube 1 layer.
Apply DSB Flux – Bright Noise:
Intensity: 10
Mix Checked
OK
Highlight Tube 2 layer.
Repeat the above step accept hit the mix button twice.
Highlight Tube 3 layer.
Repeat the above step accept hit the mix button 3x’s.
Deselect.
Close out Tube 2 and Tube 3 layers.
Only Tube 1 layer should be left open.
Add your elements. I used:
Branch: Resize 25%
Boo Button: Resize 15%/Duplicate
Totwart: Resize 25%
Kitty Pumpkin: Resize
10%/Duplicate/Resize 70%
Kit Kat: Resize 20%
Nightie Owl: Resize 10% and 80%
Flourish: Resize 25%/Mirror
Highlight your white background.
New Raster layer.
Select All.
Copy and paste the Paper 10 Into Selection.
Deselect.
Apply the mask.
Resize 110%
Merge Group.
Add your credit.
Add your name:
Color pallet:
Foreground: #000000
Background: #faaa21
Stroke: 1.0
Type your name.
Give it the same Inner Bevel.
Resize all layers 80%.
Copy Merge.
~ Time to Animate ~
Open up Animation Shop.
Paste As New Animation.
Back into PSP.
Close out Tube 1.
Open up Tube 2.
Copy Merge.
Carry Into AS.
Edit/Paste/After Current Frame.
Back in PSP.
Close out Tube 2.
Open up Tube 3.
Copy Merge.
Carry Into AS.
Edit/Paste/After Current Frame.
If you’re happy with your tag then save.

No comments:
Post a Comment