

Supplies
1 tube of choice – I used the wonderful artwork of Mitzi Sato-Wiuff
which can be purchased from PSP TubeStop. You must have a license to use.
Font of choice - I used Wretched here
Weescotlass Mask 236 here
Mary of Country Bug Template 10 here
It’s the group of templates under Sunday August 12, 2012
Thank you Mary!
My supplies here.
The paper and elements are to be used for this tutorial only.
Plug Ins used:
DSB Flux – Bright Noise
This tutorial was written assuming you have a working knowledge of PSP.
~♥~ Let’s get started ~♥~
Open up the template.
Shift + D.
Close out the original.
Delete the top 2 layers.
Open up the tube.
Highlight the very bottom layer – “FeeVerteOriginal”
Make your Selection Tool active set on Rectangle.
Section off the small area of the top left corner only sectioning off
the beautiful background only.
Copy.
Make your working canvas active.
Highlight Slats layer.
Click on each one with your Magic Wand.
New Raster layer.
Copy Into Selection – the background should be pasted in there.
Make your Clone Brush active.
Right click on an area that doesn’t have Mitzi’s copyright stamp on it.
Left click on the mouse and hold it down while you run the brush over
the copyright stamp – it’s doesn’t have to be perfect because the tube will
cover most of the copyright stamp.
Deselect.
Duplicate
Shift + B.
The Brightness/Contrast box should appear.
Brightness: -49
Contrast: 10
Ok
Move this layer to the right just a bit.
In your layers pallet move it beneath the original paper layer.
Merge Visible both paper layers.
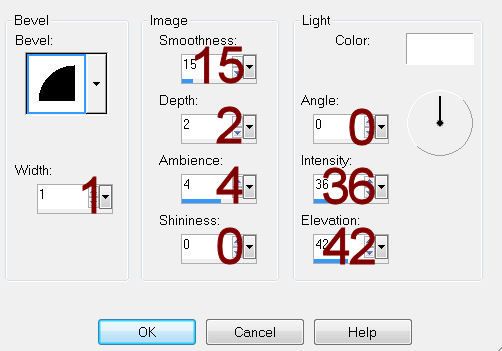
Give it a slight Inner Bevel:
Highlight White Circle layer.
Click on it with your Magic Wand.
New Raster layer.
Copy and paste the Paper I supplied Into the Selection.
Deselect.
Duplicate
Change the Properties to Multiply.
Merge Down.
Apply DSB Flux – Bright Noise:
Intensity: 31
Mix checked’
OK
Delete the template layer.
Highlight Black Circle layer.
Click on it with your Magic Wand.
New Raster layer.
Copy and paste the paper Into Selection.
Copy and paste your tube as a new layer over the paper layer.
Selections/Invert
Tap the delete key.
Deselect.
Change the Properties of the tube to Soft Light.
Lower the Opacity to about 48.
Copy and paste your tube as a new layer.
Add the elements I supplied.
Free rotate the leaf branch right 90 degrees.
Highlight your white background.
New Raster layer.
Select All.
Copy and paste the Paper Into Selection.
Deselect.
Apply the mask.
Merge Group.
Center it just a bit better behind the circle.
Now you’re going to type the words around the circle:
Make your Ellipse Tool active set on Draw Circle.
Color Pallet-
Foreground: #000000
Background: Null
Line Style: Solid
Width: 2
Draw a circle that’s just a bit larger than the
glitter circle.
If it’s too small resize to make larger and vice versa
if it’s too large.
Center this the best you can around the glitter
circle.
Color Pallet:
Foreground: #000000
Background: #404040
Stroke: .80
Make your Text Tool active.
You want the words centered on the right side of the
circle so move your mouse near the center of the right side of the circle until
you see a rocking A then click your mouse.
The text box will open.
Type: A rustle in the wind reminds us a fairy is near.
(or type whatever you choose)
In your layers pallet Right click on the + sign on the
text layer.
Click on the eye of the New Ellipse layer to close it
out.
Highlight Vector 1 layer.
Right Click.
Convert to Raster layer.
Add your credits.
Add your name.
Color Pallet:
Foreground: #000000
Background: #404040
Stroke: 1.0
Type your name.
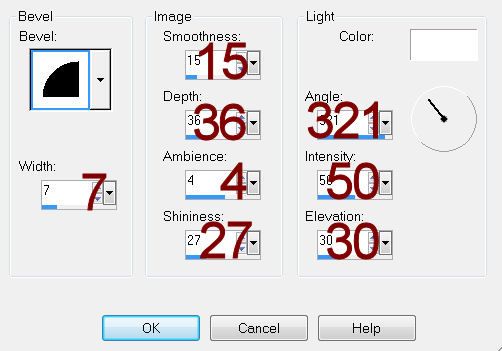
Give it a slight Inner Bevel:
Duplicate the star element layer.
Resize 35%
Use to decorate your name.
Resize all layers 80%.
No comments:
Post a Comment