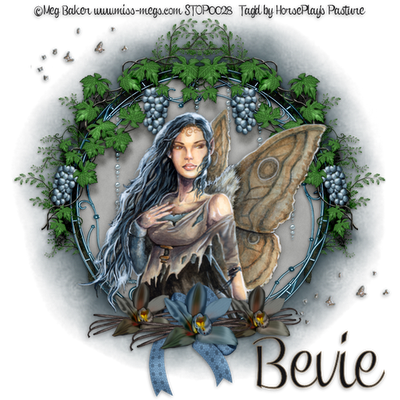
Supplies
1 tube of choice – I used the beautiful artwork of Meg Baker which can
be purchased from PSP TubeStop. You just have a license to use. The butterflies used in this tutorial came
with the tube.
“Blue Dream” is a FTU tagger size scrap kit created by Cindy of Puddicat
Creations and can be downloaded from her blog here.
Thank you Cindy for your wonderful
generosity!
This tutorial was written assuming you have a working knowledge of PSP.
~♥~ Let’s get started ~♥~
This tutorial is a quickie!
Open up a 700 x 700 blank canvas.
Flood fill white.
Copy and paste Frame 5 as a new layer.
Resize 65%
Click anywhere outside of it with your Magic Wand.
Selections/Invert
Selections/Modify/Contract by 17.
Copy and paste Paper 13 Into Selection.
Copy and paste Bling 1 as a new layer over the paper layer.
Selections/Invert
Tap the delete key.
Deselect.
Copy and paste your tube as a new layer.
Move into position in front of the frame.
Highlight the paper layer.
Click anywhere outside of it with your Magic Wand.
Selections/Invert
Highlight the tube layer.
Use your Eraser Tool to erase any part of the tube you don’t want to
hang outside of the frame.
Deselect.
Add your elements. I used:
Grapevine 1: Resize
45%/Duplicate/Mirror
Tree 1: Resize
45%/Duplicate/Mirror
Ribbon 5: Resize 35%/Flip
Flower 3: Resize 45%
Flower 1: Resize 45% and 80%/Duplicate
The butterflies from the tube – Highlight the layer that has them. Use your Freehand Selection Tool and circle
around them. Copy. Paste on your working canvas. Duplicate.
Highlight your white background.
New Raster layer.
Select All.
Copy and paste Paper 16 Into Selection.
Deselect.
Apply the mask.
Resize 95%
Merge Group.
Add your credits.
Add your name.
Color Pallet:
Foreground: #927b5d
Background: #161517
Stroke: 1
Type your name.
Convert to Raster layer.
Resize all layers 80%.


No comments:
Post a Comment