Supplies
1 tube of choice – I used the beautiful artwork of Katerina Koukiotis
which can be purchased from PSP TubeStop. You must have a license to use.
My Circle template here
“Springfully Delightful” is a tagger size scrap kit created by Charlene
of Memory Lane Creations and can be purchased from Inspirations of Scrap Friends. You can visit
her blog here.
Thank you Charlene for a really beautiful kit.
This tutorial was written assuming you have a working knowledge of PSP.
~♥~ Let’s get started ~♥~
Open up a 700 x 700 blank canvas.
Flood fill white.
New Raster layer.
Make your Selection Tool active set on Rectangle.
Create a rectangle approximately 575 x 360 pixels.
Copy and paste Paper 17 Into Selection.
Adjust/Add Remove Noise/Add Noise:
Uniform and Monochrome checked
Noise: 15%
OK
Selections/Modify/Contract by 12.
New Raster layer.
Copy and paste Paper 8 Into Selection.
Deselect.
Give this paper layer a drop shadow.
Merge Down.
Both papers should now be on the same layer.
Center this merged layer on your canvas.
DO NOT give this layer a drop shadow yet.
Copy and paste Matt 2 as a new layer – don’t worry about placement.
Resize 80%
Open up the circle template that I supplied.
Copy and paste it as a new layer.
Center it over the Matte.
Click on it with your Magic Wand.
New Raster layer.
Copy and paste Paper 8 Into Selection.
Copy and paste your tube as a new layer.
Deselect and position the tube over the circle layer.
Give the tube layer a drop shadow now.
Merge Visible with the circle paper layer – the tube layer will be
overhanging the circle.
Highlight the circle template layer.
Click on it with your Magic Wand.
Highlight the tube/paper merged layer.
Tap the delete key.
Selections/Invert
Selections/Modify/Inside Outside Feather:
Both checked
Feather amount: 30
OK
Tap the delete key until you have a nice feathered look to the merged
layer.
Deselect.
Delete the template layer.
Merge Visible the tube/paper merged layer and the matte.
Move both merged layers into position – see my tag for reference.
Copy and paste Eyelet Lace 4 as a new layer.
Resize 50%
Position behind the merged rectangle layer allowing a little of the
lace to be seen just over the top of the rectangle – see my tag for reference.
Duplicate/Flip – position this at the bottom of the rectangle.
Highlight the original lace layer and duplicate twice.
To one of the layers Free rotate Right 90 degrees.
To the other layer free rotate Left 90 degrees.
Move both of these vertical lace layers into position at the sides of
the rectangle.
Give each lace layer a drop shadow.
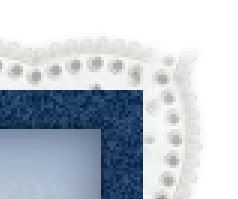
Using your Eraser Tool – you can use the default settings but lower the
Hardness to about 22 – you want to erase all of the lace that overhangs accept
create a type of point at the corners so that the vertical and horizontal laces
blend together:

Copy and paste dblframeclstr as a new layer.
Resize 40%
Mirror
Move into position behind the top left of the rectangle – see my tag
for reference.
Paste the frame again.
Resize 40%
Flip
Move into position behind the bottom right of the rectangle – see my
tag for reference. Erase the bit of
butterfly that stick out from the rectangle.
To each frame layer:
Use your Magic Wand and click inside the frame that can be seen.
Selections/Modify/Expand by 4.
New Raster layer below the frame.
Copy and paste Paper 1 Into Selection.
Deselect.
Copy and paste Scatter 1 as a new layer.
Resize 35%
Make your Target Tool active and change the color of this element to
#64586f.
Copy and paste Brad 4 as a new layer.
Resize 10%
Move it into position over the center of one of the scatter flowers.
Duplicate the brad and place over the center of another flower.
Keep doing this until all the scatter flowers have the brad over the
centers.
Merge Visible all the brads and scatter layer.
Resize the merged layer 70%
Duplicate
Move both into position – see my tag for reference.
Add your elements. I used:
Garden Vignette 1: Resize 60%
Hummingbird 1: Resize 50%/Duplicate/Mirror
Jrnl Paper 1 & 2: Resize
50%/Free rotate Left 20 degrees
Ribbon: Resize 70%/Duplicate/Flip
and move to the bottom behind the rectangle
Ribbon again: Resize 70%/Duplicate/Mirror/move behind the top left
frame.
Matte 3: Resize 70%
Crop your image.
Highlight your white background.
New Raster layer.
Select All.
Copy and paste The kit preview Into Selection.
Deselect.
Adjust/Blur/Gaussian blur:
Radius: 20
Apply the mask.
Merge Group.
Use your Pick Tool and pull the sides out just a little.
Add your credits.
Add your name.
Color Pallet:
Foreground: #000000
Background: #eab0ef
Stroke: 1
Type your name.
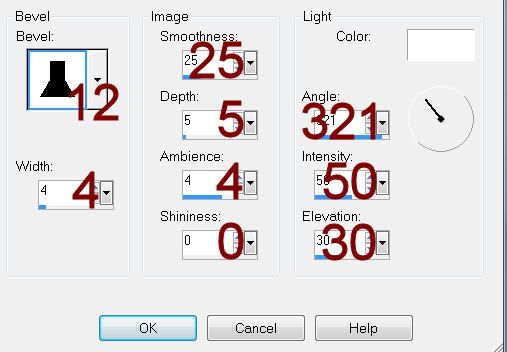
Give it an Inner Bevel.

Resize all layers 80%.


So pretty, Bev! Thanks for using "Springfully Delightful" to make the beautiful tag!
ReplyDeleteCharlene
You're very welcome Charlene. Gorgeous kit you made!!
ReplyDelete