Supplies
Font of choice - I used Verduleira here
Weescotlass mask 119 here
Scrapity Scrap and More Template 40 here
Plug Ins used:
Eyecandy 3.1 - Glow
“Happy Steam Easter” is a scrap
kit created by Heppy of H.F. Projekte and can be purchased from his storeInspirations of Scrap Friends. You can visit
his blog here.
Thank you Heppy for another fantastic kit!
This tutorial was written assuming you have a working knowledge of PSP.
~♥~ Let’s get started ~♥~
Open up the template.
Shift + D.
Close out the original.
Shift + D.
Close out the original.
Image/Canvas Size
700 x 600
OK
Flood fill the background layer white.
Delete the credit layer.
Color Pallet:
Foreground: #ffffff
Background: #3a4f11
Make your Color Replacer Tool active.
Highlight Border Smaller Circle layer.
Hold your mouse over it. Double
right click twice.
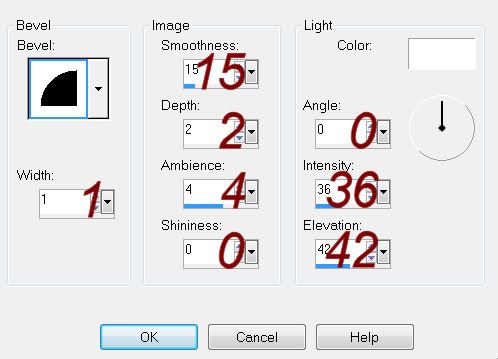
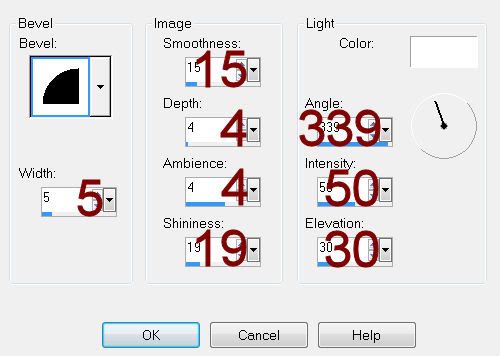
Give it a slight Inner Bevel:

In your layer pallet:
Move Border Top Rectangle
layer below Border Bottom Rectangle
layer.
Move Border Mid Rectangle
layer below Border Top Rectangle
layer.
All 3 little white frames should now be grouped together in your layers
pallet.
Highlight Border Bottom
Rectangle layer.
Merge Down.
Merge Down.
All 3 little frames should now be on one layer.
With your Color Replacer Tool still active, hold your mouse over one of
the frames and double right click.
In your Color Pallet:
Foreground: #000000
Background: keep the same green color
Highlight Small Dotted Line layer.
With your Color Replacer Tool still active hold your mouse over one of
the dots and double right click.
Repeat the above step with Long Dotted Line layer.
Highlight Big Circle layer.
Click on it with your Magic Wand.
New Raster layer.
Copy and paste Paper 4 Into Selection.
Deselect.
Delete the template layer.
Highlight Border Big Circle layer.
Adjust/Add Remove Noise/Add Noise:
Uniform and Monochrome checked
Noise: 35%
OK
Highlight Smaller Circle layer.
Click on it with your Magic Wand.
New Raster layer.
Copy and paste Paper 9 Into Selection.
Deselect.
Delete the template layer.
Highlight Big Rectangle layer.
Click on it with your Magic Wand.
New Raster layer.
Copy and paste Paper 21 Into Selection.
Deselect.
Delete the template layer.
Give it the same Inner Bevel.
Highlight Square layer.
Click on it with your Magic Wand.
New Raster layer.
Copy and paste Paper 10 Into Selection.
Deselect.
Delete the template layer.
Give it the same slight Inner Bevel.
Highlight Top Rectangle layer.
Click on it with your Magic Wand.
New Raster layer.
Copy and paste Paper 7 Into Selection.
Deselect.
Delete the template layer.
Repeat the above step with Mid Rectangle and Bottom Rectangle.
Merge Visible all 3 rectangle papers.
(We’ll come back to these in a bit to paste the reflection in them)
Copy and paste the following elements as new layers. Move them into position – see my tag for
reference.
9: Resize 30%
8: Resize 20%
7: Resize 30%
16: Resize 15
Merge Visible the elements you just pasted.
Duplicate/Mirror
Move into position over the little rectangle papers.
Highlight the rectangle papers.
Click anywhere outside of them with your Magic Wand.
Highlight the merged element layer.
Tap the delete key.
Deselect.
Change the Properties to Soft Light.
Add your elements. I used:
11: Resize 25%
26: Resize 20%
4: Resize 30%/Mirror
5: Resize 30%
6: Resize 30%
Highlight your white canvas.
New Raster layer.
Select All.
Copy and paste Paper 1 Into Selection.
Deselect.
Apply the mask.
Resize 110%
Merge Group.
Duplicate
Add your credits.
Add your name.
Foreground:
Background:
Stroke: 1
Type your name.
Give it a slight Inner Bevel:

Apply Eyecandy 3.1 – Glow:
Width: 3
Opacity: 100%
Opacity Drop Off: Fat
Color: #fdf7bb
Resize all layers 80%


No comments:
Post a Comment