Supplies
1 tube of choice – I used the wonderful artwork of Joe Peck which can
be purchased from CDO. You must have
a license to use.
Font of choice - I used Oh Lara, a pay font
Weescotlass mask 208 here
Toxic Desires Template 156 here
Plugs Ins:
Mura Meister - Copies
“New Beginning” is a tagger size
scrap kit created by Micki of Heaven Dreams and can be purchased from Twilight
Scraps. You can visit her blog here.
Thank you Micki for an incredibly beautiful kit.
This tutorial was written assuming you have a working knowledge of PSP.
~♥~ Let’s get started ~♥~
Open up the template.
Shift + D.
Close out the original.
Resize all layers 85%
Image/Canvas Size:
700 x 600
OK
Highlight and open up the Background layer.
Flood fill white.
Delete the following layers:
Top 4 layers
Word Art 1
Pixel Words
Skulls
Sm Stars 2
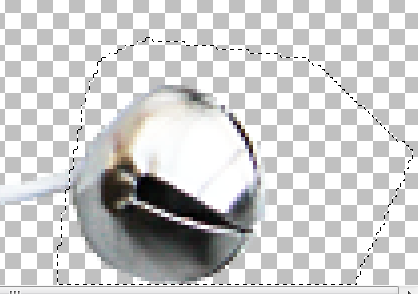
Open up Element 41.
Use your Freehand Selection Tool set on Point to Point and trace around
the bottom bell of the element.

Copy
Make your working canvas active.
Paste as a new layer.
Resize 40%
Duplicate 2x’s for a total of 3.
Move 2 of the bells to cover the stars on Stars 1 template layer.
Delete the template layer.
Highlight the bell that’s left over.
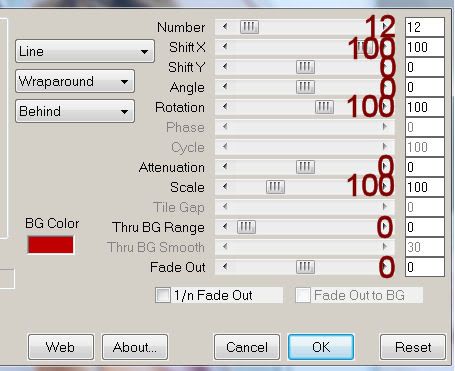
Apply Mura’s Meister – Copies:
From the Preset menu choose - Line (Rotate)
Match your settings to mine:
From the Preset menu choose - Line (Rotate)
Match your settings to mine:

Move this line of bells into position over Stars 2 template layer.
Find the bells that are next to each other that match the space of
stars the best – mine were the first 3.
Use your Selection Tool and surround the bells.
Edit Cut.
Deselect.
Delete the bells line layer.
Edit/Paste/Move into position over the stars.
Duplicate as needed to cover all the stars on this template layer.
Delete the template layer.
Make a new canvas – any size.
Flood fill with #a9636d.
Copy
Close this out as you won’t be using it any more.
Make your working canvas active.
Highlight Dotted Rectangles layer.
Click anywhere outside of it with your Magic Wand.
Selections/Invert
New Raster layer.
Paste (your color) Into Selection.
Deselect.
Delete the template layer.
Highlight Left Glitter Circle layer.
Select All/Float/Defloat
New Raster layer.
Paste (your color) Into Selection.
Adjust/Add Remove Noise/Add Noise:
Random and Monochrome checked
Noise: 43%
OK
Deselect.
Delete the template layer.
Highlight Right Glitter Circle layer.
Repeat the above step.
Make another new canvas.
Flood fill with #e6e6e6
Copy
Close this out as you won’t be needing it any longer.
Make your working canvas active.
Highlight Dotted Lines layer.
Click anywhere outside of it with your Magic Wand.
New Raster layer.
Paste (your color) Into Selection.
Deselect.
Delete the template layer.
Highlight Left Circle layer.
Click on it with your Magic Wand.
New Raster layer.
Copy and paste Paper 8 Into Selection.
Deselect.
Delete the template layer.
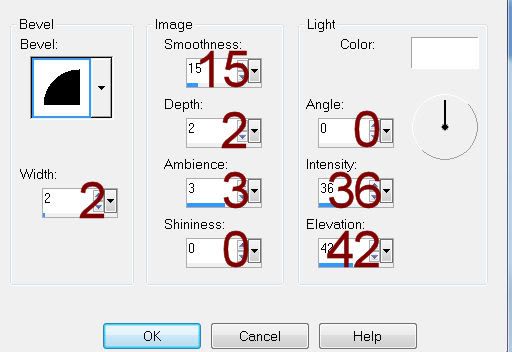
Give it a slight Inner Bevel:

Highlight Right Circle layer.
Repeat the above step.
Highlight Glitter Circle layer.
Click anywhere outside of it with your Magic Wand.
Selections/Invert
New Raster layer.
Copy and paste Paper 6 Into Selection.
Adjust/Add Remove Noise/Add Noise:
Same settings
Deselect.
Delete the template layer.
Highlight Circle layer.
Click on it with your Magic Wand.
New Raster layer.
Copy and paste Paper 6 Into Selection.
New Raster layer.
Copy and paste 33 Into Selection.
Deselect.
Delete the template layer.
Highlight Rectangle Left layer.
Click on it with your Magic Wand.
New Raster layer.
Copy and paste Paper 1 Into Selection.
Deselect.
Delete the template layer.
Give it the same slight Inner Bevel.
Highlight Rectangle Right layer.
Repeat the above step.
Highlight Rectangle layer.
Click on it with your Magic Wand.
New Raster layer.
Copy and paste Paper 3 Into Selection.
Deselect.
Delete the template layer.
Highlight Glitter Rectangle layer.
Click anywhere outside of it with your Magic Wand.
New Raster layer.
Copy and paste Paper 6 Into Selection.
Apply the same Noise effect.
Deselect.
Delete the template layer.
Highlight Rectangle 2 layer.
Click on it with your Magic Wand.
New Raster layer.
Copy and paste Paper 9 Into Selection.
Copy and paste Element 33 as a new layer above the paper layer.
Resize 65%
Move into position – see my tag for reference.
Selections/Invert
Tap the delete key.
Copy and paste your tube as a new layer above the clock layer.
Move into position.
Tap the delete key.
Change the Properties to Luminance.
Deselect.
Delete the template layer.
Copy and paste your tube as a new layer.
Add your elements. I used:
El 44: Resize
25%/Duplicate/Mirror/Duplicate both branch layers.
El 32: Resize 25%
El 66: Resize 50%
El 15: Resize 40%
El 36: Resize 25% and 60%/Duplicate/Mirror/resize
70%
Highlight your white canvas.
New Raster layer.
Select All.
Copy and paste Paper 3 Into Selection.
Deselect.
Duplicate/Change the Properties to Multiply
Merge Down.
Apply the mask.
Resize 115%
Merge Group.
Add your name.
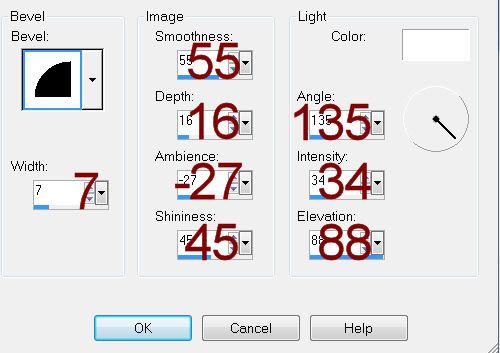
Give it a slight Inner Bevel:

Resize all layers 80%


No comments:
Post a Comment