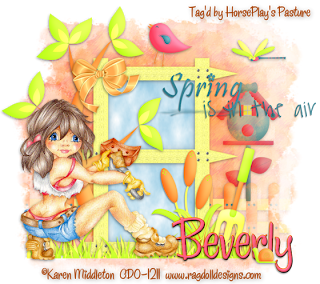
Clicking on the image will allow you to enlarge for bigger view.
Supplies
1 tube of choice - I used the artwork of Karen Middleton and can be purchased from CDO.
Font of Choice - I used Chicken Basket
Becky Mask 22 here
Brush Stroke - Sprayed Strokes
Mura’s Meister - Cloud
“Seasons” is a massive collaboration put together by many many designers in the scrapping and tagging community to help with the devastation in New Zealand caused by the tragic earthquake. This collaboration is FTU after a donation of $10 USD to the Salavation Army of NZ is made. Please visit Taggers Together for New Zealand to read more on how these talented designers are helping with this cause and to make your donation. This portion of the collaboration was created by Shells Scraps. Please visit her blog here.
This tutorial was written assuming you have a working knowledge of PSP.
~♥~ Let’s get started ~♥~
Open up a 700 x 700 blank canvas.
Flood fill white.
Color Pallet:
Foreground: #b3daec
Background: #ffffff
Copy and paste Frame 5 as a new layer.
Resize 60%
Click inside of each frame with your Magic Wand.
Selections/Modify/Expand by 4.
New Raster layer below the frame.
Apply Mura’s Meister - Cloud:
Hit the Reset button
OK
Deselect.
Copy and paste your tube as a new layer.
Add your embellishments. I used:
Bow 2: Resize 25% and 75%
Bird 5: Resize 25% and 50%
Tree 2: Resize 60% (the trunk won’t be long enough but your tube will cover it so you won’t see)
Word Art: Resize 45%
Dragonfly 1: Resize 25% and 60%
Spring Grass 1: Resize 60%/Duplicate/Mirror
Cats Eye: Resize 30%
Fork 1: Resize 30%/Free rotate Right 15 degrees
Snail 1: Resize 25% and 30%
Crop your image.
Highlight your white canvas.
New Raster layer.
Select All.
Copy and paste Paper 10 Into Selection.
Deselect.
Adjust/Blur/Gaussian Blur:
Radius: 5
OK
Apply Brush Strokes - Sprayed Strokes:
Stroke Length: 12
Spray Radius: 13
Stroke Direction: Right Diag
OK
Apply the mask.
Merge Group.
Copy and paste Fence 1 above the mask layer.
Resize 50%/Duplciate/Mirror
Merge Down.
Apply the mask.
Merge Group.
Copy and paste Bird House 3 as a new layer.
Resize 35%
Move into position to the right of the frame and below the fence layer.
Change the Properties to Soft Light.
Duplicate.
Add your copyrights.
Add your name.
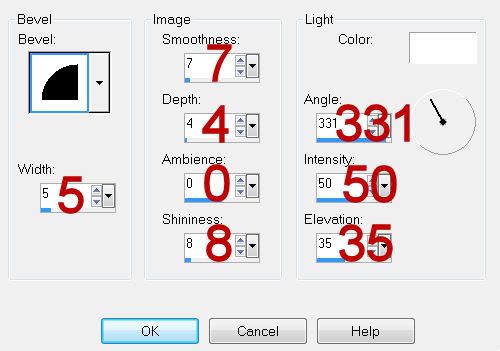
Give it a small Inner Bevel:

Resize all layers 80%.
I hope you enjoyed this tutorial.
I’d love to see your results and show it off in my gallery.
Email me!
Hugs,
Bev

No comments:
Post a Comment