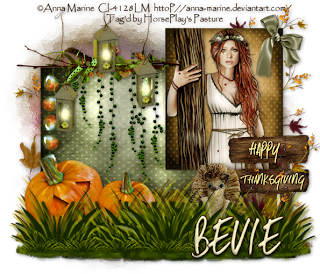
Clicking on the image will allow you to enlarge for bigger view.
Supplies
1 tube of choice - I used the artwork of Anna Marine at CILM
Font of Choice - I used Same Same But Different here
Vix Mask 452 here - under March 15, 2010
My Template 98 here
Greg’s Factory Output Vol. II - Pool Shadow
“A Little Goes a Long Way” is a Free for a Limited Time tagger size scrap kit created by Julie of Bits ’n Bobs and can be downloaded from her blog here. Please leave a thank you behind as it’s a small gesture for hard work given freely, not to mention extremely generous.
Thank you Julie! You know I’m a big fan of all your pretties♥
This tutorial was written assuming you have a working knowledge of PSP.
~♥~ Let’s get started ~♥~
Open up the template.
Shift + D.
Close out the original.
Delete the following layers:
Credit, Rectangle 3 Squares, and Words.
Image/Canvas size:
700 x 600
Flood fill the background layer white.
Highlight Strips layer.
Click on all 3 strips with your Magic Wand.
Copy and paste Paper 3 as a new layer.
Resize 60%
Move into position.
Selections/Invert
Tap the delete key.
Deselect.
Delete the template layer.
Highlight Rectangle 1 layer.
Click on it with your Magic Wand.
Copy and paste Paper 7 as a new layer.
Resize 60%
Move into position.
Selections/Invert
Tap the delete key.
Deselect.
Delete the template layer.
Highlight Rectangle 2 layer.
Click on it with your Magic Wand.
New Raster layer.
Copy and paste Paper 6 Into Selection.
Deselect.
Delete the template layer.
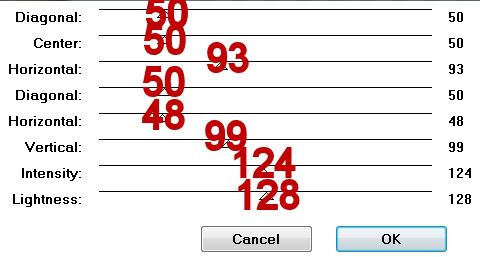
Apply Greg’s Factory Output Vol. II - Pool Shadow:

Highlight Rectangle 3 layer.
Click on it with your Magic Wand.
New Raster layer.
Copy and paste Paper 5 Into Selection.
Copy and paste your tube as a new layer.
Position it over the paper.
Selections/Invert
Tap the delete key.
Deselect.
Delete the template layer.
Copy and paste Element 20 as a new layer.
Resize 25% and 80%
Move it into position over the top square of Rectangle 2 Squares template layer.
Duplicate the element and free rotate as you like - move into position over the square below.
Repeat this until you have all the squares on the template covered with a stone.
Delete the template layer.
Add your embellishments. I used:
51
23: Resize 80%/Duplicate
24: Resize 80%/Duplciate/Position both of these behind 23
9: Resize 70%/Free rotate Left 30 degrees
9 again: Resize 50%
46
58: Resize 40%
68: Resize 40%
8: Duplicate as many times as you like and move into position just above the white background.
8 again: Resize 70%/Position before the wood sign.
Copy and paste 28 as a new layer.
Resize 50%
Move into position.
Highlight your white background.
Select All.
Selections/Modify/Feather
Number of Pixels: 53
OK
Selections/Invert
Highlight Element 28.
Tap the delete key until you have a feathered effect to it.
Deselect.
Highlight your white background.
Select All
Copy and paste a paper of choice Into Selection.
Deselect.
Apply the mask
Merge Group.
Type out the words “Happy” and “Thanksgiving” each on their own layers.
Move them into position over the wood sign. If the words are too large use your Pick Tool to fix that small problem.
Change the Properties of each layer to Hard Light.
Add your credits.
Add your name.
Resize 85%
I hope you enjoyed this tutorial.
I’d love to see your results and show it off in my gallery.
Email me!
Hugs,
Bev
Supplies
1 tube of choice - I used the artwork of Anna Marine at CILM
Font of Choice - I used Same Same But Different here
Vix Mask 452 here - under March 15, 2010
My Template 98 here
Greg’s Factory Output Vol. II - Pool Shadow
“A Little Goes a Long Way” is a Free for a Limited Time tagger size scrap kit created by Julie of Bits ’n Bobs and can be downloaded from her blog here. Please leave a thank you behind as it’s a small gesture for hard work given freely, not to mention extremely generous.
Thank you Julie! You know I’m a big fan of all your pretties♥
This tutorial was written assuming you have a working knowledge of PSP.
~♥~ Let’s get started ~♥~
Open up the template.
Shift + D.
Close out the original.
Delete the following layers:
Credit, Rectangle 3 Squares, and Words.
Image/Canvas size:
700 x 600
Flood fill the background layer white.
Highlight Strips layer.
Click on all 3 strips with your Magic Wand.
Copy and paste Paper 3 as a new layer.
Resize 60%
Move into position.
Selections/Invert
Tap the delete key.
Deselect.
Delete the template layer.
Highlight Rectangle 1 layer.
Click on it with your Magic Wand.
Copy and paste Paper 7 as a new layer.
Resize 60%
Move into position.
Selections/Invert
Tap the delete key.
Deselect.
Delete the template layer.
Highlight Rectangle 2 layer.
Click on it with your Magic Wand.
New Raster layer.
Copy and paste Paper 6 Into Selection.
Deselect.
Delete the template layer.
Apply Greg’s Factory Output Vol. II - Pool Shadow:

Highlight Rectangle 3 layer.
Click on it with your Magic Wand.
New Raster layer.
Copy and paste Paper 5 Into Selection.
Copy and paste your tube as a new layer.
Position it over the paper.
Selections/Invert
Tap the delete key.
Deselect.
Delete the template layer.
Copy and paste Element 20 as a new layer.
Resize 25% and 80%
Move it into position over the top square of Rectangle 2 Squares template layer.
Duplicate the element and free rotate as you like - move into position over the square below.
Repeat this until you have all the squares on the template covered with a stone.
Delete the template layer.
Add your embellishments. I used:
51
23: Resize 80%/Duplicate
24: Resize 80%/Duplciate/Position both of these behind 23
9: Resize 70%/Free rotate Left 30 degrees
9 again: Resize 50%
46
58: Resize 40%
68: Resize 40%
8: Duplicate as many times as you like and move into position just above the white background.
8 again: Resize 70%/Position before the wood sign.
Copy and paste 28 as a new layer.
Resize 50%
Move into position.
Highlight your white background.
Select All.
Selections/Modify/Feather
Number of Pixels: 53
OK
Selections/Invert
Highlight Element 28.
Tap the delete key until you have a feathered effect to it.
Deselect.
Highlight your white background.
Select All
Copy and paste a paper of choice Into Selection.
Deselect.
Apply the mask
Merge Group.
Type out the words “Happy” and “Thanksgiving” each on their own layers.
Move them into position over the wood sign. If the words are too large use your Pick Tool to fix that small problem.
Change the Properties of each layer to Hard Light.
Add your credits.
Add your name.
Resize 85%
I hope you enjoyed this tutorial.
I’d love to see your results and show it off in my gallery.
Email me!
Hugs,
Bev

No comments:
Post a Comment