Supplies
Font of Choice - I used Rolina here
Becky Mask 9 here
Mura Meister - Copies
Animation Shop
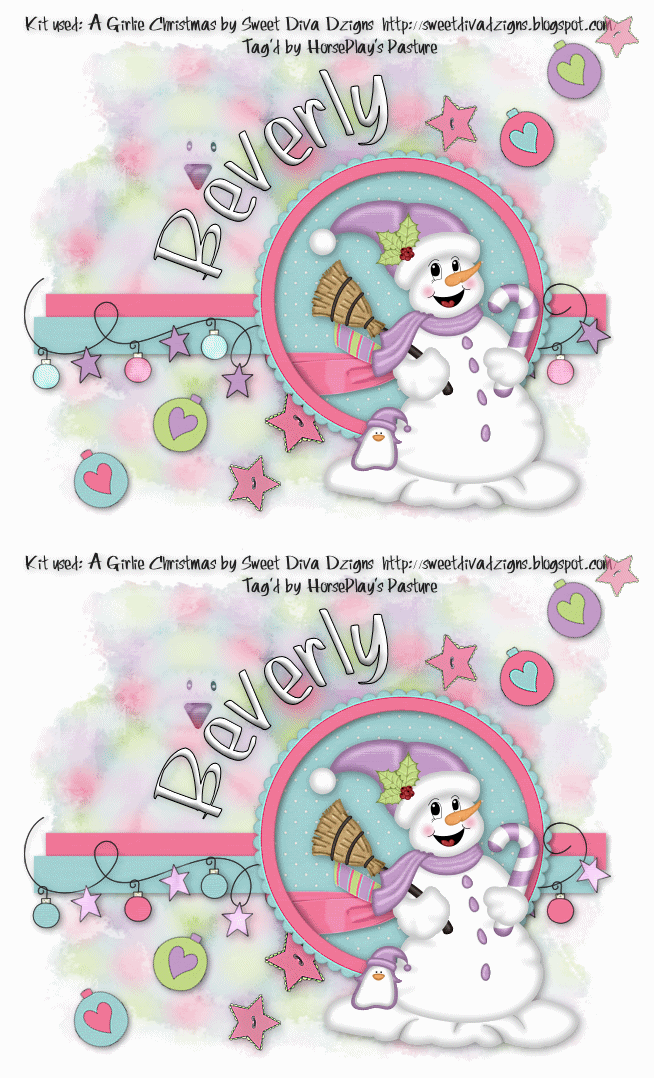
“A Girlie Christmas” is a PTU tagger size scrap kit created by Brooke of Sweet Diva Dzigns and can be purchased from her store Butterfly Blush Designs. You can visit her blog here.
Thank you Brooke. This kit is drop dead adorable!
This tutorial was written assuming you have a working knowledge of PSP.
~♥~ Let’s get started ~♥~
Open up a 700 x 700 blank canvas.
Flood fill white.
Copy and paste Frame 3 as a new layer.
Resize 50%
Move into position toward the left side of your canvas.
Click inside of it with your Magic Wand.
Selections/Modify/Expand by 6.
New Raster layer below the frame.
Copy and paste Paper 8 Into Selection.
Copy and paste Ribbon 2 as a new layer below the frame.
Resize 40% - move into position - see my tag for reference.
Selections/Invert
Tap the delete key.
Deselect.
Make your Selection Tool active - set on rectangle.
Make a rectangle approximately 45 x 550 - it doesn’t matter where it is on your canvas.
New Raster layer.
Copy and paste a paper of choice Into Selection.
New Raster layer.
Copy and paste a different paper of choice Into Selection.
Deselect.
Move the strips into position - see my tag for reference.
Copy and patse Xmasdecs1 as a new layer.
Resize 75%
Duplicate/Merge down.
Move into position over the bottom rectangle - see my tag for reference.
Duplicate.
Rename the layers Dec 1 and Dec 2
Highlight Dec 1 layer.
Make your Lighten/Darken tool active and beginning with the first ornament lighten every other one on the line.
Highlight Dec 2 layer.
Starting with the 2nd ornament lighten every other one.
When you’re done close this layer out.
You should now only have Dec 1 layer open.
Copy and paste Button 1 as a new layer.
Resize 50%
Apply Mura Meister - Copies
Wallpaper (Perspective) - Default Settings
Use your eraser tool to erase any of the buttons you don’t want.
Add your embellishments. I used:
Button 1: Resize
Xmas Balls 1 - 4: Erase the hook at the top of each one, Resize 30%/Free rotate 30 degrees
Snowman 1
Pbear 4 - Apply the Becky Mask/Merge Group/Change the Properties to Soft Light/Duplicate
Crop your image.
Highlight your white background.
Select All
Copy and paste a paper of choice Into Selection.
Deselect.
Apply the mask
Merge Group.
Add your credits.
Add your name.
To make it slightly rounded:
Foreground: Black
Background: null
Width: 2
Make a circle that’s larger than the frame.
Move your curser along the edge of the circle where you want your name.
When you see the rocking A click the mouse.
A Text Box will appear.
Type your name in it.
In your layers pallet click on the + sign.
Close out the New Ellipse layer.
Highlight Vector 1 layer.
Convert to Raster layer.
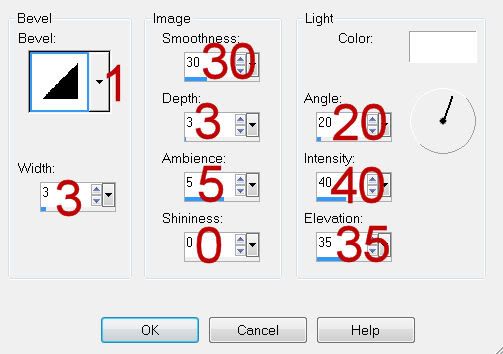
Give your name a slight inner bevel:

Resize all layers 90%.
Copy Merge
~Time to Animate~
Open up Animation Shop
Edit/Paste/As New Animation
Back in PSP.
Close out Dec 1.
Open up Dec 2.
Copy Merge
Carry into AS
Edit/Paste/After Current Frame.
Ctrl + A to highlight both frames.
Animation/Frame Properties
Change the display time to 20.
OK
View your Animation.
If you’re happy then save.
I hope you enjoyed this tutorial.
I’d love to see your results and show it off in my gallery.
Email me!
Hugs,
Bev

No comments:
Post a Comment