Supplies
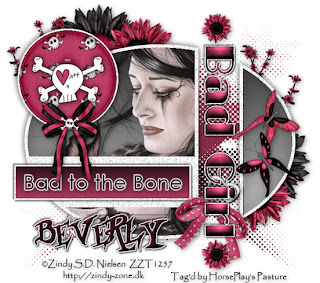
1 tube of your choice - I used the wonderful artwork of Zindy S.D. Nielsen here
Font of Choice - I used Borracho here
Linda’s template #59 - can be found at Creative Misfits here - scroll down the blog. You’ll find it under the name of Linda.
Eyecandy 5: Impact - Gradient Glow
“Tortured Deams” is a PTU tagger size scrap kit created by Tammy of Tammy’s Scraps and can be purchased at Lollipops n Gumdrops. You can visit her blog here.
Thank you Tammy - I totally love, love, loved this kit!!
This tutorial was written assuming you have a working knowledge of PSP.
♥~ Let’s get started ~♥~
Open up the template.
Shift + D.
Close out the original.
Open up the Background layer.
Delete the following layers:
Credit, Skull, Pixel Text, and Stars
Highlight Black Oval layer.
Use your Magic Wand and click on all the portions of it.
New Raster layer.
In your color pallet:
Foreground: Black
Background: white
Set to Gradient:
Style: Linear
Angle and Repeats both set to 0.
Flood fill the layer with your gradient.
Copy and paste your tube as a new layer.
Selections/Invert
Tap the delete key.
Deselect.
Delete the template layer.
In your color pallet change the colors:
Foreground: #231019
Background: #b63959
Highlight Halftone layer.
Make your Target Tool active and change the template layer’s color using the background color.
Highlight Text layer.
Select All/Float/Defloat
New Raster layer.
Change the gradient angle:
Angle: 90
Repeat: 1
Invert: Unchecked
Flood fill the layer.
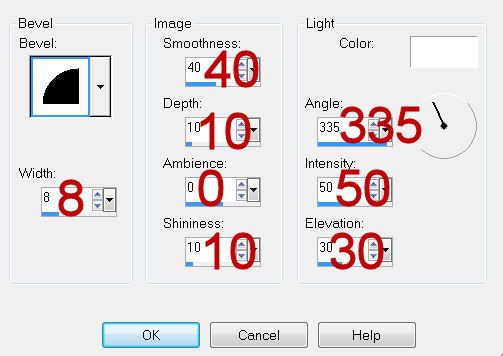
Give it a slight inner bevel:

Deselect.
Delete the template layer.
Highlight Rectangle layer.
New Raster layer.
Flood fill with the gradient set to:
Angle and Repeat: 0
Invert: checked
Highlight Bad to the Bone.
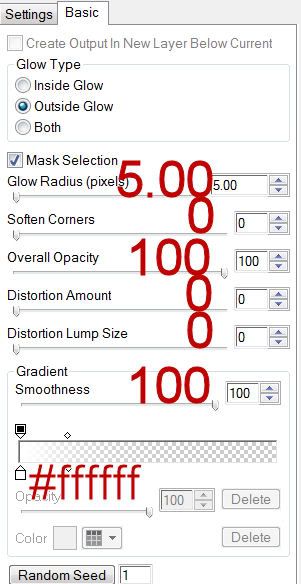
Apply Eyecandy 5: Gradient Glow

Apply Gradient Glow again.
Highlight Lines
Select All/Float/Defloat
New Raster layer.
Copy and paste Paper 5 Into Selection.
Deselect.
Delete the template layer.
Highlight Circle layer.
Select All/Float/Defloat
New Raster layer.
Copy and paste Button 2 Into Selection.
Deselect.
Delete the template layer.
Add your embellishments. I used:
Bow 3: Resize 35%
Cherry Blossom 1: Resize 60%
Skull and Crossbone 1: Resize 30%
Heart and Ribbons 2: Resize 40% Free rotate right 25 degrees
Butterflies 1 & 2: Resize 25%
Flower 2: Resize 40%
Flower 1: Resize 30%
Flower 1 again: Resize 25% and 50% Duplicate/Flip
Add your credits.
Add your name.
Apply Eyecandy 5 - Gradient Glow twice to it.
Resize all layers 85%.
I hope you enjoyed this tutorial.
I’d love to see your results and show it off in my gallery.
Email me!
Hugs,
Bev

No comments:
Post a Comment