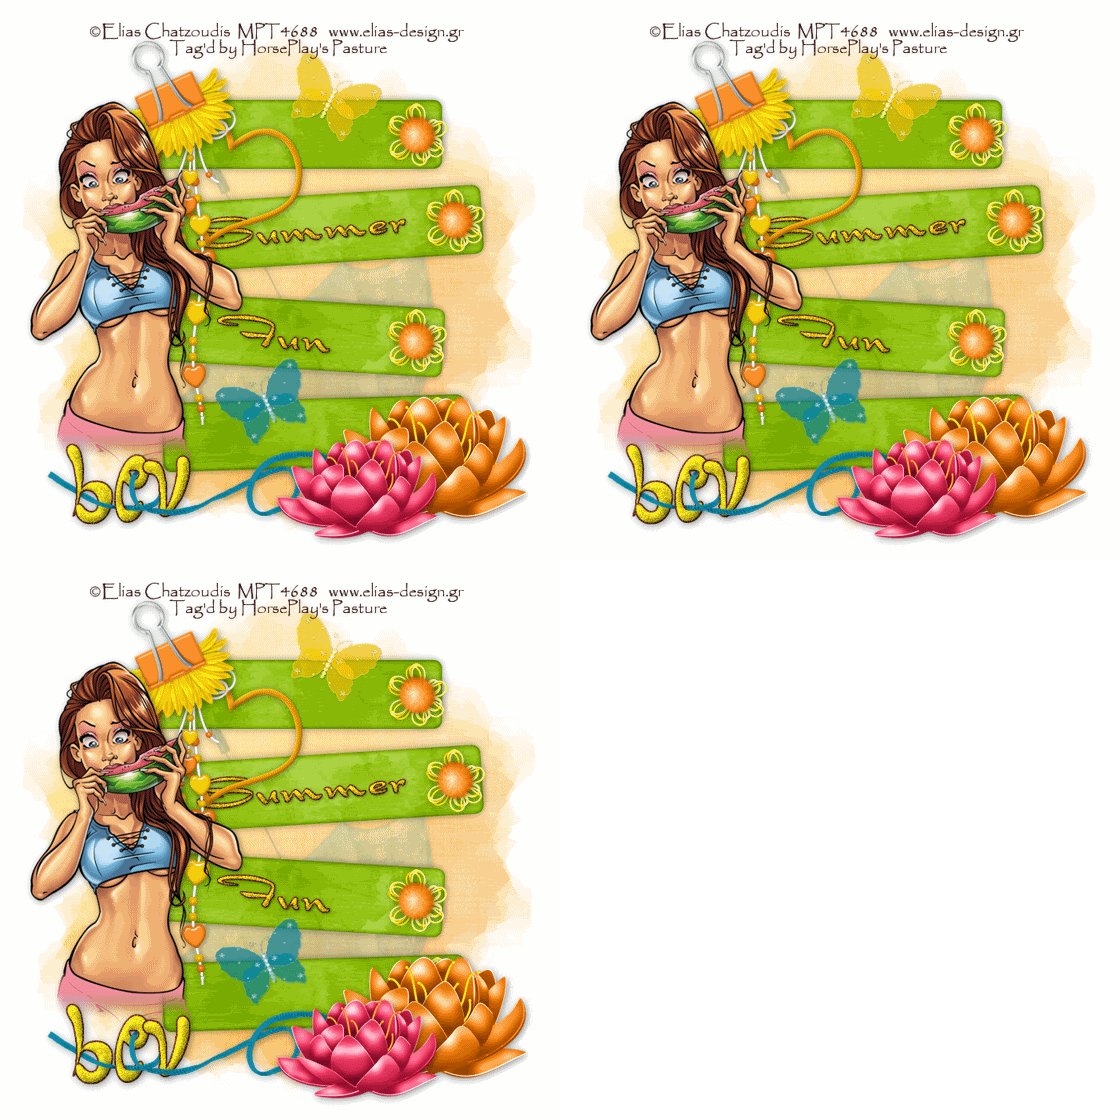
Supplies
1 tube of choice - I’m using the wonderful artwork of Elias Chatzoudis which you can purchase here.
Font of Choice - I used Dragonfly here and Fruitopia here
Weescotlass Mask 220 here
DSB Flux - Bright Noise
Animation Shop
“Chipper” is a PTU tagger size scrap kit created by Jane of JT’s Designs and can be purchased from Kreative Kreations Korner. You can visit her blog here.
Thank you Jane for such a fun kit! It really makes me want summer here NOW!
This tutorial was written assuming you have a working knowledge of PSP.
~♥~ Let’s get started ~♥~
Open up a 700 X 700 blank canvas.
Flood fill white.
Copy and paste Journal 2 as a new layer.
Copy and paste Poof 2 as a new layer.
Resize 25% and 80%
Position at the end of the top rung.
Copy and paste String Flower 6 as a new layer.
Resize 25%
Position behind the Poof.
Merge visible the Poof and String Flower.
Duplicate 3 times.
Position each at the end of each rung.
Copy and paste Clip 2 as a new layer.
Resize 40%
Free rotate left 25 degrees.
Position on the top rung.
Copy and paste Heart Beads 1 as a new layer.
Resize 50%
Position behind the clip.
Copy and paste Heart Frame 4 as a new layer.
Resize 25%
Free rotate right 25 degrees
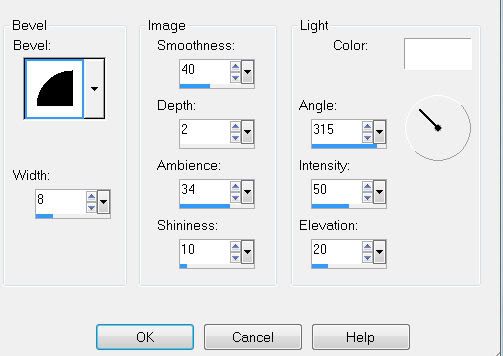
Give it a slight inner bevel:
Move into position behind the clip.
Copy and paste your tube as a new layer.
Copy and paste Butterfly 6 as a new layer.
Resize 25% and 70%
Free rotate right 25 degrees.
Repeat the above step with Butterfly 4.
Copy and paste Lilly 2 as a new layer.
Resize 50%
Copy and paste Lilly 1 as a new layer.
Resize 50% and 80%
Copy and paste String Swirl 3 as a new layer.
Resize 40%
Highlight your white background.
Select All.
Copy and paste a paper of choice Into Selection.
Deselect.
Apply the mask.
Merge Group.
Copy and paste Umbrella 3 as a new layer.
Resize 130%
Free rotate left 30 degrees
Position just over the mask.
Add your copyrights.
Add your name.
Give it the same inner bevel.
Duplicate twice for a total of 3 layers.
Rename Name 1, 2, and 3.
Highlight Name 1.
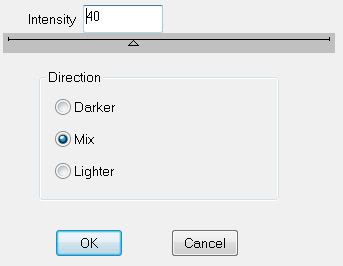
Apply DSB Flux - Bright Noise:
Highlight Name 2.
Apply Bright Noise again accept hit the mix button twice.
Highlight Name 3.
Apply Bright Noise again accept hit the mix button 3 times.
Close out Name 2 & 3 layers.
Keep Name 1 layer open.
Using the Dragonfly font, type out the words on separate layers:
Summer
Fun
Merge Visible.
Give it the same inner bevel.
Duplicate twice for a total of 3 days.
Rename SF 1, 2, and 3.
Highlight SF 1.
Apply Bright Noise - same settings.
Highlight SF 2.
Apply Bright Noise - same settings accept hit the mix button twice.
Highlight SF 3.
Apply Bright Noise - same settings accept hit the mix button 3 times.
Close out SF 2 & 3.
Resize all layers 80%.
Copy Merge.
~Time to Animate~
Open up AS.
Edit/Paste/As New Animation
Back in PSP.
Close out SF 1 and Name 1.
Open up SF2 and Name 2.
Copy Merge.
Carry into AS.
Edit/Paste/After current Frame.
Back into PSP.
Close out SF 2 and Name 2.
Open up SF 3 and Name 3.
Copy Merge.
Carry into AS.
Edit/Paste/After Current Frame.
View your animation.
If you’re happy then save.
I hope you enjoyed this tutorial.
I’d love to see your results and show it off in my gallery.
Email me!
Hugs,
Bev

No comments:
Post a Comment