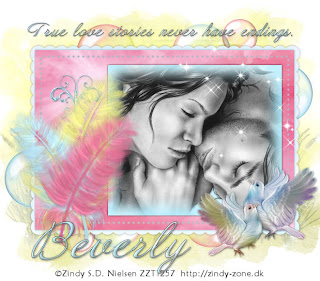
Clicking on the image will enlarge to full view.
Supplies
1 tube of choice - I’m using the artwork of Zindy S.D. Nielsen which you can purchase here
Font of Choice - I’m using Annabelle here
Weescotlass Mask 254 here
Divine Intentionz, Missy Template 29 here
“Fantasia” is a PTU tagger size scrap kit by Julie of Bits ‘n Bobs. It can be purchased at Exquisite Scraps. Thank you Julie for such a precious dreamy kit!
This tutorial was written assuming you have a working knowledge of PSP.
~♥~ Let’s get started ~♥~
Open up the template.
Shift + D.
Close out the original.
Delete the watermark layer and Brush by Ivy layer.
Resize all layers 120%.
We’re going to do the mask layer first so you might want to close out all your template layers so you can see what you’re doing.
New Raster Layer.
Select All.
Copy and paste a paper of choice Into Selection.
Deselect.
Copy and paste the trellis ladder as a new layer. Resize 80%. Using your Freehand Selection Tool, outline the ladder.
Selections/Modify/Feather
Number of Pixels: 43
Selections/Invert
Tap the delete key just to give it a slight feathered look.
Deselect.
Lower the Opacity to 48.
Copy and paste the grass as a new layer. Move it toward the left of your canvas.
Duplicate/Mirror.
Merge Visible these 2 grass layers.
Lower the opacity to 48.
Copy and paste a Cloud of choice as a new layer.
Move into position near the top of your frame.
Lower the Opacity to 71.
Close out your white canvas and Merge Visible.
Apply the Mask.
Be sure the layer with the mask is highlighted.
Click on your pick tool.
Reopen the Scalloped Rectangle Edge layer.
Pull each side of our mask layer out just a little until you can see some of the grass on each side peeking out from the sides of the scalloped rectangle layer. Once you’re happy with it then Merge Group.
And there you have it - your mask layer is done!
Highlight the Scalloped Rectangle Edge layer.
Select All/Float/Defloat
New Raster Layer.
Copy and paste Into Selection a paper of choice.
Deselect.
Delete the template layer.
Repeat the above step with the Large and Small Rectangle layers.
Copy and paste your tube over the Small Rectangle layer.
Move it into position.
Highlight the Small Rectangle Layer.
Select All/Float/Defloat
Selections/Modify/Feather
Number of pixels: 43
Selections/Invert
Tap the delete key until you have the desired feathered look you want.
Deselect.
Move it into position.
Highlight the Small Rectangle Layer.
Select All/Float/Defloat
Selections/Modify/Feather
Number of pixels: 43
Selections/Invert
Tap the delete key until you have the desired feathered look you want.
Deselect.
Add your embellishments. I used:
Feather 1: Resize 80%. Free rotate left 30 degrees
Feather 2: Resize 80%. Mirror. Free rotate right 15 degrees
Feather 3: Resize 80%. Free rotate left 15 degrees
Sparkle 1: Resize 40%
Butterfly 1: Resize 40%
Dove 2: Resize 75%
Dove 3: Resize 85%
Bubbles 2
String 4: Resize 80%
Using your Text Tool, type out “True love stores never have endings” and position over the top of your tag.
Add your copyrights.
Add your name.
I hope you enjoyed this tutorial.I’d love to see your results and show it off in my Show Arena.
Email me!
Hugs,
Bev

No comments:
Post a Comment