
 Clickong on the image above will enlarge to full view.
Supplies
1 tube of choice (and one close up image if you choose) - I’m using the artwork of Elizabeth Austin which you can purchase here
Font of Choice - Jester here
Weescotlass Mask 129here
Dezings by Ali Template #4 here
Eyecandy 5: Impact - Gradient Glow here Optional
Filters Unlimited 2 - Optional
Animated Fireworks which I supplied here
“Americana” is a tagger size scrap kit created by Julie of Bits ’n Bobs. It’s FTU right now, so better hurry and grab while you can! You can donwload it from her blog here.
Thank you Julie for this awesome kit! You rock, Chickadee!
This tutorial was written assuming you have working knowledge of PSP.
~♥~ Let’s get started ~♥~
Open up the template.
Shift + D and close out the original.
Delete the copyright layer.
Highlight Raster 1.
Select All/Float/Defloat
Copy and paste a paper of choice (I chose to use a plain color from one of the papers, created a new raster layer and flood filled. I then gave it a texture using default settings of the Japanese Paper texture in Filters Unlimited 2.).
If you chose to use a paper then Selections/Invert.
Hit the delete key.
DO NOT DESELECT!
Selections/Modify/Contract by 15.
Hit the delete key.
You should now be able to see the black circle within what you just made a frame.
DON’T DELESECT YET!
Selections/Modify/Expand by 3
Copy and paste your close up image as a new layer.
(I just used my tube and enlarged quite a bit)
Selections/Invert
Hit the delete key.
Selections/Modify/Feather
Number of Pixels: 53
Tap the delete key until you have a nice feathered look.
Lower the opacity to about 34
Lookin’ good?
Ok, wipe the sweat from your brow…it wasn’t that bad, was it?
hehehe
Highlight Raster 3.
Select All/Float/Defloat
Copy and paste a paper of choice as a new layer.
Selections/Invert
Hit the delete key.
Delete the template layer.
Repeat with Raster 2.
Add your embellishments. I used:
Bead Bow 1: Resize 40%
Bead Bow 2: Resize 40%
Flower Spray 2: Resize 50%, Mirror, use your Pick tool to turn and align with side of circle.
Add your tube and give it a Gradient Glow as follows: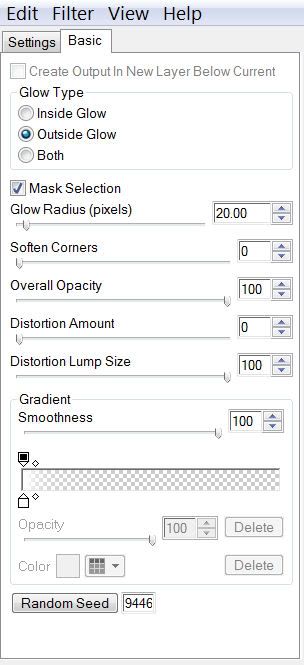
Highlight your white canvas.
New Raster Layer.
Select All.
Copy and paste a paper of choice Into Selection.
Deselect.
Apply the mask.
Merge Group.
Resize 110%.
Add your copyrights.
Add your name.
I gave mine the same gradient glow and a drop shadow.
Time to Animate -
And I promise this won’t be hard at all to do!!
In PSP close out every layer accept for your white canvas, the mask layer, and the black circle.
Copy Merge and carry into Animation Shop.
In AS Edit/Paste/As New Animation
Ctrl + L - tap the L key until you have a total of 22 frames.
Open up the animated fireworks that I supplied.
We’ll start with the Red Fireworks first.
Ctrl + A to highlight all the frames.
Edit/Copy
Now highlight the 22 frames.
Ctrl + A to highlight all of them.
Ctrl + E and position the fireworks where you like.
Repeat the above steps with the other 2 remaining fireworks.
Go back into PSP.
Starting at the very bottom layer (your white canvas) click on the eye beside every single layer.
What you’re doing is closing out the ones you had open and opening up the ones you had closed.
Copy Merge and carry into AS.
In AS click on the folder icon at the top of your screen (It looks like 3 folders with the corners bent down)
Highlight the 22 frames where you just added your fireworks.
Ctrl + A to be sure all frames are highlighted
Ctl + E and position the merged image from PSP over the circle.
Click your mouse when it’s where you like.
Animation/Frame Properties
Change the number to 12
Save your tag.
I hope you enjoyed this tutorial.
I’d love to see your results.
Email me!
Hugs,
Bev
No comments:
Post a Comment