Tuesday, April 7, 2009

Easter Surprises

Clicking on the image will enlarge to full view.


Supplies Needed

4 tubes of choice. I'm using the artwork of Elias Chatzoudis which you can purchase here
Font of choice - I'm using Bibliotheque here
Template 13 by Babes Designz here
Becky Mask 22 here
EyeCandy 5: Impact - Optional
This is a tagger’s size scrap kit created by Eclipse’s Creations and is in the Pink Krush Easter Collaboration which can be found here. You can visit Pink Krush’s blog here.
Thank you so much, Eclipse for another super scrap kit!

This tutorial was written assuming you have working knowledge of PSP.

~♥~ Let’s get started ~♥~

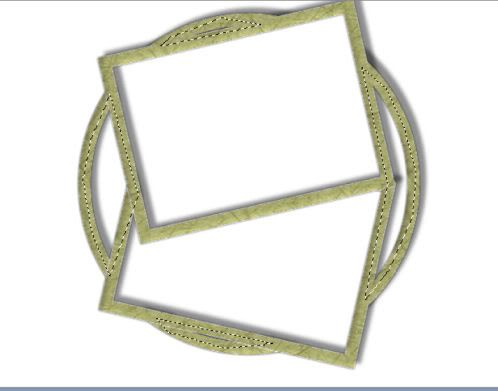
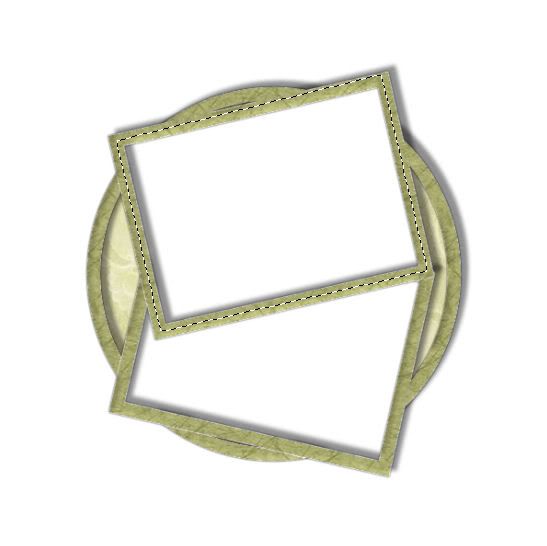
Open up the template. Delete the copyright layer. Highlight Left Triangle layer. Selections/Float/Defloat. Copy and paste a paper of choice as a new layer. Selections/Invert. Hit the delete key. Deselect. Give it a slight inner bevel:
Bevel: 2
Width: 3
Smoothness: 35
Depth: 2
Ambience: -8
Shininess: 10
Color: white
Angle: 315
Intensity: 75
Elevation: 20
OK
Delete the template layer.

Repeat the above steps on every layer using a different paper.

Highlight the frame layer. Use your Magic Wand and click inside of each square. New Raster layer. Flood fill with a light color of your choice.

Copy and paste a tube of choice below the frame layer. Move into position. Selections/Invert. Hit the delete button. Repeat this step for the other 2 frames using a different tube in each one. Deselect.

Highlight your stars layer.
Adjust/Add Remove Noise/Add Noise:
Random checked
Noise: 30%
OK

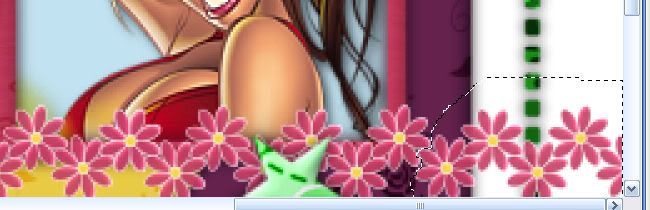
Highlight your frame layer. Copy and paste Floral Ribbon 4 as a new layer. Resize 30%. Line it up along the bottom of the frame making sure the end of the flower ribbon is at the left corner of the frame. It’s not long enough so duplicate and move it to just overlap at the last flower. Merge down. It’s definitely way too long now so to shorten it, use your Selection Tool and trace around the end flower and surround the overage of flower ribbon with the dotted lines.


Hit the delete button. Duplicate/Flip. Duplicate/Free rotate 90% and shorten to fit the short side of the frame.
Tip: If you intend to put a bow at the top corners of the frame then line up the flower end at the bottom of the frame and just erase the overage off at the top instead of trying to make it look nicely finished off….the bow will hide it….hehehe
Yikes, I hope I didn’t confuse you!

Duplicate/Mirror. Your frame should now be outlined with flowers.

Add your embellishments. I used:
Bow 3: Resize 30%
Basket 4: Resize 30%

Highlight your white canvas. New Raster layer. Copy and paste a paper of choice Into Selection. Select none. Apply the mask. Merge Group. I used the Pick Tool and pulled the mask out on each side just a little and moved it down slightly. Then I cropped the image.

Add your copyrights.

Add your name. I added the same bevel to my name and used the same settings of Noise. I also added a gradient glow:
Basic Tab
Outside Glow checked
Mask Selection checked
Glow Radius: 5
Soften Corners: 0
Overall Opacity: 100
Distortion Amount: 0
Distortion Lump Size: 100
Smoothness: 46
Color: white
OK

I’d love to see your results.
Email me!
Hugs,
Bev

Monday, April 6, 2009

Easter with Elias

Clicking on the image will enlarge to full view
Supplies Needed

1 tube of choice. I'm using the artwork of Elias Chatzoudis which you can purchase here
Font of choice - I'm using Boomerang
Toadies - Ommadawn
This is a tagger’s size scrap kit created by RebelChick’s Scraps and is in the Pink Krush Easter Collaboration kit which can be found here. You can visit Pink Krush’s blog here.
Thank you so much, RebelChick for such a colorful Easter scrap kit!

This tutorial was written assuming you have working knowledge of PSP.

~♥~ Let’s get started ~♥~

Open a new canvas 700 X 700. Flood fill white. Copy and paste Frame 3 as a new layer. Free rotate 90 degrees. Move to the left side of your canvas.

Use your Magic Wand and click inside of each square. Selections/Modify/Expand by 6. Copy and paste a paper of choice below the frame. Selections/Invert. Hit the delete button.

Selections/Invert. New Raster Layer.
Effects/3D Effects/Cutout
Vertical and Horizontal: -15
Opacity and Blur: 25
Color: black
OK

Selections/Invert.
Copy and paste Bunny 4 as a new layer below the Cutout Layer. Resize 60%. Position under the top frame. Hit the delete button.

Copy and paste Chick 2 as a new layer below the cutout layer. Resize 85% and 90%. Position in the center of the bottom frame.

Add your embellishments. I used:
Bow Patterend 4 & 5: Resize 50%
Snowdrop 2 & 3: Resize 70%
Butterfly 1
Eggs: 40%
Basket: Resize 50% and colored to match my tag
Easter Grass 2: 30%
Egg 10: Resize 50%

Assembly of the basket:
After you’ve resized and recolored (if you choose to recolor) the basket, copy, paste, and resize all the eggs. Move them over the basket, arranging them in a way you like. Don’t be afraid to rotate some of them…eggs don’t all sit straight up and down in a basket…hehehe Then arrange your Easter grass clumps amongst the eggs. Merge visible all the eggs and Easter grass. Be sure it is over the basket exactly where you like. Dupicate the basket and move the layer above the eggs. Use your eraser tool and erase parts of the basket so that the eggs now look like they’re sitting inside of it. Highlight your merged egg and grass layer and erase the part that’s hanging out below the basket. Merge visible the egg and basket layers. Ta da! Lookin’ good?

Close out your white canvas and merge visible all layers. Duplicate. On the merged layer apply Blur/Gaussian Blur/Radius: 20
Apply Toadies/Ommadawn/Default settings.

Add your copyrights.

Add your name. I used clumps of grass and and an egg to dress my name up.

I’d love to see your results.
Email me!
Hugs,
Bev

Sunday, April 5, 2009

Krush On You


Clicking on image will enlarge to full view.
Supplies Needed

2 tubes of choice. I'm using the artwork of Keith Garvey which you can purchase here
Font of choice - I'm using Fat – came with my pc
Template 15 by Babes Designz here
Greg’s Factory Output Vol. II – Pool Shadow – Optional
Penta.com – Dot and Cross - Optional
This is a tagger’s size scrap kit created by RebelChick’s Scraps and is in the Pink Krush Collab which can be found here. You can visit Pink Krush’s blog here.
Thank you so much, RebelChick for another fun and fab kit to use!

This tutorial was written assuming you have working knowledge of PSP.

~♥~ Let’s get started ~♥~

Open up the template. Shift + D. Close out the original. Delete the credit layer.

Highlight Rectangles Layer. Select All/Float/Defloat. New Raster Layer. Flood fill with a gradient that will match your tubes. Delete the template layer. Give it a slight inner bevel:
Bevel: 2
Width: 3
Smoothness: 35
Depth: 2
Ambience: -8
Shininess: 10
Color: white
Angle: 315
Intensity: 75
Elevation: 20
OK

Duplicate. Highlight the original layer.
Adjust/Blur/Gaussian Blur
Radius: 20

Penta.com/Dot and Cross
Apply default settings.

Highlight Flower Frame. Select All/Float/Defloat. New Raster Layer. Flood fill with the same gradient. Delete the template layer. Give it the same slight inner bevel. Duplicate. Highlight the original layer.
Adjust/Blur/Gaussian Blur
Radius: 20

Penta.com/Dot and Cross
Apply default settings.

Highlight Circle Fill layer. Select All/Float/Defloat. Copy and paste a paper of choice as a new layer. Selections/Invert. Hit the delete button. Delete the template layer.

Highlight the Flower Frame. Use your Magic Wand and click inside of it. Selections/Modify/Expand by 4. Selections Invert. Copy and paste your tube of choice below the frame layer. Move into position. Hit the delete key. Deselect.

Highlight Frame layer. Select All/Float/Defloat. Copy and paste a paper of choice as a new layer. Selections/Invert. Hit the delete button. Delete the template layer. Apply the same slight inner bevel.

Highlight Frame Fill layer. Select All/Float/Defloat. Copy and paste a paper of choice as a new layer. Selections/Invert. Hit the delete button. Delete the template layer.

Highlight Frame layer. Use your Magic Wand and click inside of it. Selections/Modify/Expand by 3. Selections Invert. Copy and paste your tube of choice below the frame layer. Move into position. Hit the delete key. Deselect. Duplicate/Mirror.

In the layer pallet move the Dot and Cross layer to the Flower Frame below your tubes that are in the square frames.

Create a new canvas 700 X 700. Flood fill with your gradient. Copy. Close it out – we don’t need it any more.

Go back to your working canvas and highlight Squared Dot Line layer.
Edit/paste as new layer.
The gradient you just made should cover your entire working canvas. Selections/Invert. Hit the delete key. Delete the template layer.

Add your embellishments. I used:
Daisy 1 & 4: Resize 30%
Heart: Resize 25% Free rotate left 25 degrees. Duplicate/resize 80%.
Butterfly 5: Resize 50%. Free rotate left 25 degrees.
Doodle 1: Resize 60%

Add your copyrights.

Add your name.

I’d love to see your results.
Email me!
Hugs,
Bev

Time Away

Clicking on the image will enlarge to full view.


Supplies Needed

2 tubes of choice. I'm using the artwork of Jennifer Janesko which you can purchase here
Font of choice - I'm using Aquarelle here
Babes Designz Mask 15 here
Weescotlass Frame Set 1 here. (Frames Set 1 – use Frame 5)
Filters Unlimited 2 - Optional
"Into the Past" PTU scrap kit by Swheat Creations which can be found here. You can visit her site here.
This kit is beautiful and filled with lots of charm.

This tutorial was written assuming you have working knowledge of PSP.

~♥~ Let’s get started ~♥~

Open up the frame. Shift + D. Close out the original. Resize the canvas to 650 X 650. Select All/Float/Defloat. Pick a color that will match your tube and flood fill the frame. You may even need to enlarge and fill in a couple of gray gaps. Deselect.
Filters Unlimited 2/Paper Textures/Japanese Paper/default settings.
Give it a slight inner bevel:
Bevel: 11
Width: 3
Smoothness: 35
Depth: 2
Ambience: -8
Shininess: 10
Color: white
Angle: 315
Intensity: 75
Elevation: 20
OK

Use your Selection Tool and outline the circular areas of the frame.


Copy and paste a paper of choice as a new layer beneath the frame. Resise 70%. Selections/Invert. Hit the delete key. Deselect.

Use your Selection Tool again and outline the top frame.


Copy and paste your tube as a new layer beneath the frame. Hit the delete key. Deselect.

Repeat the above with the bottom frame.

Now we’re going to outline the top frame with lace.
Copy and paste Lace 4 as a new layer. Resize 15%. Free rotate right 13 degrees. Give it a very light drop shadow and then line it up along the bottom of the frame. Erase any overhang. Duplicate/Mirror/Flip. Duplicate/Free Rotate Left 90 degrees. Duplicate/Mirror/Flip. Yikes! Hope I didn’t lose ya! If I didn’t, repeat for the bottom frame.

Add your embellishments:
Dahlia 1: Resize 25%
Dahlia 2: Resize 25%
Dahlia 6: Resize 25%
Bow 4a: Resize 25%
Heart Box 5: Resize 15%. Free rotate left 25 degrees
Butterfly 3: Resize 25% and 90%
Buttefly 6: Resize 25% and 90%
Journal 1: Use Selection Tool to delete rings on top and bottom
Resize 35%. Free Rotate 35 degrees

Highlight your white canvas. New Raster Layer. Select All. Copy and paste a paper of choice Into Selection. Deselect. Apply the mask. Merge group.

Add your copyrights.

Add your name.

I hope you enjoyed this tutorial.
I’d love to see your results.
Email me!
Hugs,
Bev

Saturday, April 4, 2009

Over the Moon


Clicking on the image will enlarge to full view.
Supplies Needed

1 tube of choice. I'm using the artwork of Zindy S.D. Nielsen which you can purchase here
Font of choice - I'm using Dobkin here
Becky Mask 22 here
Babes Designz Template 29 here
Animation Shop – Optional
Alien Skin Xenofex 2 – Constellation - Optional
This is a full size scrap kit created by Monica’s Sweet Addiction and is in the Pink Krush Collab which can be found here. You can visit Pink Krush’s blog here.
Thank you so much for such a beautiful kit, Monica!

This tutorial was written assuming you have working knowledge of PSP.

~♥~ Let’s get started ~♥~

Open up the template. Shift + D. Close out the original. Delete the copyright layer.

Highlight the white canvas. New Raster Layer. Select All. Copy and paste a paper of choice Into Selection. Deselect. Apply the mask. Merge Group.

Highlight the Word Art layer. Select All/Float/Defloat. Copy and paste a paper of choice as a new layer. Selections/Invert. Hit the delete key. Deselect. Delete the template layer. Give it a heavy drop shadow.

Highlight the Half Moon layer. Select All/Float/Defloat. Copy and paste a paper of choice as a new layer. Selections/Invert. Hit the delete key. Deselect. Delete the template layer. Give it a slight inner bevel:
Bevel: 2
Width: 3
Smoothness: 35
Depth: 2
Ambience: -8
Shininess: 10
Color: white
Angle: 315
Intensity: 75
Elevation: 20
OK

Highlight the Stars layer. Select All/Float/Defloat. Copy and paste a paper of choice as a new layer. Selections/Invert. Hit the delete key. Deselect. Delete the template layer. Duplicate twice for a total of 3 star layers. Rename them Stars 1, 2, and 3.

Highlight Stars 1 Layer. Apply Alien Skin Xenofex/Constellation:
Star Size: 2
Star Variation: 3
Edge Star Denisty: 4
Overall Star Density: 0
Overdrive: 100
Twinkle Amount: 37
Twinkle Rotation: 37
Keep Original Image – checked
Random Seed Button – whatever the number you have is fine :O)
OK

Repeat the above on Star Layers 2 accept hit the Randon Seed button once and then OK. Repeat for Star layer 3.

Close out Star Layers 2 and 3.

Add your copyrights.

Add your name.

~Onto the Animation~

Copy Merge and carry into Animation Shop.
Edit/Paste as New Animation.

Go back into PSP. Close out Star Layer 1 and open up Star Layer 2.
Copy Merge and carry into AS.
Edit/Paste After current Frame

Go back into PSP. Close out Star Layer 2 and open up Star layer 3. Copy Merge and carry into AS.
Edit/Paste After current Frame

View your animation. If you’re happy with it then save.

I hope you enjoyed this tutorial.
I’d love to see your results.
Email me!
Hugs,
Bev

Pouting Pretty

Clicking on the image will enlarge to full view.
Supplies Needed

1 tube of choice. I'm using the artwork of Keith Garvey which you can purchase here
Font of choice - I'm using Baby Kruffy here
Template 29 by Babes Designz here
Weescotlass Mask 167 here
This is a tagger’s size scrap kit created by Eclipse’s Creations and is in the Pink Krush Collab which can be found here. You can visit Pink Krush’s blog here.
Eclipse, I totally adore this kit. Thank you once again for another fabulous kit of scraps to play with!

This tutorial was written assuming you have working knowledge of PSP.

~♥~ Let’s get started ~♥~

Open up the template. Shift + D. Close out the original. Delete the credit layer.

Highlight Layer 1. Select All/Float/Defloat. Copy and paste a paper of choice as a new layer. Selections/Invert. Hit the delete key. Delete the template layer. Give it a slight inner bevel:
Bevel: 2
Width: 3
Smoothness: 35
Depth: 2
Ambience: -8
Shininess: 10
Color: white
Angle: 315
Intensity: 75
Elevation: 20
OK

Highlight Layer 5. Repeat the above step with a different paper. Use your Magic Wand and click inside the frame. Selections/Modify/Expand by 4. Copy and paste a paper of choice below the frame. Selections/Invert. Hit the delete key.

Copy and paste your tube beneath the frame. Move into position. Hit the delete key. Deselect.

Highlight Layer 4. Select All/Float/Defloat. Copy and paste a paper of choice as a new layer. Selections/Invert. Hit the delete key. Delete the template layer. Give it the same slight inner bevel.

Use your Magic Wand and click inside the frames. Selections/Modify/Expand by 2. Copy and paste a paper of choice beneath the frames. Selections/Invert. Hit the delete key. Deselect.

Use your magic wand and click inside the top frame. Selections/Invert. Copy and paste your tube as a new layer beneath the frame. Move into position. Hit the delete key.

Repeat the above step for the lower frame.

Highlight Layer 2. Select All/Float/Defloat. Copy and paste a paper of choice as a new layer. Selections/Invert. Hit the delete key. Delete the template layer. Give it the same slight inner bevel.

Repeat the above step with Layer 3.

Add your embellishments. I used:
Bow 6: Resize 52%
Flower 1: Resize 15%
Ladybug 2: Resize 30%. Free Rotate left 35 degrees. Duplicate/Mirror/Resize 60%

Highlight your white canvas. New Raster Layer. Select All. Copy and paste a paper of choice Into Selection. Deselect. Apply the mask. Merge Group. Duplicate/Mirror.

Add your copyrights.

Add your name. I used:
Foreground: Black
Background: Set to Pattern using a paper from the kit.
Stroke: 1
Type out your name. Add the same inner bevel and a drop shadow.

I’d love to see your results.
Email me!
Hugs,
Bev

Lavendar Scent


Clicking on the image will enlarge to full view
Supplies Needed

1 tube of choice. I'm using the artwork of Gennadiy Kouffay which you can purchase here
Font of choice - I'm using ArkansasDB here
Template by Charlii here . For a great PSP group, please visit her's - Time4Tags
Thank you so much Charlii for a terrific template!!
Weescotlass Mask 38 here
Greg’s Factory Output Vol. II - Optional
Xero – Porcelain - Optional
"Prisoner of Love" scrap kit by Krissy’s Scraps which can be found here. You can visit her blog here.

This tutorial was written assuming you have working knowledge of PSP.

~♥~ Let’s get started ~♥~

Open up Charlii’s template. Shift + D. Close out the original. Delete the credit layer. Highlight the white canvas layer. Change canvas size to 550 X 550. Flood fill white. You can close out the stripes layer and the circle layers to keep them out of your way for now.

Highlight Raster 2. Select All/Float/Defloat. Copy and paste a paper of choice as a new layer. Selections/Invert. Hit the delete key. Delete the template layer. Give it a slight inner bevel:Bevel: 2
Width: 3
Smoothness: 35
Depth: 2
Ambience: -8
Shininess: 10
Color: white
Angle: 315
Intensity: 75
Elevation: 20
OK

Move the ring layers so that they’re evenly spaced over your beveled paper layer. Open up the 3 circle layers and center them inside the ring layers.

Highlight Circle 3 layer. Merge down and Merge down again. All 3 circles should be on one layer now. Select All/Float/Defloat. Copy and paste a paper of choice as a new layer. Selections/Invert. Hit the delete key. If you don’t want to add a paper then make a new raster layer. Flood fill with a color or gradient of your choice. Delete the template layer, but do not deselect yet.

Copy and paste your tube as a new choice above the circles layer. Move into position. Hit the delete key. Deselect.
Xero/Porcelain
Apply default settings.
Merge down.

Close out your white canvas. (Your stripes layer should already be closed out. If not, close it out, too). Merge visible. Open up all layers. Move the merged layer over to the left of your canvas.

Move the stripes to the right side of your canvas. Select All/Float/Defloat. Copy and paste a paper of choice as a new layer. Selections/Invert. Hit the delete button. Deselect. Delete the template layer.

Copy and paste your tube over the stripes.

Add your embellishments.
I used:
Cherry Blossom: Resize 65%
Flower 2: Resize 30%. Duplicate/Resize 80%
Calla Lilly: Resize 50%

Highlight your white canvas. New Raster Layer. Select All. Copy and paste a paper of choice Into Selection. Deselect. Apply the mask. Merge Group. Resize 110%.

Add your copyrights.

Add your name. I used:
The background to my tube layer as the foreground
Background: #a28dab
Stroke: 2
Type out your name. Change it into a Raster Layer.
Selection/Float/Defloat/Modify/Contract by 2
Greg’s Factory Output Vol. II/Pool Shadow
Apply default settings.
Deselect.

I’d love to see your results.
Email me!
Hugs,
Bev

Wednesday, April 1, 2009

He Has Risen


Clicking on the image will enalrge to full view.
Supplies Needed

2 tubes (or images) of choice. I'm using the artwork of Zindy S.D. Nielsen which you can purchase here
Font of choice - I'm using Boomerang here
Becky Mask 22 here
Missy Tag Template 84 here
“Sunrise Service” FTU scrap kit created by Cindy of Southern Scrapz which can be found here.
Thank you Cindy for an amazing kit.

This tutorial was written assuming you have working knowledge of PSP.

~♥~ Let’s get started ~♥~

Open up the template. Sift +D. Close out the original. Delete the watermark and heart layers.

Highlight the Circle layer. Select All/Float/Defloat. Copy and paste a paper of choice as a new layer. Selections/Invert. Hit the delete key. Deselect. Delete the template layer. Give it a slight inner bevel. I used:

Bevel: 2
Width: 3
Smoothness: 35
Depth: 2
Ambience: -8
Shininess: 10
Color: white
Angel: 315
Intensity: 75
Elevation: 20
OK

Repeat the above steps for Frame 1, Frame 2, and Small Circle layers.

Highlight Frame Background 1. Select All/Float/Defloat. You can do either of 2 things:
New Raster Layer. Flood Fill with a gradient of your choice. Delete template layer.
OR
Copy and paste a paper of choice as a new layer. Selections/Invert. Hit the delete key.

Whichever you chose to do, repeat it with Frame Background 2.

Copy and paste your tube or image as a new layer below each frame.

Add your embellishments. I used:
Element 4: Resize 70%.
Element 1
Element 3: Resize 25%
Butterflies: Resize 25%

Highlight your white canvas. New Raster Layer. Select All. Copy and paste a paper of choice Into Selection. Deselect. Apply the mask. Merge Group. Resize 110%.

Add your copyrights.

Add your name.
What I did for the color of my name was I copied the mask layer. Pasted as a new image. New Raster layer, moved to bottom, flood filled white. Used my selection tool and selected the whole center of the mask. In my color pallet I set the background to pattern. Foreground is set to color: #1a1a1a.

Type out your name. Give it the same inner bevel as you’ve been using. Duplicate. On the original:
Adjust/Blur/Gaussian Blur:
Radius: 10
Give the copied layer a heavy drop shadow. Merge down and move your name into position.

I hope you enjoyed this tutorial.
I’d love to see your results.
Email me!
Hugs,
Bev

A Mermaid's World

Clicking on the image will enlarge to full view.
Because it won't show the animaition this way
below is the animated version, but won't enlarge.


Supplies Needed

1 tube of choice. I'm using the artwork of Nicole Brune which you can purchase here
Font of choice - I'm using Dragonfly here
Becky Mask 22 here
EyeCandy 3.: Glow – Optional
Animation Shop - Optional
"Beach Bum" scrap kit by Creationz by Jo which can be found here. You can visit her blog here.
This kit is packed full of “beach” and loads of fun to use!!

This tutorial was written assuming you have working knowledge of PSP. For this particular tut you must have loads of patience, but it does pay off in the end…hehehe

~♥~ Let’s get started ~♥~

Open a blank canvas 700 X 700. Flood fill white. We’re going to do the mask layer first. Copy and paste Paper 11 as a new layer. Copy and paste the sand as a new layer. Resize 60% and move into the bottom left corner of your canvas. Duplicate/Mirror. Duplicate once more and move to the bottom middle to close the gap. The sand layers should look blended now. Close out your white canvas and merge visible. Apply your mask. Merge Group. Duplicate 3 times to darken the appearance more. Merge visible all mask layers. Resize 110%.

Copy and paste Wood Frame as a new layer. Resize 70%. Use your Magic Wand and click inside the frame. Selections/Modify/Expand by 20. Copy and paste Paper 5 as a new layer. Resize 50%. Selections/Invert. Hit the delete button. Rename this paper layer as Aquarium Water.

Copy and paste Rock. Resize 85%. Position at the bottom right corner of the frame.

Copy and paste Leaves. Position behind the rock. Duplicate and position at the bottom left frame. Duplicate as many times as your like, move them behind the frame and position so the leaves peek out from behind the sides and top of the frame. Merge visible only the leave layers that are behind the frame.

Copy and paste Flowers of your choice. I used:
Flower, Flower 2, and Flower 3. Resize 15% and 50%. Duplicated and resized 80%. Position these in various places on the leaves. Merge visible the leave layer and all the flower layers.

Add your embellishments. I used:
Fish 1 & 2: Resize 25%. (place them below the frame layer)
Pebbles – Resize 25%.
Sea Gull: Resize 60%.
Starfish – Resize 20%.
Shell Pile: 20%.
Shell – Resize 15%.
Wrap String: 50%. Mirror. Free Rotate right 80 degrees

Copy and paste your tube as a new layer. How’s it lookin’? :O)

Add your copyright.

Add your name. I used:
Foreground: #8d3817
Background: Paper 5 set as Pattern
Then added an inner bevel:
Bevel: 2
Width: 7
Smoothness: 55
Depth: 16
Ambience: -27
Shininess: 45
Color: white
Angle: 135
Intensity: 31
Elevation: 88
OK

Then I gave it a glow:
EyeCandy 3.1/Glow
Width: 5
Opacity: 100
Color: #f6e28f
OK
Give it a drop shadow.

If you don’t want to animate then resize and save your tag.

~Onward to the Animation~

In PSP copy the Aquarium Water layer. Carry into Animation shop:Edit/Paste as New Animation.

Click on Effects/Insert Image Effects.
Under Effect you want to choose Underwater.
Effect Length: 1.3 sec
Frames per second: 6

Click Customize

Under Effects:
Apply Sunlight Dappling
Sun Intensity: 25

Liquid Properties:
Water Depth: 20
Waves:
Wave 1: X -24, Y 61
Wave 2: X 0, Y 33
Wave 3: X 11, Y 83
Wave 4: X 50, Y 72
Wave 5: X 18, Y 47
Wave 6: X 21, Y 15
Wave 7: X 52, Y 24
Wave 8: X 36, Y 0
Wave 9: X 12, Y -49
Wave 10: X -19, Y -26
Wave 11: X -48 Y -3
Wave 12: X -29, Y 17
Wave 13 – 16: X 0, Y 0
Click Ok, and then OK again.

Your Aquarium Water should now have 8 frames. Highlight and delete Frame 1.

Go back into PSP and copy your name. Repeat the above step. Please don’t forget after you’ve animated it to delete that first frame. :O)

Now if up to this point hasn’t tried your patience then hang onto your computer seat…hehehe

Go back into PSP. Close out all your layers. Only open up your white canvas, mask, and merged leaves and flowers layers. Copy Merged. Carry into AS.
Edit/Paste as New Animation.
CTL + L and hit the L key until you have 7 frames.

Go back into PSP. Open up the Aquarium Water layer. YOU ARE NOT COPYING ANYTHING AT THIS TIME! Study it for a minute to see where it is on the canvas. I focused on a corner of the water and made a mental note of where it was touching the leaves. Now go back into AS. Highlight the Aquarium Water Animation.
CTL + A
Edit/Copy

Highlight the merged background image with the mask and leaves.
View/Normal Viewing
Ctl + A
Ctl + E
Position the Aquarium Water animation where you remembered it should go.

Go back into PSP. Close out all layers. Open up all layers FROM ABOVE the Aquarium Water layer accept your name – keep your name closed. Copy Merged. Carry it into AS.

Click the Propogate Paste icon button at the top of the screen. It looks like 3 pieces of paper with the corners folded.
Ctl & E.
Move the rest of your tag into position over the aquarium water.

Looking good? Yes? :O)

Now copy your animated name.
Ctl + E.
Position it where you like.

Ctl + A
Animation/Frame Properties:
Change the number to 20.

Animation/Resize Animation:
Percentage of Original:
85%
View your tag. If you’re happy with it then save.

I hope you enjoyed this tutorial.
I’d love to see your results.
Email me!
Hugs,
Bev

Risky


Clicking on the image will enlarge to full veiw.
Supplies Needed

1 tube of choice. I'm using the artwork of Elizabeth Austin which you can purchase here
Font of choice - I'm using Aquarelle here
Weescotlass Mask 297 here
Eyecandy 5: Impact – Optional
“Risky” scrap kit created by Sematra Designs which can be found here. You can visit her blog here.

This tutorial was written assuming you have working knowledge of PSP.

~♥~ Let’s get started ~♥~

Open up a blank canvas 700 X 700. Flood Fill white. Copy and paste Frame 1 as a new layer. Resize 50% and move to the upper right side of your canvas. Duplicate, Mirror. Move to the lower left side of your canvas.

Use your Magic Wand and click inside one of the frames. Selections/Modify/Expand by 4. Copy and paste a paper of choice below the frame. Selections/Invert. Hit the delete key. Copy and paste your tube below the frame. Enlarge as much as you like until you get the desired image inside the frame. Hit the delete key. Deselect. Close out your white canvas and merge visible.

Repeat the above step with the other frame.

Add your embellishments. I used:
Flower 2a: Resize 50%
Flower 2b: Resize 50% and again 80%
Heart Bow 1: Resize 60%
Leaves 1: Resize 40%. Mirror. Free rotate right 50 degrees.
Highlight your white canvas. New Raster Layer. Select All. Copy and paste a paper of choice Into Selection. Deselect. Apply the mask. Merge Group.

Add your copyrights.

Add your name.
I added a slight inner bevel:
Bevel: 2
Width: 1
Smoothness: 15
Depth: 2
Ambience: -2
Shininess: 0
Color: white
Angel: 0
Intensity: 36
Elevation: 42
OK

Then I added a Gradient glow:
Outside Glow
Mask Selection checked
Glow Radius: 5
Soft Corners: 0
Overall Opacity: 100
Distortion Amount: 0
Distortion Lump Size: 100
Smoothness: 46
Choose your color
Ok

I hope you enjoyed this tutorial.
I’d love to see your results.
Email me!
Hugs,
Bev

Everything Nice


Clicking on the image will enlarge to full view
Supplies Needed

2 tubes of choice. I'm using the artwork of PinUpToons which you can purchase here
Font of choice - I'm using Arctic2 here
Weescotlass Mask 6 here
Eyecandy 5: Impact – Optional
“Spring Time” tagger size kit created by Bits ‘N Bobs which can be found here. It’s FTU for a limited time so better hurry and snag this totally adorable kit before it hits the stores!
Thank you so much, Julie for such a fabulous kit!
You’re awesome!

This tutorial was written assuming you have working knowledge of PSP.

~♥~ Let’s get started ~♥~

Open up a blank canvas 700 X 700. Flood Fill white. Copy and paste Frame 1 as a new layer. Resize 75%. Free rotate left 5 degrees. Move to the left side of your canvas. Duplicate/Mirror. Merge down.

Use your Magic Wand and click inside of each frame. Selections/Modify/Expand by 4. Copy and paste a paper of choice below the frame. Selections/Invert. Hit the delete button.

Copy and paste a tube of choice into each frame.

Copy and paste Flower Spray as a new layer. Resize 75%. Move behind the lower left side of the frame. Duplicate/Mirror.

Copy and paste Flower 3 as a new layer. Resize 50%. Position behind the upper left side of the frame. Duplicate and move to the top left of the frame. Duplicate and mirror each of these flowers.

Copy and paste Flower 8 as a new layer. Position at the top left corner of the frame, above the other 2 flowers. Duplicate/Mirror.

Copy and paste Bow 1 as a new layer. Resize 60%. Free rotate left 20 degrees. Position at the top left corner of the frame. Duplicate/Mirror.

Copy and pate Flower 6 as a new layer. Resize 50%. Move into position between both frames. Duplicate. Resize 80%.

Copy and paste Bunny 2 as anew layer. Resize 75% and position in the lower middle of both frames.

Copy and paste Sticker 4 as a new layer. Resize 50% and 90%. Free rotate right 5 degrees. Position near the bottom right of the frames.

Copy and paste the Egg as a new layer. Resize 35%. Duplicate and free rotate to your liking.

Copy and paste a Feather in between the eggs. Resize 50%.

Highlight your white canvas. New raster layer. Select All. Copy and paste a paper of choice Into Selection. Deselect. Apply the mask. Merge Group. Duplicate. Merge down. Resize 135%.

Add your copyrights.

Add your name.
I added a slight inner bevel:
Bevel: 2
Width: 1
Smoothness: 15
Depth: 2
Ambience: -2
Shininess: 0
Color: white
Angel: 0
Intensity: 36
Elevation: 42
OK

Then I added a Gradient glow:
Outside Glow
Mask Selection checked
Glow Radius: 5
Soft Corners: 0
Overall Opacity: 100
Distortion Amount: 0
Distortion Lump Size: 100
Smoothness: 46
Choose your color
Ok

I hope you enjoyed this tutorial.
I’d love to see your results.
Email me!
Hugs,
Bev