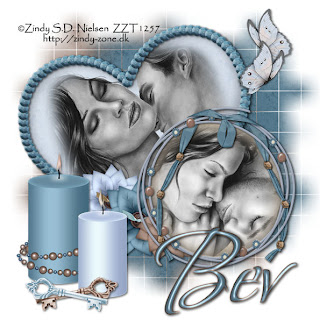
Clicking on the image will enlarge to full view.
Supplies
2 Images of choice - I’m using the artwork of Zindy S.D. Nielsen here
Font of Choice - I’m using Bonheur Royale.
It appears it's now a pay font. Any scripty type font from here will work.
Weescotlass Mask 84 here
“Something Beautiful” a PTU scrap kit by Tina’s Magical Scrap World here and can be purchased at Exquisite Scraps here
Tina, thank you so much for such a beautiful scrap kit!
Weescotlass Mask 84 here
“Something Beautiful” a PTU scrap kit by Tina’s Magical Scrap World here and can be purchased at Exquisite Scraps here
Tina, thank you so much for such a beautiful scrap kit!
This tutorial was written assuming you have working knowledge of PSP.
~♥~ Let’s get started ~♥~
Open up a blank 700 X 700 canvas. Flood fill white.
First we’re going to assemble the heart frame.
Open up Sequenheart 1 and paste as a new layer. Resize 80%. Use your Magic Wand and click inside of it. Selections/Modify/Expand by 6.
Copy and paste a paper of choice below the frame. Selections/Invert. Hit the delete button. Select none.
Copy and paste your image of choice below the frame. Highlight your frame layer and click inside with your Magic Wand.
Selections/Modify/Feather
Number of Pixels: 58
Selections/Invert
Tap your delete key until your image is feathered nicely inside the frame.
Select none.
Close out your white canvas. Merge visible. Open your canvas back up. Free rotate left 15 degrees.
Move the merged heart layer near the upper left portion of your canvas. You can move it into exact position later on.
Now we’re going to assemble String Frame 2.
Copy and paste it as a new layer. Resize 80%. Use your Magic Wand and click inside of it. Selections/Modify/Expand by 2. Copy and paste a paper of choice below it. Selections/Invert. Hit the delete key. Deselect.
Copy and paste your image of choice below the frame. Highlight the frame layer and click your Magic Wand inside of it.
Selections/Modify/Feather
Number of Pixels: 58
Selections/Invert
Tap your delete key until your image is feathered nicely inside the frame.
Select none.
Copy and paste Knot Ribbon 1 as a new layer. Resize 70% and move into position over the frame layer. Once you have it where you want it, duplicate. Move the original just below the frame. Highlight the copy layer. Use your Eraser Tool and erase parts of the ribbon to give the affect as if the ribbon is twisted below parts of the frame.
Close out your white canvas and your merged heart layer. Merge visible. Resize 80% and move both of your merged frame layers into position where you want them.
Add your embellishments. I used:
Candle 2 - Resize 70%
Candle 3 - Resize 40%
Keys 1 & 2 - resize 40%
Bow Flowers 1,2,and 3 - Resize 40%
Butterfly 3 - Resize 30%
Candle 2 - Resize 70%
Candle 3 - Resize 40%
Keys 1 & 2 - resize 40%
Bow Flowers 1,2,and 3 - Resize 40%
Butterfly 3 - Resize 30%
Highlight your white canvas. New Raster layer. Select All. Copy and paste a paper of choice Into Selection. Select none. Apply the mask. Merge Group.
New Raster Layer. Select All. Copy and paste a contrasting colored paper of choice Into Selection. Select none. Apply the same mask. Merge Group.
Move the mask slightly to the left. Now move the other mask to line up the white lines that are in both masks. Once you’ve done that then merge down. Resize 105%.
Add your copyrights.
Add your name.
I used an inner bevel on mine:
Bevel: 1
Width: 7
Smoothness: 55
Depth: 16
Ambience: -27
Shininess: 45
Color: white
Angle: 135
Intensity: 31
Elevation: 88
I hope you enjoyed this tutorial as much as I enjoyed working with this gorgeous kit. The possibilities for creating tags with this kit are endless!!
Hugs,
Bev

No comments:
Post a Comment