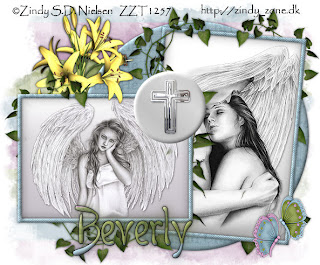
Clicking on the image will enalrge to full view.
Supplies Needed
2 tubes (or images) of choice. I'm using the artwork of Zindy S.D. Nielsen which you can purchase here
Font of choice - I'm using Boomerang here
Becky Mask 22 here
Missy Tag Template 84 here
“Sunrise Service” FTU scrap kit created by Cindy of Southern Scrapz which can be found here.
Thank you Cindy for an amazing kit.
This tutorial was written assuming you have working knowledge of PSP.
~♥~ Let’s get started ~♥~
Open up the template. Sift +D. Close out the original. Delete the watermark and heart layers.
Highlight the Circle layer. Select All/Float/Defloat. Copy and paste a paper of choice as a new layer. Selections/Invert. Hit the delete key. Deselect. Delete the template layer. Give it a slight inner bevel. I used:
Bevel: 2
Width: 3
Smoothness: 35
Depth: 2
Ambience: -8
Shininess: 10
Color: white
Angel: 315
Intensity: 75
Elevation: 20
OK
Repeat the above steps for Frame 1, Frame 2, and Small Circle layers.
Highlight Frame Background 1. Select All/Float/Defloat. You can do either of 2 things:
New Raster Layer. Flood Fill with a gradient of your choice. Delete template layer.
OR
Copy and paste a paper of choice as a new layer. Selections/Invert. Hit the delete key.
Whichever you chose to do, repeat it with Frame Background 2.
Copy and paste your tube or image as a new layer below each frame.
Add your embellishments. I used:
Element 4: Resize 70%.
Element 1
Element 3: Resize 25%
Butterflies: Resize 25%
Highlight your white canvas. New Raster Layer. Select All. Copy and paste a paper of choice Into Selection. Deselect. Apply the mask. Merge Group. Resize 110%.
Add your copyrights.
Add your name.
What I did for the color of my name was I copied the mask layer. Pasted as a new image. New Raster layer, moved to bottom, flood filled white. Used my selection tool and selected the whole center of the mask. In my color pallet I set the background to pattern. Foreground is set to color: #1a1a1a.
Type out your name. Give it the same inner bevel as you’ve been using. Duplicate. On the original:
Adjust/Blur/Gaussian Blur:
Radius: 10
Give the copied layer a heavy drop shadow. Merge down and move your name into position.
I hope you enjoyed this tutorial.
I’d love to see your results.
Email me!
Hugs,
Bev

this is just beautiful Bev.. I never seen it.. I will get it added to my blog today..
ReplyDeletehugs
Cindy
Southern Scrapz