Supplies
1 tube of choice - I used the beautiful artwork of Zindy S.D. Nielsen here
Font of choice - I used Oh Lara. It’s a pay font and can be found here.
Weescotlass Mask 241 here
Babe’s Designz Template 31 here
DSB Flux - Bright Noise
Eyecandy 5: Impact - Glass
“White Christmas” is a PTU tagger size scrap kit created by Julie of Bits ’n Bobs and can be purchased at AMI. You can visit Julie’s blog here.
Thank you Julie for a very beautiful kit!
This tutorial was written assuming you have a working knowledge of PSP.
~♥~ Let’s get started ~♥~
Open up the template.
Delete the credit and circle layer.
Highlight Large Rectangle layer.
Select All/Float/Defloat
Copy and paste a paper of choice as a new layer.
Selections/Invert
Tap the delete key.
Deselect.
Delete the template layer.
Highlight Frame Inner layer.
Select All/Float/Defloat
New Raster layer.
Copy and paste a paper of choice Into Selection.
Deselect.
Delete the template layer.
Select All/Float/Defloat
New Raster layer.
Copy and paste a paper of choice Into Selection.
Deselect.
Delete the template layer.
Highlight Fancy Frame layer.
Select All/Float/Defloat
New Raster Layer.
Flood fill with a color of your choice.
Deselect.
Delete the template layer.
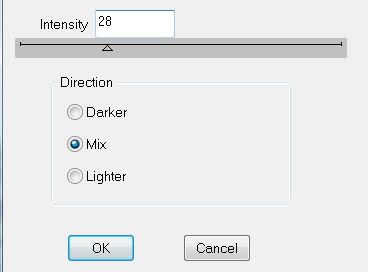
Apply DSB Flux - Bright Noise
Select All/Float/Defloat
New Raster Layer.
Flood fill with a color of your choice.
Deselect.
Delete the template layer.
Apply DSB Flux - Bright Noise

Highlight Small Rectangle layer.
Select All/Float/Defloat
New Raster Layer.
Flood fill with a gradient of choice.
Deselect.
Delete the template layer.
Highlight Small Dots layer.
Select All/Float/Defloat
New Raster Layer.
Flood will with the same color you used on the fancy frame.
Deselect.
Delete the template layer.
Highlight Large Dots layer.
Select All/Float/Defloat
New Raster layer.
Flood fill with the same color you used for the fancy frame.
DO NOT DESELECT.
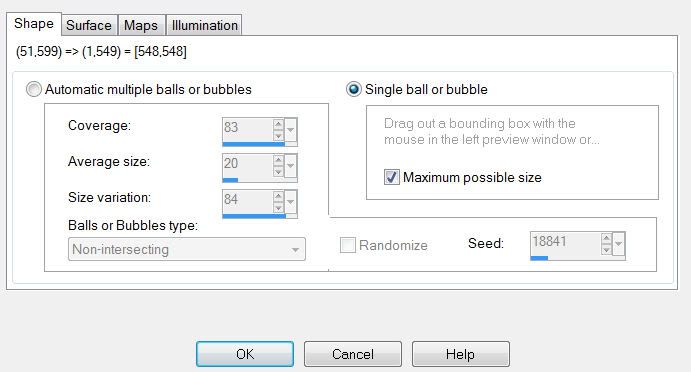
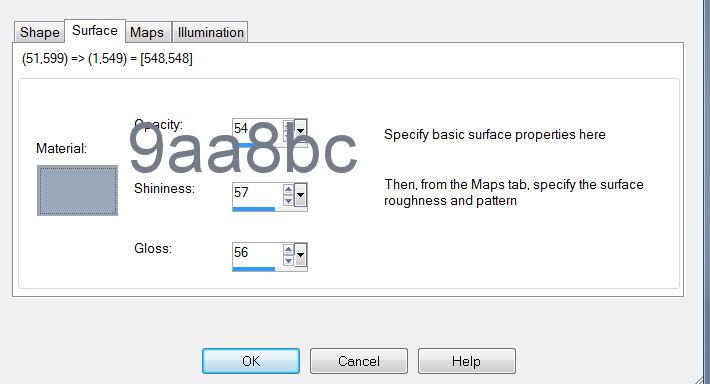
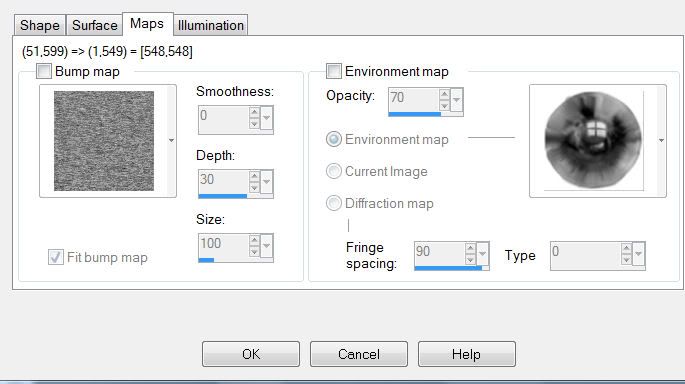
Effects/Artistic Effects/Balls and Bubbles
On the Shape tab:
On the Surface Tab:

On the Maps tab:
On the Illumination tab:
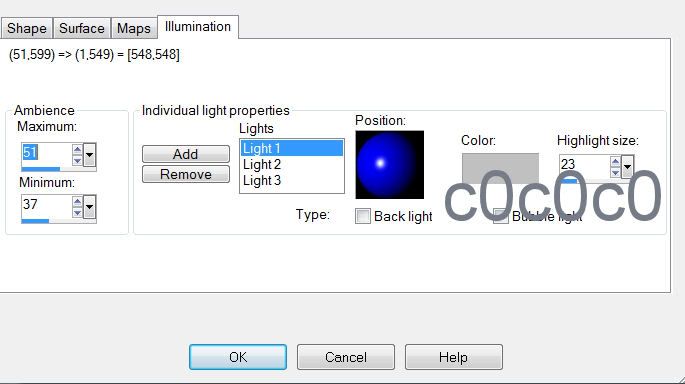

On the Illumination tab:

Deselect
Apply Eyecandy 5: Impact - Glass
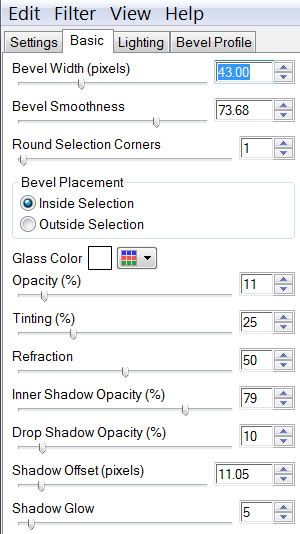
Add your embellishments. I used:
Element 2: Resize 50%. Duplicate/Mirror as you like and use your Pick Tool to angle differently.
Element 13: Resize 80%
Element 12: Resize 50%
Element 15
Element 5: Resize 70%
Highlight your white background.
New Raster layer.
Select All.
Copy and paste the BNB White Christmas Preview Into Selection.
Deselect.
Adjust/Blur/Gaussian Blur:
Radius: 20
OK
Apply the mask.
Merge Group.
Add your copyrights.
Add your name.
Give it a slight inner bevel:
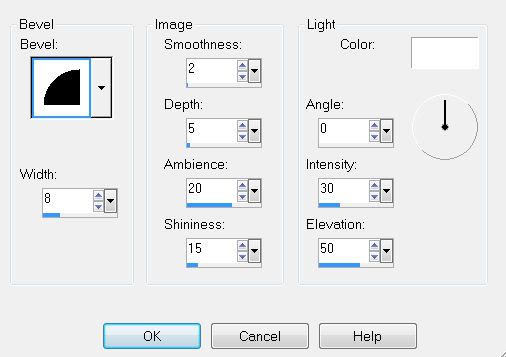
I hope you enjoyed this tutorial.
I’d love to see your results.
Email me!
Hugs,
Bev


No comments:
Post a Comment