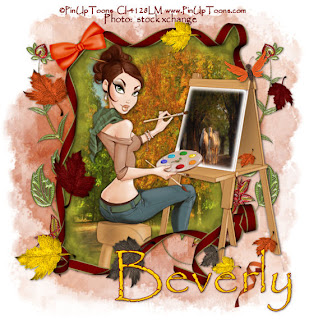
Clicking on the image will enlarge to full view.
Supplies
1 tube of choice - I’m using the artwork of PinUpToons which you can purchase here
1 misted autumn image
1 autumn image
You can acquire the images by going onto the stock xchange site here. There are endless photo's to choose from!
Font of Choice - Papyrus here
Becky Mask 22 here
“Autumn Romance” is a PTU tagger size scrap kit created by Alyssa‘s Scraps & Such and is part of the store collaboration. It can be purchased at Twilight Scraps. At the end of the month the kit goes on sale in all Alyssa's stores.
Thank you Alyssa for a kit that truly made me wish I lived back up north!
This tutorial was written assuming you have a working knowledge of PSP.
~♥~ Let’s get started ~♥~
Open up a 700 X 700 transparent image.
Flood fill white.
Copy and paste Frame 1 as a new image.
Resize 80%
Use your Magic Wand and click inside of it.
Selections/Modify/Expand by 3
Copy and paste a paper of choice below the frame.
Selections/Invert
Tap the delete key.
DO NOT DESELECT.
Resize 80%
Use your Magic Wand and click inside of it.
Selections/Modify/Expand by 3
Copy and paste a paper of choice below the frame.
Selections/Invert
Tap the delete key.
DO NOT DESELECT.
Copy and paste you misted image as a new layer above your paper layer.
Tap the delete key.
Deselect.
Copy and paste your tube.
If you’re using the same tube as I did….
Use your Freehand Selection Tool and outline the Easel board and around her paint brush and around the color pallet she’s holding onto.
New Raster Layer.
Copy your autumn image Into Selection.
DO NOT DESELECT.
Duplicate.
Close out the original.
Highlight the copy.
Selections/Modify/Feather
Number of Pixels: 10
Selections/Invert
Tap the delete key until you have the feathered effect you want.
Deselect.
Highlight the original and open the layer up.
Use your eraser tool and erase along the outer edges of the easel board.
Add your embellishments.
Bow 7: Resize 25% Free rotate Left 25%
Butterfly 5: Resize 25%
Doodle
Ribbon 1: Resize 25% and 80%
I used all the leaves, resizing and rotating differently and placing them about.
Highlight your white canvas.
New Raster Layer.
Select All.
Copy and paste a paper of choice Into Selection.
Deselect.
Apply the Mask.
Merge Group.
Add your copyrights.
Add your name.
Resize all layers 85%.
I hope you enjoyed this tutorial.I’d love to see your results and show it off in my Show Arena.
Email me!
Hugs,
Hugs,
Bev

No comments:
Post a Comment