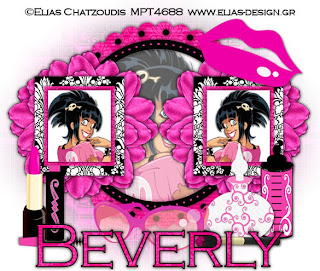
Clicking on the image will enlarge to full view.
Supplies
1 tube of choice - I’m using the artwork of Elias Chatzoudis which you can purchase here
Font of Choice - I’m using Copperplate Gothic Light (came with pc)
Weescotlass Mask 62 here
Babe’s Designs Template 17 here
“Girly Girl” a PTU tagger scrap kit created by Southern Scrapz by Cindy and can be purchased here. Visit her blog here.
Cindy, this kit is awesome!
This tutorial was written assuming you have working knowledge of PSP.
~♥~ Let’s get started ~♥~
Open up the template. Shift + D. Close out the original. Delete Raster 1.
Highlight Circle Frame layer. Select All/Float/Defloat. Copy and paste a paper of choice as a new layer. Selections/Invert. Hit the delete key. Deselect. Delete the template layer. Give it a heavy drop shadow.
Repeat the above steps for Dots, Inner Frame, Inner Dots layers.
Highlight Square Frames. Selections/Float/Defloat. Copy and paste a paper of choice as a new layer. Selections/Invert. Hit the delete key.
Selections/Invert.
Selections/Modify/Contract by 20.
Copy and paste a paper of choice.
Selections/Invert. Hit the delete key.
Selections Invert.
Selections/Modify/Contract by 8.
New Raster Layer. Flood Fill white.
Copy and paste your tube of choice into one of the squares.
Selections/Invert.
Hit the delete key.
Deselect.
Duplicate/Mirror.
I didn’t lose ya, did I?!
If not, then go back and give the same heavy drop shadow to all those layers we just made.
Highlight your inner frame layer. Use your Magic Wand and click inside of it. Copy and paste your tube into the circle. Selections/Invert. Hit the delete button. Lower the opacity down to 63.
Copy and paste Element 50 as a new layer behind one of the squares. Duplicate/Mirror.
Add your embellishments. I used:
Element 15: Resize 50%
Element 16: Resize 50%
Element 14: Resize 40%
Element 18: Resize 40%
Element 1: Resize 50%
Element 4: Resize 30%
Element 10: Resize 70%
Close off your white canvas and merge visible. Reopen your white canvas.
New Raster Layer. Select All. Copy and paste a paper of choice Into Selection. Apply the mask. Merge Group.
Keeping the mask layer highlighted, use your eraser tool and erase where the mask shows through your tube in the inner frame.
Copy and paste Element 13. Resize 50%.
Add your copyrights.
Add your name.
Hugs,
Bev

Love it.. thanks Bev..
ReplyDelete