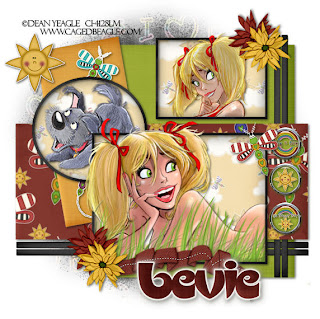
Clicking on the image will enlarge to full view.
Supplies
3 tubes of choice - I’m using the artwork of Dean Yeagle which you can purchase here
Dezigns by Ali Template 50 here
Eye Candy 5 Impact - Optional
“Cute as a Bug 2” a PTU tagger scrap kit by Twinky Dezines and can be purchased here. You can visit her blog here.
Thank you Twinky for a totally fun and adorable kit!! It put a smile on my face for sure :O)
This tutorial was written assuming you have working knowledge of PSP.
~♥~ Let’s get started ~♥~
Open up the template. Shift + D. Close out the original.
Image/Canvas Size
Width & Height: 700New Raster layer. Send to Bottom. Flood fill white.
Delete the credit layer.
Delete the credit layer.
Highlight Back Rectangle. Select All/Float/Defloat. Copy and paste a paper of choice as a new layer. Selections/Invert. Hit the delete key. Deselect. Delete the template layer. Give it a slight inner bevel:
Bevel: 2
Width: 20
Smoothness: 17
Depth: 3
Ambience: 0
Shininess: 14
Color: white
Angle: 248
Intensity: 28
Elevation: 63
Elevation: 63
Ok
Highlight Bottom Lines. Select All/Float/Defloat. Copy and paste a paper of choice as a new layer. Selections/Invert. Hit the delete key. Deselect. Delete the template layer.
Repeat the above step for Side Lines layer.
Highlight Black Rectangle Layer. Select All/Float/Defloat. Copy and paste a paper of choice as a new layer. Resize 110%. Selections/Invert. Hit the delete key. Deselect. Delete the template layer.
Highlight Side Rectangle layer. Select All/Float/Defloat. Copy and paste a paper of choice as a new layer. Selections/Invert. Hit the delete key. Deselect. Delete the template layer.
Highlight Back Frame 1. Select All/Float/Defloat. Copy and paste a paper of choice as a new layer. Selections/Invert. Hit the delete key. Deselect. Delete the template layer. Reduce the opacity to 45.
Highlight Frame 1. Select All/Float/Defloat. Copy and paste a paper of choice as a new layer. Selections/Invert. Hit the delete key. Deselect. Delete the template layer.
Use your Magic Wand and click inside the frame. Select All/Modify/Expand by 2. Copy and paste your tube of choice below the frame. Selections/Invert. Hit the delete key. Deselect.
Repeat the above 3 steps for Circle Back, Circle Back Frame, Middle Frame, Main Middle Frame layers.
Highlight Small Circle 1. Merge Down. Merge Down again. Select All/Float/Defloat. Copy and paste a paper of choice as a new layer. Selections/Invert. Hit the delete key. Deselect. Delete the template layer.
Highlight Small Circle 1. Merge Down. Merge Down again. Select All/Float/Defloat. Copy and paste a paper of choice as a new layer. Selections/Invert. Hit the delete key. Deselect. Delete the template layer.
Add your embellishments. I used:
Flowers 1 & 3: Resize 25%
Brad 1, 2, & 3: Resize 30%
Brad 1, 2, & 3: Resize 30%
Clipart 16: Resize 60%
Clipart 1: Resize 25%. Free rotate left 20 degrees
Folded Ribbon 4: Resize 50%
Clipart 21: Resize 30%
Highlight your white canvas. New Raster layer. Select All. Copy and paste a paper of choice Into Selection. Select none. Apply your mask. Merge Group.
Add your copyrights.
Add your name. I gave mine the same slight inner bevel and a Glow:
Eye Candy 5: Impact
Basic Tab:Outside Glow checked
Mask Selection: checked
Glow Radius: 40
Soften corners: 0
Overall Opacity: 100
Distortion Amount: 0
Gradient Smoothness: 100
Color: white
Ok
Apply again and then give a drop shadow.
I hope you enjoyed this tutorial.
I’d love to see your results.

No comments:
Post a Comment