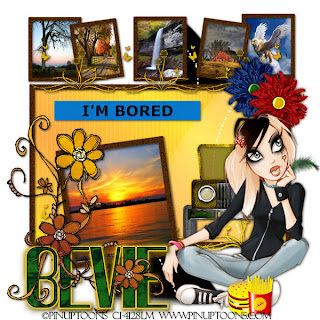
Clicking on the image will enlarge to full view.
Supplies
1 tube of choice - I’m using the artwork of PinUpToons which you can purchase here
6 scenery images. Mine are from various Yahoo groups.
Font of Choice - I’m using Quimbie here
Weescotlass Mask 216 here
Dezigns by Ali Template 141 here
Eye Candy 5 Impact - Optional
Filters Unlimited 2 - Optional
“Are We There Yet?” a PTU tagger scrap kit by Bits ’n Bobs and can be purchased here. You can visit her blog here.
Thank you Julie for such a fun kit!! It brought back memories of when I was a kid….stuck in a car traveling up and down the east coast of the U.S.!
This tutorial was written assuming you have working knowledge of PSP.
~♥~ Let’s get started ~♥~
Open up the template. Shift + D. Close out the original.
New Raster Layer. Send to bottom. Flood fill white.
Highlight Raster 2. Select All/Float/Defloat. Copy and paste Paper 11 as a new layer. Resize 75%. Move into position beneath the frame where you like. Selections/Invert. Hit the delete button. New Raster layer. Selections/Invert. Flood fill with a gradient of your choice.
Right Click on the layer. Choose “Properties”. Change Blend Mode to Overlay.
Copy and paste a Truck of your choice as a new layer just above the overlay layer. Resize 80%. Position it just over the pic of the truck on the paper. Selections/Invert. Hit the delete button. Deselect.
Highlight Raster 3. (the Frame) Select All/Float/Defloat. Selections/Modify/Expand by 2. New Raster Layer. Flood fill with a color you’d like the picture frames to be. Deselect.
Apply Filters Unlimited:
Mineral Paper, Sandstone
Default Settings
Ok
Highlight Raster 12. Select All/Float/Defloat. Selections/Invert. New Rater layer. Flood fill with a gradient. Deselect. Delete template layer. Repeat with Raster 11.
Highlight Raster 4. Select All/Float/Defloat. New Rater Layer. Copy and paste your image Into Selection. Deselect. Delete the template layer.
Highlight Raster 5. Select All/Float/Defloat. Selections/Modify/Expand by 2. New Rater Layer. Flood fill with the same color you used for the other frame. Apply Filters Unlimited - same default settings as before. Delete the template layer.
Repeat the above steps for the remainder of the frames.
Highlight Raster 10. Select All/Float/Defloat. Selections/Invert. New Rater layer. Flood fill with the same gradient as you already used before. Deselect. Change the blend mode to Overlay.
Copy and paste your tube as a new layer.
Add your embellishments. I used:
Flowers 1 & 2: Resize 40%
Charm 1 & Charm 2: Resize 90%. Use eraser tool to remove chain.
Feather of choice. Resize to your liking.
Highlight your white canvas. Copy and paste the Road as a new layer. Resize 80%. Select All/Float/Defloat. Selections/Invert. New Raster layer. Flood fill black. Deselect. Change the Blend Mode to Overlay.
Highlight your white canvas. New Raster layer. Select all. Copy and paste a paper of choice Into Selection. Deselect. Apply the mask. Resize 140%.
Add your copyrights.
Add your name. I gave mine a Glow:
Eye Candy 5: Impact
Basic Tab:
Outside Glow checked
Mask Selection: checked
Glow Radius: 40
Soften corners: 0
Overall Opacity: 100
Distortion Amount: 0
Gradient Smoothness: 100
Color: your choice
Ok
Apply again and then give a drop shadow.
Resize all layers 75%.
Hugs,
Bev

No comments:
Post a Comment