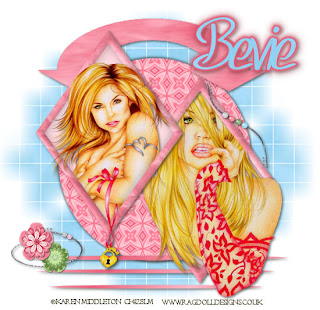
Clicking on the image will enlarge to full view.
Supplies
2 tubes of choice - I’m using the artwork of Karen Middleton which you can purchase here
Font of Choice - I’m using SF Foxboro Script here
Zuzzanna Mask 7 here
Template by Charlii here - Thank you so much Charlii!!
Eye Candy 5 Impact - Optional
Mura’s Meister - Cloud (optional)
“Spring into Summer” a free tagger scrap kit created by Scraps in Your Pocket and can be found here. Please leave a much appreciated Thank You when downloading. It’s a small gesture in exchange for beautiful work given freely :O)
This tutorial was written assuming you have working knowledge of PSP.
~♥~ Let’s get started ~♥~
Open up the template. Shift + D. Close out the original. Delete the credit layer. Resize all layers 130%. Highlight Raster 1 and Flood fill white.
Highlight the Oval layer. Select All/Float/Defloat. Copy and paste a paper of choice as a new layer. Selections/Invert. Hit the delete key. Delete the template layer.
Highlight the Diamond layer. Select All/Float/Defloat. Copy and paste a paper of choice as a new layer. Selections/Invert. Hit the delete key. Delete the template layer. Add a slight Inner Bevel:
Bevel: 2
Width: 20
Smoothness: 17Depth: 3
Ambience: 0
Shininess: 14
Color: White
Angle: 248
Intensity: 28
Elevation: 63
OK
Duplicate Raster 3.
Close out the Copy of Raster 3. Highlight Raster 3. Use your Magic Wand and click inside of it. Selections/Modify/Expand by 6. Copy and paste a paper of choice below the diamond. Selections/Invert. Hit the delete key. Copy and paste your tube below the diamond. Hit the delete key. Merge visible the diamond, tube, and paper. Resize 80%.
Open up the Copy of Raster 3 and repeat the above step. Then move both merged visible diamonds into position on your canvas.
Highlight the Lines layer. Select All/Float/Defloat. New Raster layer. Flood will with a gradient that will match your tubes. Delete the template layer.
Highlight the Arrow layer. Select All/Float/Defloat. Flood fill with the same gradient you used for the Lines. Keep Selected.
Mura’s Meister/Clouds:
Blend Mode
Change the FG and BG colors to the same colors you have for your gradient.
Effect: 100
Amount: 100
Grain: 3
All the rest should be 0
OK
Deselect.
Highlight the Flower layer. Select All/Float/Defloat. New Raster Layer. Flood fill with your gradient. Apply the same settings of Mura’s Meister Copies. Deselect. (I did one flower in pink, another in green)
Copy and paste Flower Sticker (Pink Flower) as a new layer. Resize 60%. Place over the template flower you just made. Merge Down.
Repeat the above step with the green flower. You can resize the merged flowers to your liking.
Add your embellishments. I used:
Doodle Beads: Resize 40%
Doodle Beads 2: Resize 40%
Highlight your white canvas. New Raster Layer. Select All. Copy and paste a paper of choice Into Selection. Deselect. Apply the mask. Merge Group.
Add your copyrights.
Add your name. I gave mine a Glow:
Eye Candy 5: Impact
Basic Tab:
Outside Glow checked
Mask Selection: checked
Glow Radius: 40
Soften corners: 0
Overall Opacity: 100
Distortion Amount: 0
Gradient Smoothness: 100
Color: your choice
Ok
Apply again and then give a drop shadow.
Hugs,

No comments:
Post a Comment