

Supplies
1 tube of choice – I used the wonderful artwork of Morgan Fitzsimons
which can be purchased from My Tubed Art. You must have
a license to use.
Weescotlass Mask 208 here
“Winter Fantasy” is a PTU tagger size scrap kit created by Cindy of
Puddicat Creations and can be purchased from TKOScraps. You can visit her blog here.
Thank you Cindy for a beautiful kit.
~♥~ Let’s get started ~♥~
Open up a 700 x 700 blank canvas.
Flood fill white.
Copy and paste Frame 3 as a new layer.
Resize 60%
Free rotate Left 10 degrees
Click inside of it with your Magic Wand.
Selections/Modify/Expand by 4.
New Raster layer below the frame.
Copy and paste Paper 6 Into Selection.
Deselect.
Copy and paste Paper 7 as a new layer.
Copy and paste Church 2 as a new layer.
Move in into a position you like on the paper – see my tag for
reference.
Merge Down.
The paper and church element should now be on the same layer.
Resize 50%
You can move it into a better position over the frame if you like.
Copy and paste your tube as a new layer.
Depending on how large (or small) your tube is, resize it so that the
face takes up the majority of the upper left corner of the merged paper layer.
Make your Freehand Selection Tool active and circle around the face:
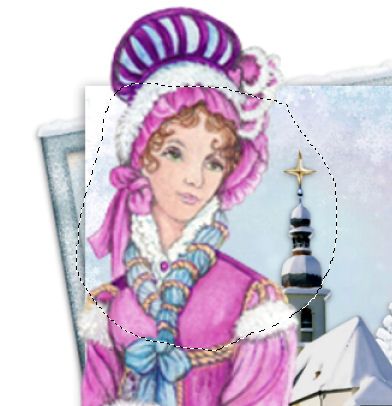
Selections/Modify/Inside Outside Feather
Both checked
Feather amount 30
OK
Tap the delete key until you have a nice feathered effect.
Deselect.
Change the Properties to Soft Light.
Copy and paste your tube as a new layer.
Position at the right in front of the merged paper layer – see my tag
for reference.
Copy and paste Bow 1 as a new layer.
Resize 30% - Move into position – see my tag for reference.
Copy and paste Balls 6 as a new layer.
Resize 35%
Position the wire just in front of the bow.
Use your Freehand Selection Tool and section out the area of the bow
that’s over the knot.

Tap the delete key.
Deselect.
Add your elements. I used:
Pinecones 1: Resize
50%/Duplicate 2 x’s
Bird 4: Resize
20%/Duplicate/Mirror
Ribbon 2: Resize 35%
Highlight your white background.
New Raster layer.
Select All.
Copy and paste Paper 3 Into Selection.
Deselect.
Apply the mask.
Merge Group.
Crop your image.
Add your credits.
Add your name.
Color Pallet:
Foreground and Background: #000000
Stroke: 0.50
Type your name.
Resize all layers 80%.
No comments:
Post a Comment