Supplies
1 tube of choice – I used the beautiful artwork of Deanna Bach Taloma
which can be purchased at PSP Tube Stop. You must have a license to
use.
Font of choice – I used Before the
Rain here
Weescotlass Mark 4 here
A Kandee New Year Template Collab – Template 3
Can be found on Dee’s blog here under Monday, December 17, 2012
“Baby It’s Cold Outside” is a tagger
size scrap kit created by Kara of Sweet Cravings Scraps and can be purchased
from ExquisiteDesigns. You can visit her blog here.
Thank you Kara for a fantastic Christmas kit!
~♥~ Let’s get started ~♥~
Open up the template.
Shift + D.
Close out the original.
Resize all layers 95%
Image/Canvas Size:
700 x 650
OK
Highlight the background layer and open it up.
Flood fill white.
Delete the top 10 layers.
Highlight Tan Bar 2 layer.
Click on it with your Magic Wand.
New Raster layer.
Copy and paste Paper 23 Into Selection.
Deselect.
Delete the template layer.
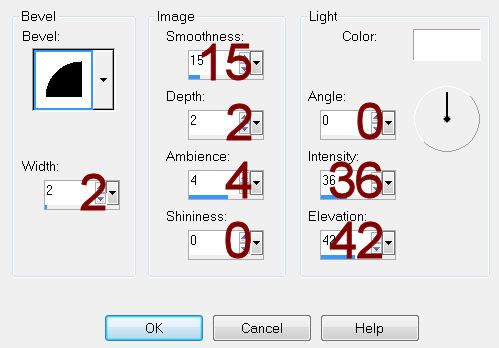
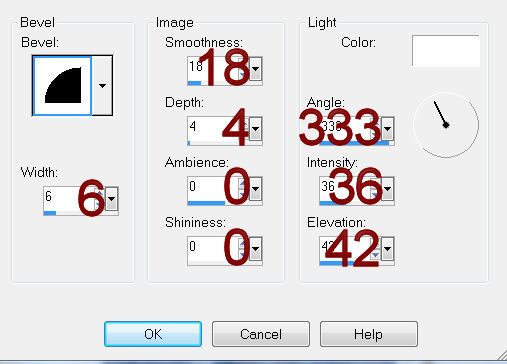
Give it a slight Inner Bevel:

Repeat the above step with Tan Bar 1 layer.
Highlight Gray Rectangle layer.
Click on it with your Magic Wand.
New Raster layer.
Copy and paste Paper 1 Into Selection.
Deselect.
Delete the template layer.
Give it the same slight Inner Bevel.
Highlight Top Red Strip layer.
Merge Down.
Click on each strip with your Magic Wand.
New Raster layer.
Copy and paste Paper 5 Into Selection.
Deselect.
Delete the template layer.
Give it the same slight Inner Bevel.
Highlight Green Circle 2 layer.
Click on it with your Magic Wand.
New Raster layer.
Copy and paste Paper 2 Into Selection.
Deselect.
Delete the template layer.
Give it the same slight Inner Bevel.
Repeat the above step with Green Circle 1 layer.
Color Pallet:
Foreground: #ffffff
Background: #585d73
Highlight Dotted Circle 2 layer.
Make your Color Replacer Tool active.
Double Right click on the dotted circle.
It should have changed to the blue color.
Repeat the above step with Dotted Circle 1 layer.
Highlight Back 3 layer.
Click on it with your Magic Wand.
New Raster layer.
Copy and paste Paper 22 Into Selection.
Deselect.
Delete the template layer.
Repeat the above step with Back 2 and Back 1 layers.
Highlight Frame 3 layer.
Click on it with your Magic Wand.
New Raster layer.
Copy and paste Paper 24 Into Selection.
Deselect.
Give it a slight Inner Bevel

Adjust/Add Remove Noise/Add Noise:
Uniform checked
Noise: 50%
OK
Delete the template layer.
Repeat the above steps with Frames 2 and 1.
You’re going to add the elements below the front left and right frame –
see my tag for reference of placement.
Don’t worry about what overhangs the paper layers. We’ll clean that up in a bit.
Snow Night 1: Resize 65%/Duplicate
and move this one just below the right frame.
Snowy Fence/Duplicate and move this just below the right frame.
Snow Mound/Duplicate and move just below the right frame.
Highlight the Left paper layer.
Click anywhere outside of it with your Magic Wand.
Highlight each element that is above the paper and tap the delete key.
Deselect.
Repeat the above step with the right paper layer.
Copy and paste your tube as a new layer.
Move into position in front of both of the bottom frames.
Duplicate the tube layer 2x’s.
Move one duplicated tube layer below the right frame.
Highlight the paper that belongs to the right frame.
Click anywhere outside of it with your Magic Wand.
Highlight the duplicated tube layer that’s just below the right frame.
Tap the delete key.
Deselect.
Move the other duplicated tube layer below the left frame.
Highlight the paper that belongs to the Left frame.
Click anywhere outside of it with your Magic Wand.
Highlight the duplicated tube layer that’s just below the Left frame.
Tap the delete key.
Deselect.
Highlight the original tube layer.
Erase what overhangs on the left side of the left frame and erase what
overhangs on right side of the right frame.
Paste your tube again and move so that it’s just above the back circle
paper layer.
Resize it so it’s just a little larger than the tube that you place in
front of the bottom frames.
Lower the Opacity to about 40.
Move it into a position that you like that looks good over both the
back rectangle and circle papers.
Duplicate the tube layer – move this one just above the back rectangle
layer.
Highlight the rectangle paper layer.
Click anywhere outside of it with your Magic Wand.
Highlight the tube just above it.
Tap the delete key.
Deselect.
Highlight the back circle paper layer.
Click anywhere outside of it with your Magic Wand.
Highlight the tube just above it.
Tap the delete key.
Deselect.
Add your elements. I used:
Swirl Flare 1: Resize 45%/Mirror/Free
rotate Right 45 degrees/Duplicate/Mirror/Flip
Glitter Frame 2: Resize
40%/Duplicate/Mirror
Bow 5: Resize
25%/Duplicate/Mirror
Flower 3: Resize 20%/Duplicate
2x’s
Flower 4: Resize 15%/Duplicate
2x’s
Highlight your white background.
New Raster layer.
Select All.
Copy and paste Paper 4 Into Selection.
Deselect.
Apply the mask.
Resize 110%
Merge Group.
Add your credits.
Add your name.
Color Pallet:
Foreground: #000000
Background: Pattern/Paper 2
Stroke: 1.0
Type your name.
Give it the same slight Inner Bevel:
Resize all layers 80%.


No comments:
Post a Comment