Supplies
1 tube of choice – I used the artwork of Keith Garvey which can be
purchased from PSPTubes Emporium. You must have a license to use.
Font of choice - I used Lyrics Movement here
Weescotlass Mask 297 here
Dee’s Sign Post – Snowflakes template (under the entry of “And the
Winner Is…”) which can be found here under January
2, 2012
Plugs Ins used:
Greg’s Factory Output Vol. II – Pool Shadow
Eyecandy 3.1 - Glow
“Beautiful Moments” is a tagger size scrap kit created by Kesha of KnC
Scrapz and can be purchased from her store Lollipops n Gumdrops. You can visit her blog here.
Thank you Kesha for such a beautiful kit.
This tutorial was written assuming you have a working knowledge of PSP.
~♥~ Let’s get started ~♥~
Open up the template.
Image/Canvas Size
700 x 500
OK
Highlight bg layer.
Flood fill white.
Delete the top 2 layers and Snow Flake Overlay.
Highlight Right Blue Rectangle layer.
Click on it with your Magic Wand.
New Raster layer.
Copy and paste Paper 5 Into Selection.
Deselect.
Delete the template layer.
Apply Eyecandy 3.1 – Glow:
Width: 3
Opacity: 100%
OpacityDrop Off: Fat
Color: White
OK
Highlight Left blue Rectangle layer.
Repeat the above step.
Highlight Aqua Oval layer.
Click on it with your Magic Wand.
New Raster layer.
Copy and paste Paper 3 Into Selection.
Deselect.
Delete the template layer.
Highlight Blue Rectangle layer.
Click on it with your Magic Wand.
New Raster layer.
Copy and paste Paper 9 Into Selection.
Deselect.
Delete the template layer.
Highlight White Strip layer.
Click on it with your Magic Wand.
New Raster layer.
Copy and paste Paper 8 Into Selection.
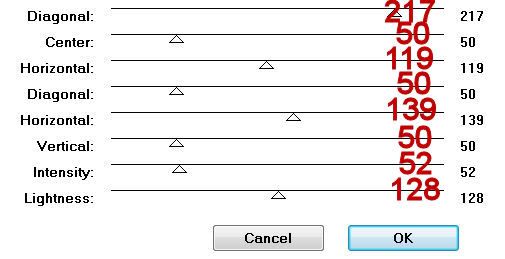
Apply Greg’s Factory Output Vol. II – Pool Shadow:

Deselect.
Delete the template layer.
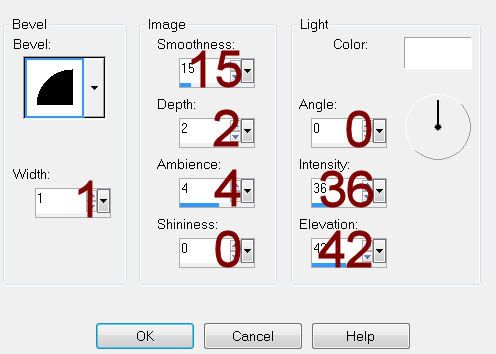
Give it a slight Inner Bevel:

Highlight Aqua Frame Rectangle layer.
Click on it with your Magic Wand.
New Raster layer.
Copy and paste Paper 2 Into Selection.
Deselect.
Delete the template layer.
Highlight Aqua Strip layer.
Click on it with your Magic Wand.
New Raster layer.
Copy and paste Paper 2 Into Selection.
Deselect.
Delete the template layer.
Give it the same slight Inner Bevel.
Highlight Blue Circle layer.
Click on it with your Magic Wand.
New Raster layer.
Copy and paste Paper 10 Into Selection.
Deselect.
Delete the template layer.
Highlight White Circle Frame layer.
Click on it with your Magic Wand.
New Raster layer.
Copy and paste Paper 2 Into Selection.
Deselect.
Delete the template layer.
Highlight Aqua Circle Frame layer.
Click on it with your Magic Wand.
New Raster layer.
Copy and paste Paper 7 Into Selection.
Apply the same Pool Shadow Effect.
Deselect.
Delete the template layer.
Copy and paste your tube as a new layer in front of the circle frame.
Move it into the position you want.
Paste your tube again as a new layer just above the circle paper layer.
Change the Properties to Soft Light.
Move into position.
Highlight the circle paper layer.
Click anywhere outside of it with your Magic Wand.
Highlight the tube layer.
Tap the delete key.
Deselect.
Add your elements. I used:
Hearts: Resize 25%/Duplicate
Bow 1: Resize
20%/Duplicate/Mirror
Hearts 1: Resize
25%/Duplicate/Mirror
Highlight your white background.
Select All.
New Raster layer.
Copy and paste Paper 2 Into Selection.
Deselect.
Apply the mask.
Merge Group.
Add your credits.
Add your name.
Resize all layers 80%


No comments:
Post a Comment