

Supplies
1 tube of choice – I used the wonderful artwork of Tim Lowery which can
be purchased from PSP Tubes Emporium. You must have a license to use.
Font of choice - I used Al Sandra here
Tracy’s Template 20 here – you’ll find her templates in bulk on the
right hand side
Plug Ins used:
Xero - Porcelain
“Pillows” is tagger size FTU scrap kit created by Niqui of Niqui’s
Deisgns and can be downloaded from her blog here.
Thank you Niqui for an awesome kit.
This tutorial was written assuming you have a working knowledge of PSP.
~♥~ Let’s get started ~♥~
Open up the template.
Shift + D.
Close out the original.
Image/Canvas Size
600 x 550
OK
New Raster layer.
Flood fill white.
Send to bottom.
Delete the credit layer, Heart 1, and Heart 2 layers.
Highlight Dotted Circle 1 layer.
Click anywhere outside it with your Magic Wand.
Selections/Invert
New Raster layer.
Copy and paste Paper 11 Into Selection.
Deselect.
Delete the template layer.
Highlight Circle layer.
Click on it with your Magic Wand.
New Raster layer.
Copy and paste Paper 3 Into Selection.
Deselect.
Delete the template layer.
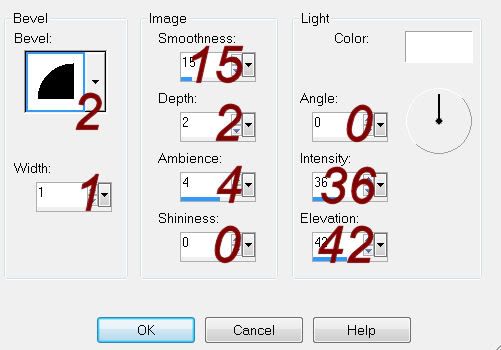
Give it a slight Inner Bevel:
Highlight Circle 2 layer.
Click on it with your Magic Wand.
New Raster layer.
Copy and paste Paper 2 Into Selection.
Deselect.
Delete the template layer.
Give it the same slight Inner bevel.
Highlight Dotted Circle 2 layer.
Click anywhere outside of it with your Magic Wand.
Selections/Invert
New Raster layer.
Copy and paste Paper 3 Into Selection.
Tap the delete key.
Deselect.
Delete the template layer.
Highlight Frame layer.
Click on it with your Magic Wand.
New Raster layer.
Copy and paste Paper 11 Into Selection.
Deselect.
Delete the template layer.
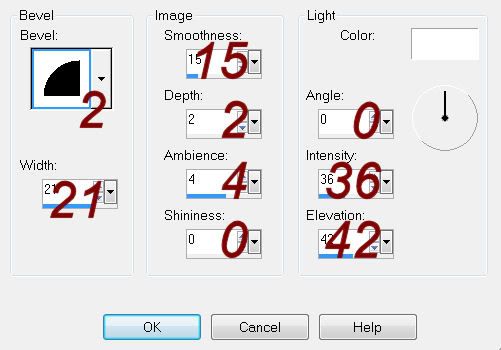
Give it a slight Inner bevel:

DO NOT give the frame a drop shadow yet.
Highlight Rectangle layer.
Click on it with your Magic Wand.
New Raster layer.
Copy and paste Paper 12 Into Selection.
Deselect.
Delete the template layer.
Copy and paste your tube as a new layer just above the rectangle paper.
Move this tube layer into position within the middle frame.
Highlight the frame paper layer.
Click inside of it with your Magic Wand.
Selections/Modify/Expand by 3.
Selections/Invert
Highlight the tube layer.
Tap the delete key.
Deselect.
Apply Xero - Porcelain to the
tube layer –
Use Default settings accept turn the Blue Channel mixer to 0.
Change the Properties to Luminance Legacy
Repeat the above step accept position the tube within the end frame.
Give the frame a drop shadow.
Add your elements. I used:
26
5: Resize 35%/Free Rotate Left 3
degrees
27: Resize 25%/Duplicate/Mirror
25: Resize 25%/Mirror
24
Highlight your white canvas.
New Raster layer.
Select All.
Copy and paste Paper 12 Into Selection.
Deselect.
Apply the mask.
Resize 110%
Merge Group.
Add your name.
Foreground: #de6399
Background: #99ffff
Stroke Width: 3
Type your name.
Give it a slight Inner Bevel:
No comments:
Post a Comment