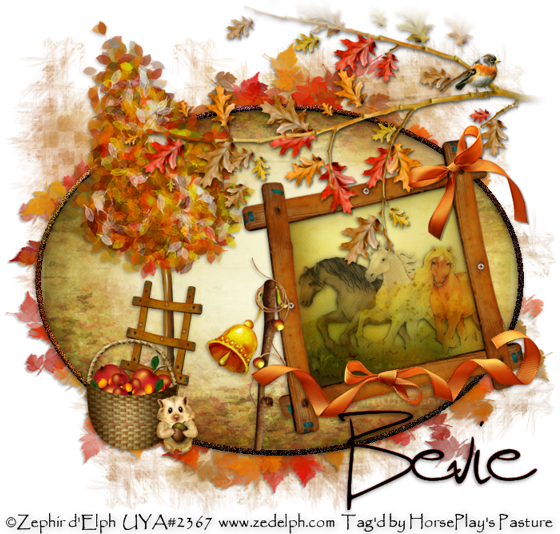
Supplies
1 tube of choice - I used the beautiful artwork of Zephir d’Elph which can be purchased from Up Your Art. You must have a license to use.
Font of choice - I used Scotosaurus here
Weescotlass Mask 297 here
Plugs Ins:
Xerox - Porcelain
“Autumn Harvest” is scrap kit available in both full and tagger size, created by Kesha of KnCScrapz and can be purchased from her store Lollipops n Gumdrops. You can visit her blog here.
Thank you Kesha for such a festive kit!
This tutorial was written assuming you have a working knowledge of PSP.
~♥~ Let’s get started ~♥~
Open up a 700 x 700 blank canvas.
Flood fill white.
Make you Selection Tool active set on Ellipse.
Make a 600 x 450 ellipse.
New Raster layer.
Copy and paste Paper 2 Into Selection.
New Raster layer.
Copy and paste Paper 6 Into Selection.
Selections/Modify/Contract by 7.
Tap the delete key.
Deselect.
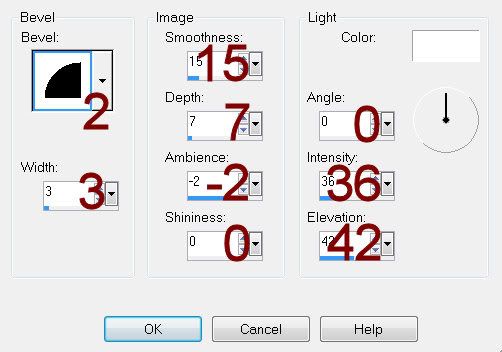
Give it a slight Inner Bevel:

Adjust/Add Remove Noise/Add Noise
Monochrome and Gaussian checked
Noise: 43%
OK
Copy and paste Frame 1 as a new layer.
Resize 35%
Mirror
Free rotate Left 10 degrees
Click inside the frame with your Magic Wand.
Selections/Modify/Expand by 4.
New Raster layer below the frame.
Copy and paste Paper 9 Into Selection.
Copy and paste your tube below the frame.
Selections/Invert
Tap the delete key.
Deselect.
Change the Properties of the tube layer to Luminance (Legacy)
Be sure the tube layer is highlighted.
Merge Down.
The tube and paper should be on one layer now.
Apply Xerox - Porcelain:
Use default settings accept move the blue channel button to 0.
Add your elements. I used:
Wreath: Use your Pick tool to pull the sides out.
Bow 1: Resize 25% and 80%
Tree: Resize 50%
Bell: Resize 35%
Ladder: Resize 25%/Mirror
Basket: Resize 25%
Element 2: Resize 25% and 50%
Bird: Resize 25% and 50%
Ribbon Bow 2: Resize 30%
Branch: Resize 60%/Mirror
To feather the branch:
Use your Freehand Selection Tool and surround the branch - letting the dotted line touch the areas of the branch you want feathered.
Selections/Modify/Inside Outside Feather:
Both checked
Feather amount: 43
OK
Selections/Invert
Be sure the branch layer is highlighted and tap the delete key until you have the feathered look you want.
Deselect.
Highlight your white canvas.
New Raster layer.
Select All.
Copy and paste Paper 7 Into Selection.
Deselect.
Apply the mask.
Use your Pick Tool to pull the sides out slightly.
Merge Group.
Crop your image.
Add your copyrights.
Add your name.
Resize all layers 80%.
I hope you enjoyed this tutorial.
I’d love to see your results and show it off in my gallery.
Email me!
Hugs,
Bev

No comments:
Post a Comment