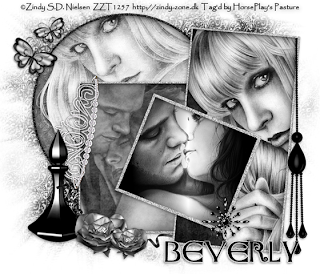
Supplies
3 tubes of choice - I used the beautiful artwork of Zindy S.D. Nielsen which can be purchased from her store here. You must have a license to use.
Font of choice - I used Anglo-Saxon here
Weescotlass Mask 249 here
Scraps of Enchantment Template 125 here
Eyecandy 3.1 - Glow
“Pewter Dreams” is a tagger size scrap kit created by Pixie of KissedByPix and can be purchased from her store TKO Scraps. You can visit her blog here.
Thank you Pixie for another stunning kit!
This tutorial was written assuming you have a working knowledge of PSP.
~♥~ Let’s get started ~♥~
Open up the template.
Shift + D.
Close out the original.
Delete the top 4 layers.
Resize all layers 85%
Image/Canvas Size:
700 x 600
Highlight Raster 1 layer and flood fill white.
Highlight Circle Background layer.
Click on it with your Magic Wand.
New Raster layer.
Copy and paste Paper 4 Into Selection.
Copy and paste your tube as a new layer.
Move into position.
Selections/Invert
Tap the delete key.
Deselect.
Delete the template layer.
Change the Properties to Hard Light.
Highlight Circle Frame layer.
Adjust/Add Remove Noise/Add Noise:
Random and Monochrome checked
Noise: 48%
OK
Highlight Rectangle Background.
Click on it with your Magic Wand.
New Raster layer.
Copy and paste Paper 2 Into Selection.
Copy and paste a different tube as a new layer.
Move into position.
Selections/Invert
Tap the delete key.
Deselect.
Delete the template layer.
Change the Properties to Screen.
Highlight Large Rectangle Background layer.
Click on it with your Magic Wand.
New Raster layer.
Copy and paste Paper 2 Into Selection.
Copy and paste the same tube as you used in the circle as a new layer.
Move into position.
Selections/Invert
Tap the delete key.
Deselect.
Delete the template layer.
Change the Properties to Hard Light.
Color Pallet:
Foreground: Black
Background: White
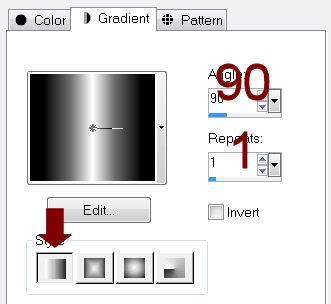
Set your Gradient settings to match mine:

Highlight Square Background.
Click on it with your Magic Wand.
New Raster layer.
Flood fill with the gradient.
Copy and paste a different tube as a new layer.
Move into position.
Selections/Invert
Tap the delete key.
Deselect.
Delete the template layer.
Change the Properties to Hard Light.
Highlight Square Frame.
Apply the same noise effect.
Add your embellishments. I used:
Butterfly 1: Resize 25% and 70%/Duplicate/Mirror/Resize 70%
Dangle 2
Pearl Flake 2; Resize 25%
Perfume 4: Resize 60%
Tiara: Resize 40%/Free rotate Left 80%/Adjust/Sharpness/Sharpen
Flower 1: Resize 30%/Duplicate/Mirror/Resize 70%
Curly 2: Resize 40%/Flip
Highlight your white canvas.
New Raster layer.
Select All.
Copy and paste Paper 6 Into Selection.
Deselect.
Apply the mask.
Resize 120%
Merge Group.
Add your copyrights.
Add your name.
Apply Eyecandy 3.1 - Glow:
Width: 3
Opacity: 100
Opacity Drop off: Fat
Color: white
OK
Resize all layers 80%.
I hope you enjoyed this tutorial.
I’d love to see your results and show it off in my gallery.
Email me!
Hugs,
Bev

No comments:
Post a Comment