

Supplies
3 tubes of your choice - I used the wonderful artwork of PinUpToons at CILM
Font of Choice - I used Enter Sansman here
Becky Mask 22 here
Filters Unlimited 2.0 - Optional
DSB Flux - Bright Noise - Optional
“Colors of Fall” is a PTU tagger size scrap kit created by Jen of Sleek n Sassy Designz and can be purchased from her store Scrappin‘ Dollars. You can visit her blog here.
Thank you Jen for such a festive kit to jump start the autumn season!
This tutorial was written assuming you have a working knowledge of PSP.
~♥~ Let’s get started ~♥~
Open up a 700 X 700 blank canvas.
Flood fill white.
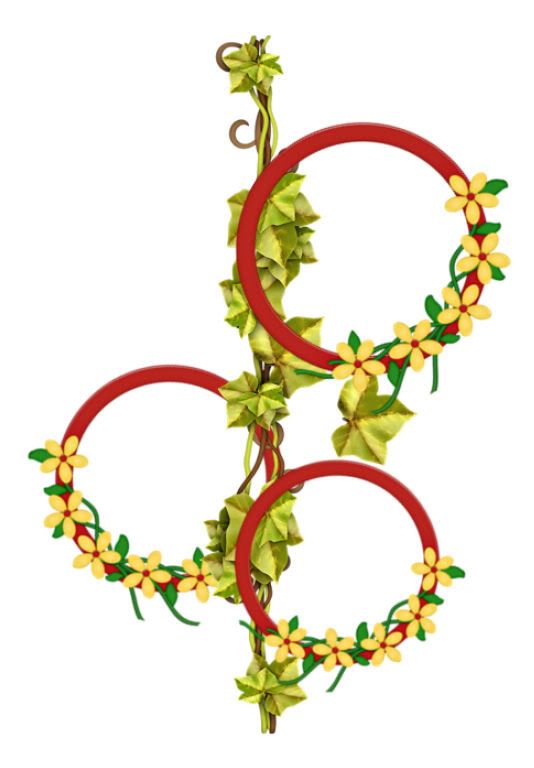
Copy and paste Ivy 2 as a new layer.
Resize 80%
Move into position at the left side of your canvas - see my tag for reference.
Copy and paste Frame 1 as a new layer.
Resize 45%/Rename Frame 1
Duplicate
Resize 90%/Mirror/Rename Frame 2
Duplicate
Resize 90%/Mirror/Rename Frame 3
Highlight Frame 1 - Free rotate right 30 degrees
Highlight Frame 2 - Free rotate left 45 degrees
Highlight Frame 3 - Free rotate right 60 degrees
Very Important - you must move your Ivy and frames into the exact position where you want them now because later on we’re going to be duplicating the Ivy and erasing areas to give the effect the frames are hung from the vine - and that can’t be done if the frames, papers, and tubes are merged. So before you go any further in this tutorial be sure the vine and frames are exactly where you want them.
Highlight Frame 1.
Use your Freehand Selection Tool and outline the frame.
New Raster layer below the frame.
Copy and paste a gradient of your choice Into Selection.
Copy and paste a tube below the frame.
Selections/Invert
Tap the delete key.
Deselect.
Repeat the above step with Frame 2 and Frame 3 - using a different tube in each frame.
Highlight your vine layer.
Duplicate
Move the duplicated layer to the top of your layers pallet.
Using your Freehand Selection Tool section out the area of the vine you don’t want.
Tap the delete key.
Deselect.
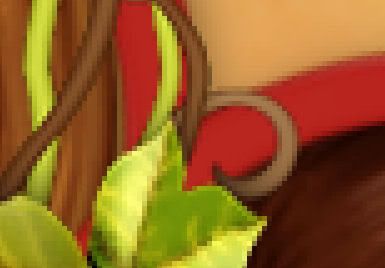
I’m a stickler for detail and I’ve zoomed in on the very smallest of the frames and saw the tiny spec of the hook that I didn’t want on the tag so I used my Eraser Tool to erase it.
Add your embellishments. I used:
Leaves 1, 2, 3, 4, and 5: Resize 25% and 60%/duplicate, free rotate, flip ones that you want. You can also lower the Opacity on some as well.
Fall Tag: Resize 40%
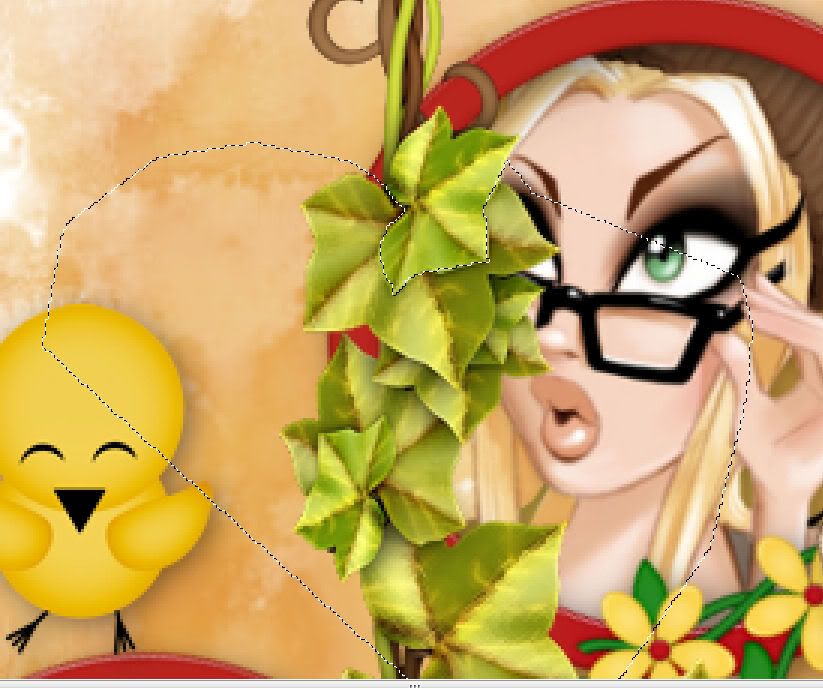
Owl 1: Resize 20% and 70%
Snail 1 & 2: Resize 25%
Dragonfly: Resize 40%/Free rotate left 25 degrees
Highlight your white canvas.
New Raster layer.
Select All
Copy and paste Paper 8 Into Selection.
Deselect.
Adjust/Blur/Gaussian Blur:
Radius: 10
OK
Copy and Paste Sun as a new layer above the paper.
Resize 50% - Move into position.
Merge Down.
Apply the mask.
Merge Group.
For an added touch I applied Filter’s Unlimited 2.0:
Paper Textures
Canvas, Fine
Default settings
Add your credits.
Add your name.
Give it a slight Inner Bevel:
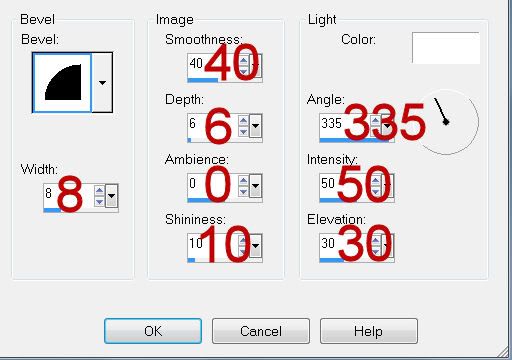
Add your name again in a different color.
Give it the same inner bevel and offset it slightly from the other.
To the name that’s at the top in your layers pallet Apply DSB Flux - Bright Noise:
Intensity: 17
Mix checked.
OK
Resize all layers 85%.
I hope you enjoyed this tutorial.
I’d love to see your results and show it off in my gallery.
Email me!
Hugs,
Bev
No comments:
Post a Comment