Supplies
2 tubes of choice - I’m using the artwork of Michael Calandra which you can purchase at MPT
Font of Choice - I used Borracho & Loko
Becky Mask 9 here
Greg’s Factory Output Vol. II - Pool Shadow
Eyecandy 5: Nature - Fire
Animation Shop
“Trick or Treat” is a PTU tagger size scrap kit created by Julie of Bits n Bobs and can be purchased at Exquisite Scraps. You can visit her blog here.
Thank you Julie for such a fun kit to kick off the upcoming holiday season!
This tutorial was written assuming you have working knowledge of PSP.
~♥~ Let’s get started ~♥~
Open up a 700 x 700 blank canvas.
Flood fill white.
In your color pallet:
Foreground: Null
Background: Set to pattern/Paper 10
Angle: 0
Scale: 25
Make your Rectangle Tool active and draw out a rectangle 200 X 250.
Convert to Raster lawyer.
Click anywhere outside of the rectangle with your Magic Wand.
Selections/Invert
Selections/Modify/Contract by 12.
Tap the delete key.
Deselect.
Free rotate left 10 degrees.
Duplicate/Mirror
Move the “frames” into postion -
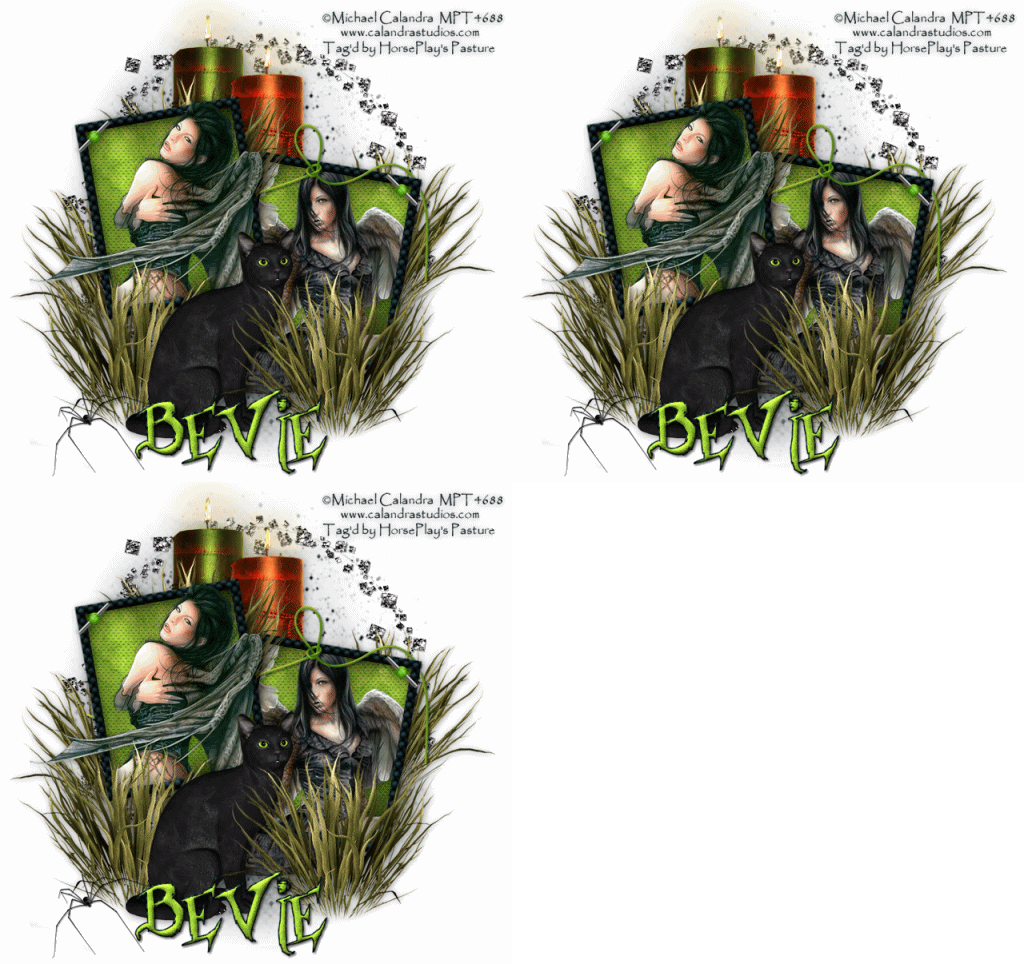
See my tag for reference.
Highlight the left frame.
Click inside of it with your Magic Wand.
Selections/Modify/Expand by 3.
New Raster layer below the frame.
Copy and paste Paper 6 Into Selection.
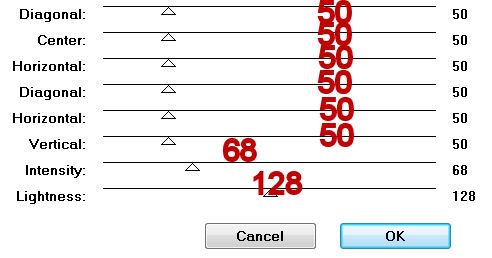
Apply Greg’s Factory Output Vol. II - Pool Shadow:

Copy and paste your tube as a new layer below the frame.
Selections/Invert
Tap the delete key.
Deselect.
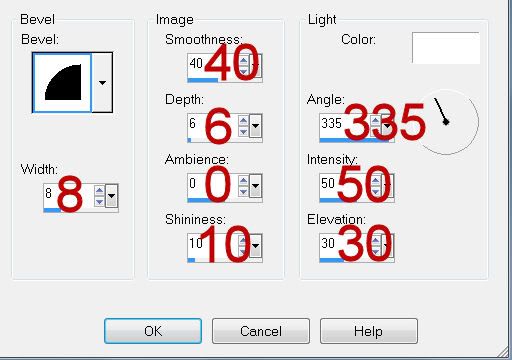
Give the frame a slight inner bevel:

Merge Visible the frame, tube, and paper.
Highlight the bottom frame.
Repeat the above steps using a different tube.
Copy and paste Elements 14 & 15 as a new layers.
Resize each 50%
Move into position - see my tag as reference.
Give each a drop shadow but be sure “Shadow on new Layer” is checked.
Use your eraser tool and erase the shadow that’s where the flame is.
Merge each candle down with it’s own shadow layer.
Now Merge Visible the two candle layers.
Using your Freehand Selection Tool outline the flame of each candle.
Create 3 Raster layers above the candle.
Rename them Flame 1, 2, and 3.
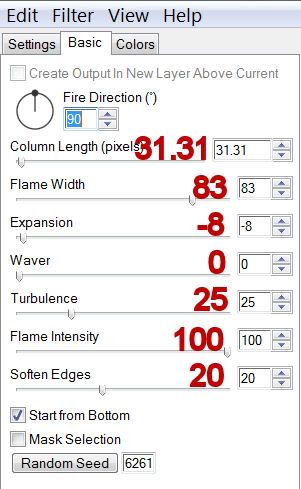
Highlight Flame 1 and apply Eyecandy 5: Nature - Fire
On the Settings Tab:
Small, candle
On the Basics Tab:

Highlight Flame 2 layer.
Apply the flame effect again accept hit the random seed button once.
Highlight Flame 3 layer.
Repeat the above step.
Close out Flame 2 and Flame 3 layers.
Add your embellishments. I used:
Element 65: Resize 65%
Element 24
Element 70: Resize 50%
Element 48: Resize 80% Free rotate left 45 degrees/Duplicate/Mirror
Element 60: Resize 60%
Element 72: Resize 25%/Mirror
Highlight your white canvas.
New Raster Layer
Select All
Copy and paste a paper of choice Into Selection.
Deselect.
Apply the mask.
Merge Group.
Add your copyrights.
Add your name.
Give it the same slight inner bevel.
Apply a touch of Noise.
Resize all layers 80%.
Copy Merge.
~Time to Animate~
Edit/Paste/As New Animation
Back in PSP.
Close out Flame 1.
Open up Flame 2.
Copy Merge
Carry into AS
Edit/Paste/After Current Frame
Back in PSP
Close out Flame 2.
Open up Flame 3.
Copy Merge
Carry into AS
Edit/Paste/After Current Frame.
Ctrl + A to highlight all the frames.
Animation/Frame Properties
Change the number to 21
OK
Animation/Resize Animation
Percentage of Original checked
Width X Height: 80
OK
View your animation.
If you’re happy then save.
I’d love to see your results.
Email me!
Hugs,
Bev

No comments:
Post a Comment