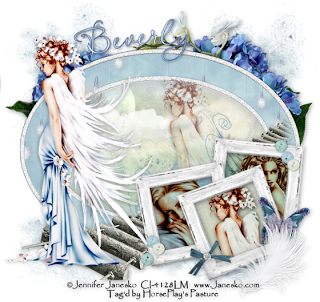
Clicking on the image will allow you to enlarge for bigger view.
Supplies
4 tubes of your choice - I used the artwork of Jennifer Janesko at CILM
Font of Choice - I used LavishlyYoursROB
Gem’s Mask 161 here
“Secret Escape” is a PTU tagger size scrap kit created by Krissy’s Scraps and can be purchased at at her store Exquisite Scraps. You can visit her blog here.
Thank you Krissy for a truly beautiful scrap kit.
This tutorial was written assuming you have a working knowledge of PSP.
~♥~ Let’s get started ~♥~
Open up a blank 700 x 700 canvas.
Flood fill white.
In your color pallet:
Foreground: Null
Background: #efefef
Make your Ellipse Tool active set on Oval.
Make an oval approximately 625 X 450 pixels.
Convert to Raster layer.
Adjust/Add Remove Noise/Add Noise
Gaussian & Monochrome checked
Noise: 33%
OK
Click on it with your Magic Wand.
Selections/Modify/Contract by 10
New Raster layer.
Open up Button 2.
Shift + D.
Close out the Original.
Make your Clone Tool active.
Right click on any area of the button (so long as you don’t go over the edge of the button or over the holes in the button)
Hold down the left mouse button and cover the center holes.
Make your Selection Tool active and section out the center of the button.
In your layers pallet, set your foreground to Patten and search for the section of the button.
Make your working canvas active.
Flood fill with the pattern.
Copy and paste Magical Lights 1 as a new layer.
Resize 70% - move into position - see my tag for reference.
Selections/Invert
Tap the delete key.
Selections/Invert
Selections/Modify/Contract by 50
New Raster layer.
Flood fill with #efefef
Apply the same noise effect
Selections/Modify/Contract by 10
Copy and paste Scene 1 Paper as a new layer.
Resize 65%
Selections/Invert
Tap the delete key.
Copy and paste your tube as a new layer.
Move into position over the paper layer - see my tag for reference.
Tap the delete key.
Deselect.
Change the Properties to Multiply.
Lower the Opacity to about 55.
Copy and paste Wooden Frame 1 as a new layer.
Resize 25%
Duplicate twice for a total of 3 frames.
Free rotate each frame:
Right 5 degrees
Left 10 degrees
Left 20 degrees
Move the frames into position - see my tag for reference.
Highlight one of the frames.
Click inside of it with your Magic Wand.
Selections/Modify/Expand by 6.
New Raster layer below the frame.
Copy and paste a paper of choice Into Selection.
Copy and paste your tube as a new layer below the frame.
Selections/Invert
Tap the delete key.
Deselect.
Change the Properties to Soft Light
Duplicate/Change the Properties to Multiply.
Repeat the above step with the other 2 frames.
Add your embellishments. I used:
Bow 2: Resize 25%/Free rotate left 20 degrees
Buttons 2, 3, & 4: Resize 25% and 50%
Natural Bloom 3: Resize
Sway Bridge 1
Natural Bloom 3
Doodle 2: Resize 60%
Butterfly 2: Resize 35%/Free rotate right 15 degrees
Feather 1: Resize 60%
Crop your image.
Highlight your white background.
Select All.
Copy and paste a paper of choice Into Selection.
Deselect.
Apply the mask.
Merge Group.
Add your credits.
Add your name.
Resize all layers 80%.
I hope you enjoyed this tutorial.
I’d love to see your results and show it off in my gallery.
Email me!
Hugs,
Bev

No comments:
Post a Comment