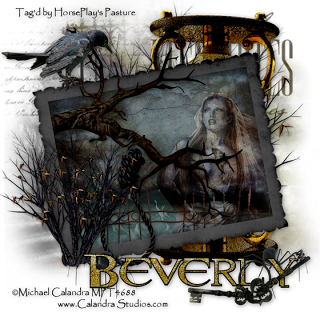
Clicking on the image will allow you to enlarge for bigger view.
Supplies
1 tube of your choice - I used the artwork of Michael Calandra at MPT
Font of Choice - I used Resident Evil here
Vix Mask 394 here
“Crytpic Corner” is a PTU tagger size scrap kit created by Jessica of Gothic Inspirations and can be purchased at Scraps with Attitude. You can visit her blog here.
Thank you Jessica for such a stunning holiday kit!
This tutorial was written assuming you have a working knowledge of PSP.
~♥~ Let’s get started ~♥~
Open up a blank 700 x 700 canvas.
Flood fill white.
Copy and paste Frame 3 as a new layer.
Resize 70%
Free rotate left 100 degrees.
Click inside with your Magic Wand.
Selections/Modify/Expand by 6.
New Raster layer below the frame.
Copy and paste a paper of choice Into Selection.
Deselect for now.
Copy and paste Tree Limb as a new layer above the frame.
Resize 70%
Move into position - see my tag for reference.
Duplicate/Move below the frame.
Highlight the paper layer.
Click anywhere outside of the paper with your Magic Wand.
Highlight the tree limb that just above the paper.
Tap the delete key.
Deselect.
Highlight the Tree limb that’s above the frame.
Use your Eraser Tool and erase any of the limb that overhangs the frame on the left side.
In the next bit of this tutorial see my tag for reference. Don’t worry about anything that you paste over the paper if it overhangs the frame - we’ll take care of that in a short while…
Copy and paste your tube above the paper.
Move into position.
Copy and paste Fence as a new layer above the tube.
Resize 60%
Duplicate/Move it so the ends of the fence match up.
Merge Down.
Copy and paste Smoke as a new layer just above the paper.
Highlight the paper layer.
Click anywhere outside of it with your Magic Wand.
Highlight your tube and each of the element layers and tap the delete key.
Deselect.
Add your embellishments. I used:
Noose: Resize 35%
Bush: Resize 60%
Bush: Place behind the frame.
Time: Resize 75%
Crow: Resize 40%
Keys: Resize 40%
Spider: Resize 40%
Highlight your white background.
Select All.
Copy and paste a paper of choice Into Selection.
Deselect.
Apply the mask.
Resize 120%
Merge Group.
Add your credits.
Add your name.
Resize all layers 80%.
I hope you enjoyed this tutorial.
I’d love to see your results and show it off in my gallery.
Email me!
Hugs,
Bev

No comments:
Post a Comment