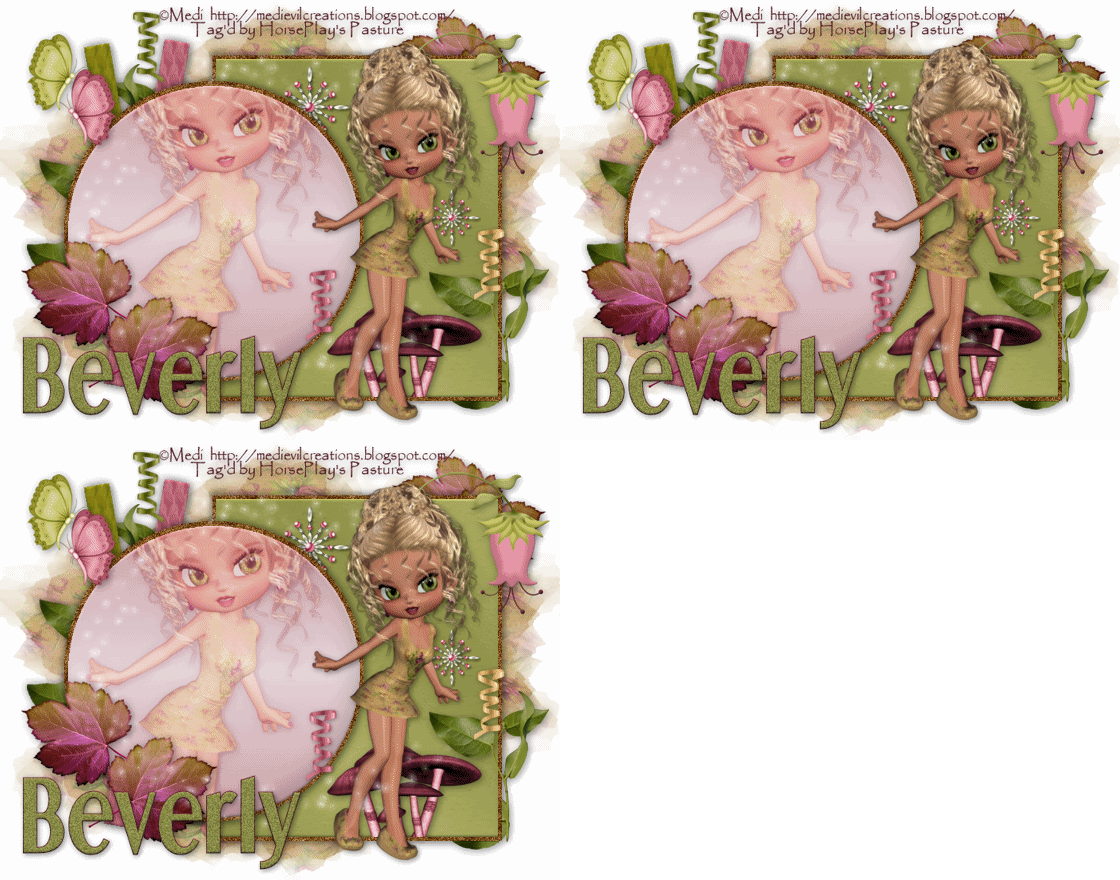
Supplies
Font of Choice - I used Dream Orphans here
Creative by Nature Template 39 here
DSB flux - Bright Noise
Weescotlass Mask 22 here
Filters Unlimited 2.0 - Optional
“Mon Beau Jordan” is a PTU tagger size scrap kit created by Pixie of Kissed By Pix Design and can be purchased at TKO Scraps. You can visit her blog here.
Thank you Pix for such a beautiful kit!
This tutorial was written assuming you have a working knowledge of PSP.
~♥~ Let’s get started ~♥~
Open up the template.
Shift + D.
Close out the original.
Image/Canvas size 700 x 550
OK
Highlight Raster 1 and flood fill white.
Delete the top 3 layers and Raster 6 layer.
Highlight Raster 2 layer.
Click on it with your Magic Wand.
New Raster layer.
Copy and paste Paper 5 Into Selection.
Deselect.
Delete the template layer.
Adjust/Add Remove Noise/Add Noise:
Uniform and Monochrome checked
Noise: 45%
OK
Highlight Raster 3 layer.
Repeat the above step.
Highlight Copy of Vector 1 layer (the large pink rectangle).
Click on it with your Magic Wand.
New Raster layer.
Flood fill with a gradient of choice.
Give it a texture of choice -
I used Filters Unlimited 2.0 - Wallpaper Fine:
Intensity: 20
Lightness: 110
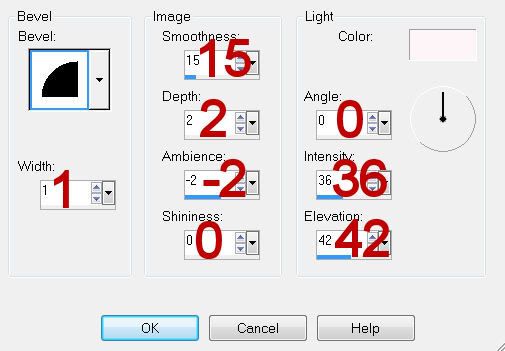
Give it a slight inner bevel:

Highlight Raster 5 layer.
Click on it with your Magic Wand.
New Raster layer.
Copy and paste Paper 7 Into Selection.
Deselect.
Delete the template layer.
Give it the same slight inner bevel.
Highlight Copy of Vector 1 layer (the light gray thin rectangle strip).
Repeat the above step accept use Paper 4.
Highlight Copy of Vector 1 layer (the light pink circle)
Click on it with your Magic Wand.
New Raster layer.
Flood fill with a gradient of choice.
Copy and paste Jardin Custom 3 as a new layer.
Resize 70%
Move into position over the circle - see my tag for reference.
Selections/Invert
Tap the delete key.
Deselect.
Delete the template layer.
Change the Properties to Soft Light.
Duplicate.
Give the Circle layer the same slight inner bevel.
Add your embellishments. I used:
Jardin Custom 3: Resize 70% and 70%
Leaf: Resize 40%
Bright Lights 2
Pearl Flake: Resize 40%/Duplicate/Resize 70%
Leaf Spray: Resize 40%
Teardrop Flower: Resize 50%/Give it a slight inner bevel
Butterflies 2 & 3: Resize 30%
Shrooms 1: Resize 40%
Highlight your white background.
Select All.
Copy and paste a paper of choice Into Selection.
Deselect.
Apply the mask.
Merge Group.
Add your credits.
Add your name.
Duplicate it 2 times for a total of 3.
Rename them Name 1, Name 2, and Name 3.
Highlight Name 1 and apply DSB Flux - Bright Noise:
Intensity: 22
Mixed checked
OK
Highlight Name 2.
Apply DSB Flux - Bright Noise:
Hit the Mix button twice.
OK
Highlight Name 3.
Apply DSB Flux - Bright Noise:
Hit the Mix button 3 times.
OK
Close out Name 2 & Name 3 layers.
Resize all layers 80%.
Copy Merge
~Time to Animate~
Open up Animation Shop.
Edit/Paste/As new Animation
Back in PSP.
Close out Name 1
Open up Name 2
Edit/Copy Merge
Back in AS.
Edit/Paste/After Current Frame
Back in PSP.
Close out Name 2.
Open up Name 3.
Edit/Copy Merge
Back in AS.
Edit/Paste After Current Frame.
View your animation.
If you’re happy then save.
I hope you enjoyed this tutorial.
I’d love to see your results and show it off in my gallery.
Email me!
Hugs,
Bev

No comments:
Post a Comment