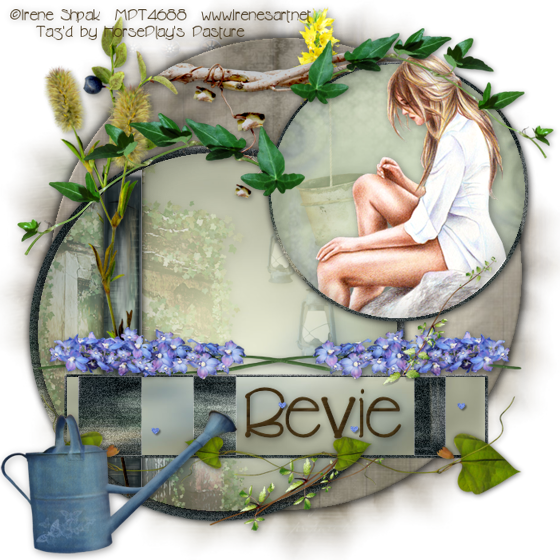
Supplies
1 tube of your choice - I used the beautiful artwork of Irene Shpak at MPT
Font of Choice - I used Cricket here
Weescotlass Mask 138 here
Divine Intentionz Template 298 here
“Good Old Days” is a PTU tagger size scrap kit created by Rieneke of Rieneke Designs and can be purchased at Twilight Scraps. You can visit her blog here.
Thank you Rieneke for such a beautiful kit. It definitely gives a yearning for the good old days.
This tutorial was written assuming you have a working knowledge of PSP.
~♥~ Let’s get started ~♥~
Open up the template.
Shift +D.
Close out the Original.
Delete the following layers:
Credit
Diamonds
Maintenance
So High
Pixel Words
Stars
Image/Canvas Size
700 X 700
Flood fill the background layer white.
Highlight Circle layer.
Click on it with your Magic Wand.
New Raster layer.
Copy and paste Paper 1 Into Selection.
Deselect.
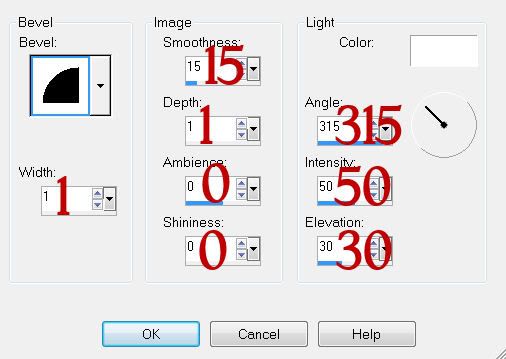
Give it a slight Inner Bevel:

Highlight Glittered Circle 1 layer.
Select All/Float/Defloat
New Raster layer.
Copy and paste Paper 11 Into Selection.
Deselect.
Adjust/Add Remove Noise/Add Noise
Uniform and Monochrome checked
Noise: 25%
OK
Delete the template layer.
Highlight Glittered Circle 2 layer.
Repeat the above step.
Highlight Glittered Rectangle layer.
Repeat the above step.
Highlight Small Rectangle Shapes layer.
Repeat the above step.
Highlight Rectangle layer.
Repeat the above step.
Highlight Thin Rectangle layer.
Click on it with your Magic Wand.
New Raster layer.
Copy and paste Paper 11 Into Selection.
Deselect.
Delete the template layer.
Highlight Circle layer.
Click on it with your Magic Wand.
New Raster layer.
Copy and paste Paper 5 Into Selection.
Deselect.
Delete the template layer.
Copy and paste Element 4 as a new layer.
Mirror/Move it into position over the circle paper.
Copy and paste Element 11 as a new layer.
Mirror/Resize 60%/Move into Position
Highlight the circle paper layer.
Use your Magic Wand and click anywhere outside of it.
Highlight each of the element layers and tap the delete key.
Deselect.
Delete the template layer.
Highlight Small Circle layer.
Click on it with your Magic Wand.
New Raster layer.
Copy and paste Paper 5 Into Selection.
Copy and paste your tube as a new layer.
Move into position over the circle layer.
Copy and paste Element 51 as a new layer.
Resize 60%/Move into position
Change the Properties to Soft Light.
Selections/Invert
Highlight the element and tube layers and tap the delete key on each.
Deselect.
Delete the template layer.
Highlight Hearts layer.
Select All/Float/Defloat
New Raster layer.
Flood fill with a color of choice.
Apply the same noise as used before.
Deselect.
Delete the template layer.
Erase the large heart.
Add your embellishments. I used:
Element 55: Resize 80%
Element 52: Resize 60%/Flip/Mirror/Position over Bottom Circle
Element 52 again: Resize 50%/Flip/Mirror/Position over smallest circle.
Element 20: Duplicate/Mirror
Element 38: Resize 60%
Element 26: Resize 90%
Element 18: Resize 60%/Duplicate/Mirror
Element 8: Resize 80%
Element 27: Resize 70%
Element 39: Resize 60%/Mirror
Highlight your white canvas.
New Raster layer.
Select All
Copy and paste Paper 10 Into Selection.
Deselect.
Apply the mask.
Resize 130%
Merge Group.
Add your credits.
Add your name.
I hope you enjoyed this tutorial.
I’d love to see your results and show it off in my gallery.
Email me!
Hugs,
Bev

No comments:
Post a Comment