

Clicking on the image will show you the full view
Font of choice - I'm using HandScript Lcase
Weescotlass Mask 241 here
"Rion Rocks II" PTU tagger size kit by Created by Jill which can be found at Cotton Candy Kreations.
This kit is gorgeous and the possibilities of creating with it are endless!
This tutorial was written assuming you have working knowledge of PSP.
~♥~ Let’s get started ~♥~
Open up a 700 x 700 blank canvas. Flood fill white.
Copy and paste Box Heart as a new layer. Free Rotate right 25 degrees. Copy and paste Flowers 2 as a new layer. Free rotate right 25 degrees. Position the flowers so they’re within the inner circle. Don’t panic, the long green stems are supposed to be hanging way out there…hehehe.
Merge visible the flower layers. We’re going to feather them. Highlight the heart layer. Use your selection tool to outline the inner heart.
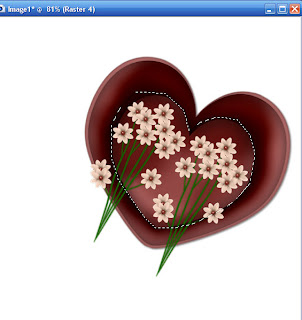
Selections/Modify/Feather. Number of Pixels: 52. Selections/Invert. Tap the delete key until you have the feathered look you want. Merge visible the heart and flowers.
I hope I didn’t lose you! The hardest part of this tut is done!
Copy and paste Frameg as a new layer. Use your magic wand and click inside of each circle. Selections/Modify/Expand by 4. Copy and paste a paper of choice below the frame. Selections/Invert. Hit the delete key. DON’T DESELECT YET.
Selections/Invert again. New Raster layer beneath the frame layer. Effects/3D Effects/Cutout with these settings:
Vertical and Horizontal: 5
Opacity & Blur: 25
Color: Black
OK
Repeat on another new raster layer accept change the horizontal and vertical to -5. Deselect. Merge the cutout layers together.
Use your magic wand and click inside the top hole. Selections/Modify/Expand by 4. Copy and paste a tube as a new layer just above the paper layer. Selections/Invert. Hit the delete key. Deselect. Repeat this until you have a tube in each hole. Once you’ve got that done then merge visible the frame, tubes, and merged cutout layer.
Position your heart and frame where you like on your canvas. Copy and paste your tube as a new layer. If you like, feather it the same as you did the flowers.
Add your elements. I used:
Flower 1: Resize 25% and 90%.
Flower 6: Resize 25% and 70%.
Butterfly 3: Resize 25%
Leaves 2
Sneakers: Resize 40% and 90%
Highlight your white canvas. New Raster Layer. Select All. Copy and paste a paper of choice Into Selection. Deselect. Apply the mask. Merge Group.
Add your copyrights.
Add your name.
I hope you enjoyed this tutorial.
I’d love to see your results.
Email me!
Hugs,
Bev
No comments:
Post a Comment