
 Clicking on the image will enlarge to full view.
Supplies
1 tube of choice - I used the wonderful artwork of Elias Chatzoudis here
Font of choice - I used Ferro Rosso here
Weescotlass Mask 47 here
“Denim Diva” is a PTU tagger size scrap kit created by Kat of Katz Scrapz and can be purchased at Lollipops n Gumdrops. You can visit Kat’s blog here.
Thank you Kat for an amazing kit!
This tutorial was written assuming you have a working knowledge of PSP.
~♥~ Let’s get started ~♥~
Open up a 700 X 700 transparent image.
Flood fill white.
Copy and paste Jean Pocket as a new layer.
Resize 70%
Select All/Float Defloat
Copy and paste a paper of choice as a new layer.
Resize 80%
Selections/Invert
Tap the delete key.
Deselect.
Resize 70%
Select All/Float Defloat
Copy and paste a paper of choice as a new layer.
Resize 80%
Selections/Invert
Tap the delete key.
Deselect.
Copy and paste your tube as a new layer.
Move into the exact position you want it.
(If you want to see any part of your tube overhang the pocket - in my tag I have the top of the head that overhangs - then duplicate your tube)
If you duplicated your tube, close out the duplicate.
Highlight your tube.
Merge down.
Your Paper and tube should now be merged and on one layer.
Highlight the Jean Pocket layer.
Select All/Float/Defloat
Selections/Modify/Feather
Number of Pixels:
53
Ok
Selections/Invert
Tap the delete key until you have a nice feathered look.
Deselect.
Open up the copy of the tube and erase all but the part that overhangs the pocket.
Close out your white background.
Merge visible.
Reopen your white background.
Merge visible.
Reopen your white background.
Copy and paste Blue Lily as a new layer beneath the merged layer.
Move into position up near the top left corner.
Duplicate/Mirror/Flip
Move into position near the bottom right of the pocket.
Add your embellishments. I used:
Blue Brand: Resize 25% and 50%
Blue Lilly: Resize 40%
Blue Flower: Resize 40%
Light Blue Flower: Reisze 25% and 75%
Butterfly 2: Resize 80% Free rotate right 25 degrees
Butterfly 1: Resize 80% Free rotate left 25 degrees.
Highlight your white background.
New Raster layer.
Select All.
Copy and paste a paper of choice Into Selection.
Deselect.
Apply the mask.
Merge Group.
Add your copyrights.
Add your name.
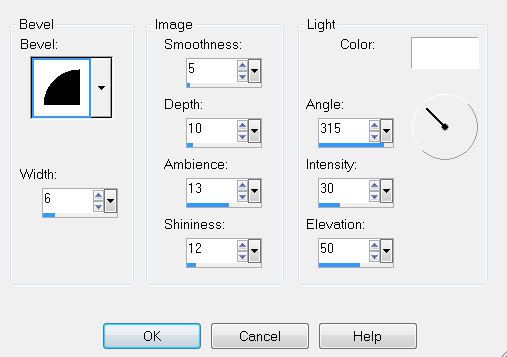
Give it a slight inner bevel:
Resize all layers 85%.
I hope you enjoyed this tutorial.
I’d love to see your results.
Email me!
Hugs,
Bev
No comments:
Post a Comment