Supplies Needed
4 tubes of choice – I'm using the artwork of Karen Middleton
which you can purchase here
4 tubes of choice – I'm using the artwork of Karen Middleton
which you can purchase here
Font of choice - I'm using HandScript here
Weescotlass Mask 259 here
Template #4 – created by Jill here
Filters Unlimited 2 (optional)
"Spring Critters" PTU tagger kit by Creative Intentionz which can be purchased here. You can visit her blog here.
This tutorial was written assuming you have working knowledge of PSP.
~♥~ Let’s get started ~♥~
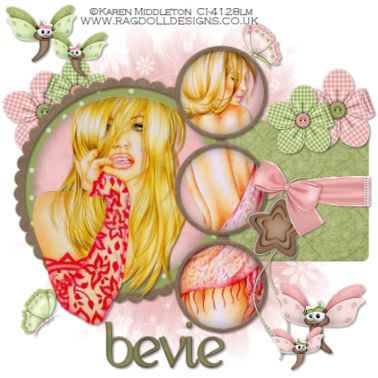
Open up the template. Shift + D. Close out the original. Delete Raster 1 and Wavy Line 1 and Wavy Line 2 layers.
Highlight the Lg Rounded Rectangle layer. Select All/Float/Defloat. Copy and paste a paper of choice as a new layer. Selections/Invert. Hit the delete key. Deselect. Delete the template layer.
Repeat the above step with all the layers. Copy and paste as new layers your tubes into each circular frame.
****This next step is optional****
Once you’ve done that, highlight the Lg Rounded Rectangle layer. Apply Filters Unlimited 2/Paper Texture/Japanese – default settings. If you don’t have this Plug-in and you want to add a texture effect then go to Effects/Text Effects and toy around with all the different textures there.
Add embellishments of your choice. I used:
Flower 8 – Resize 70%. Flower 5 – Resize 60%.
Star 3 – resize 60%. Wrap 3 – resize 40%
Butterfly & Butterfly 1 – resize 25%.
Dragonfly – resize 40%. Duplicate/mirror – resize 80%.
Highlight your white canvas. New Raster Layer. Select All. Copy and paste Into Selection a paper of choice. Deselect. Apply the mask. Merge Group.
Add your copyrights.
Add your name.
I used a dark paper set on pattern for the stroke and a light colored paper set on pattern for the fill.
I hope you enjoyed this tutorial.
I’d love to see your results and put it into my gallery.
Email me!
Hugs,
Bev


No comments:
Post a Comment