Supplies
1 tube of choice – I used the fantastic artwork of Renee Biertempfel which
can be purchased from CDO. You must have a license to
use.
Font of choice – I used Recorda
Script here
Weescotlass Mask 208 here
Tywzted T’s Playroom Hearts on Ice Blog Train here
Can be found under February 5, 2013 –
Use Hearts on Ice Template 2 for this tutorial.
“Serenity” is a tagger size
scrap kit created by Karen of Sweet Occasion Designs and can be purchased from Lollipopsn Gumdrops. You can visit her blog here. Thank you Karen for such a beautiful kit.
~♥~ Let’s get started ~♥~
Open up the template.
Shift + D.
Close out the original.
Resize all layers 85%
Image/Canvas size:
700 x 500
OK
Open up Raster 1 layer.
Flood fill white.
Delete the credit layer.
Copy and paste Frame 1 as a new layer at the top of your layers pallet.
Resize 65%
Free rotate Right 90 degrees
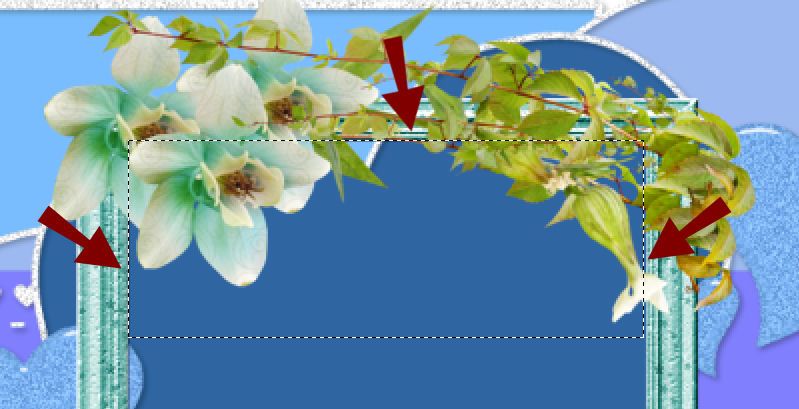
Make your Selection Tool active and section out the inside area of the
frame where the foliage and leaves are:

Tap the delete key.
Deselect.
In your layers pallet, move the frame so that it’s just above Raster 13
and position it over the template layer.
Click inside the frame with your Magic Wand.
Selections/Modify/Expand by 4.
New Raster layer below the frame.
Copy and paste Paper 10 Into Selection.
Highlight the frame layer.
Merge Down.
The frame and paper should now be on the same layer together.
Duplicate/Mirror/Flip
Position the duplicated merged layer over Raster 9 layer.
Erase any of the leaves that are sticking out from below the heart and
the little bit that is peeking out at the top of the frame.
Delete the following template layers:
Raster 3, Raster 9 Shadow 1, Raster 9, Raster 4, Raster 13 Shadow 1,
and Raster 13.
Highlight Raster 5 layer.
Click on both circles with your Magic Wand.
New Raster layer.
Copy and paste Paper 1 Into Selection.
Delete the template layer.
Highlight Raster 10 layer.
Select All/Float/Defloat.
New Raster layer.
Copy and paste Paper 8 Into Selection.
Adjust/Add Remove Noise/Add Noise:
Uniform and Monochrome checked
Noise: 55%
OK
Deselect.
Delete the template layer.
Repeat the above step with Raster 12, Raster 11, and Raster 14.
Highlight Raster 6 layer.
Click on it with your Magic Wand.
Copy and paste Paper 2 Into Selection.
Deselect.
Delete the template layer.
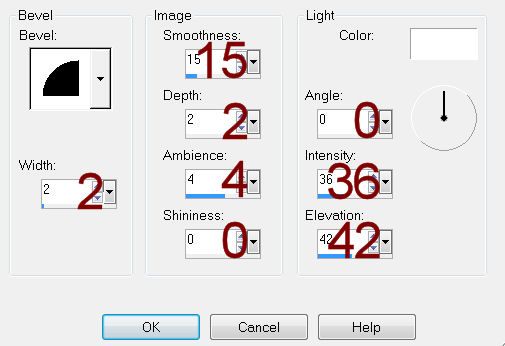
Give it a slight Inner Bevel:

Highlight Raster 2 layer.
Click on it with your Magic Wand.
New Raster layer.
Copy and paste Paper 6 Into Selection.
Copy and paste your tube as a new layer.
Duplicate/Move above Raster 8 in your layers pallet.
Highlight the original tube layer.
Selections/Invert
Tap the delete key.
Deselect.
Highlight the duplicated tube layer and erase any part of it you don’t
want.
Delete the template layer.
Highlight Raster 8 layer.
Make your Target Tool active and change the color of the hearts to #7fb3a7.
Copy and paste “outlawbydesignft63” as a new layer.
Resize 70%
Move into position behind the heart that your tube is in – see my tag
for reference.
Duplicate the element layer and move above the tube layer.
Use your Eraser Tool and erase all area of the element accept near the
bottom – carefully eraser near the rocks to make it appear as if the heart is
sitting in the pont.
Add your elements. I used:
Bow 2: Resize 15% and
70%/Duplicate/Mirror
Outlawbydesignft326: Resize
35%/Duplicate
Butterfly 1: Resize 15%/Free
rotate Right 25 degrees/Duplicate/Mirror/Resize 70%
Highlight your white background.
New Raster layer.
Select All.
Copy and paste Paper 7 Into Selection.
Deselect.
Apply the mask.
Resize 120%
Merge Group.
Add your credits.
Add your name:
Color Pallet:
Foreground: #423f1b
Background: #101307
Stroke 1.5
Type your name.
Convert to Raster layer.
Effects/Edge Effect/Enhance
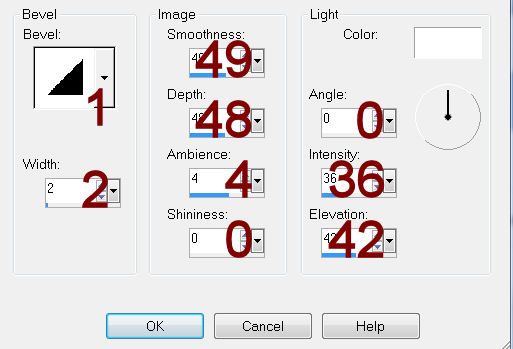
Give it a slight Inner Bevel:

Resize all layers 80%.


No comments:
Post a Comment