Supplies
Font of choice - I used LD Gregarious – a pay font.
Weescotlass Mask 208 here
Snow which I supply here. The snow is to be used only for this
tutorial. If you would like to use it
for anything else please ask.
Plug Ins:
Mura’s Meister - Cloud
Eyecandy 5 - Nature: Snowdrift
Animation Shop
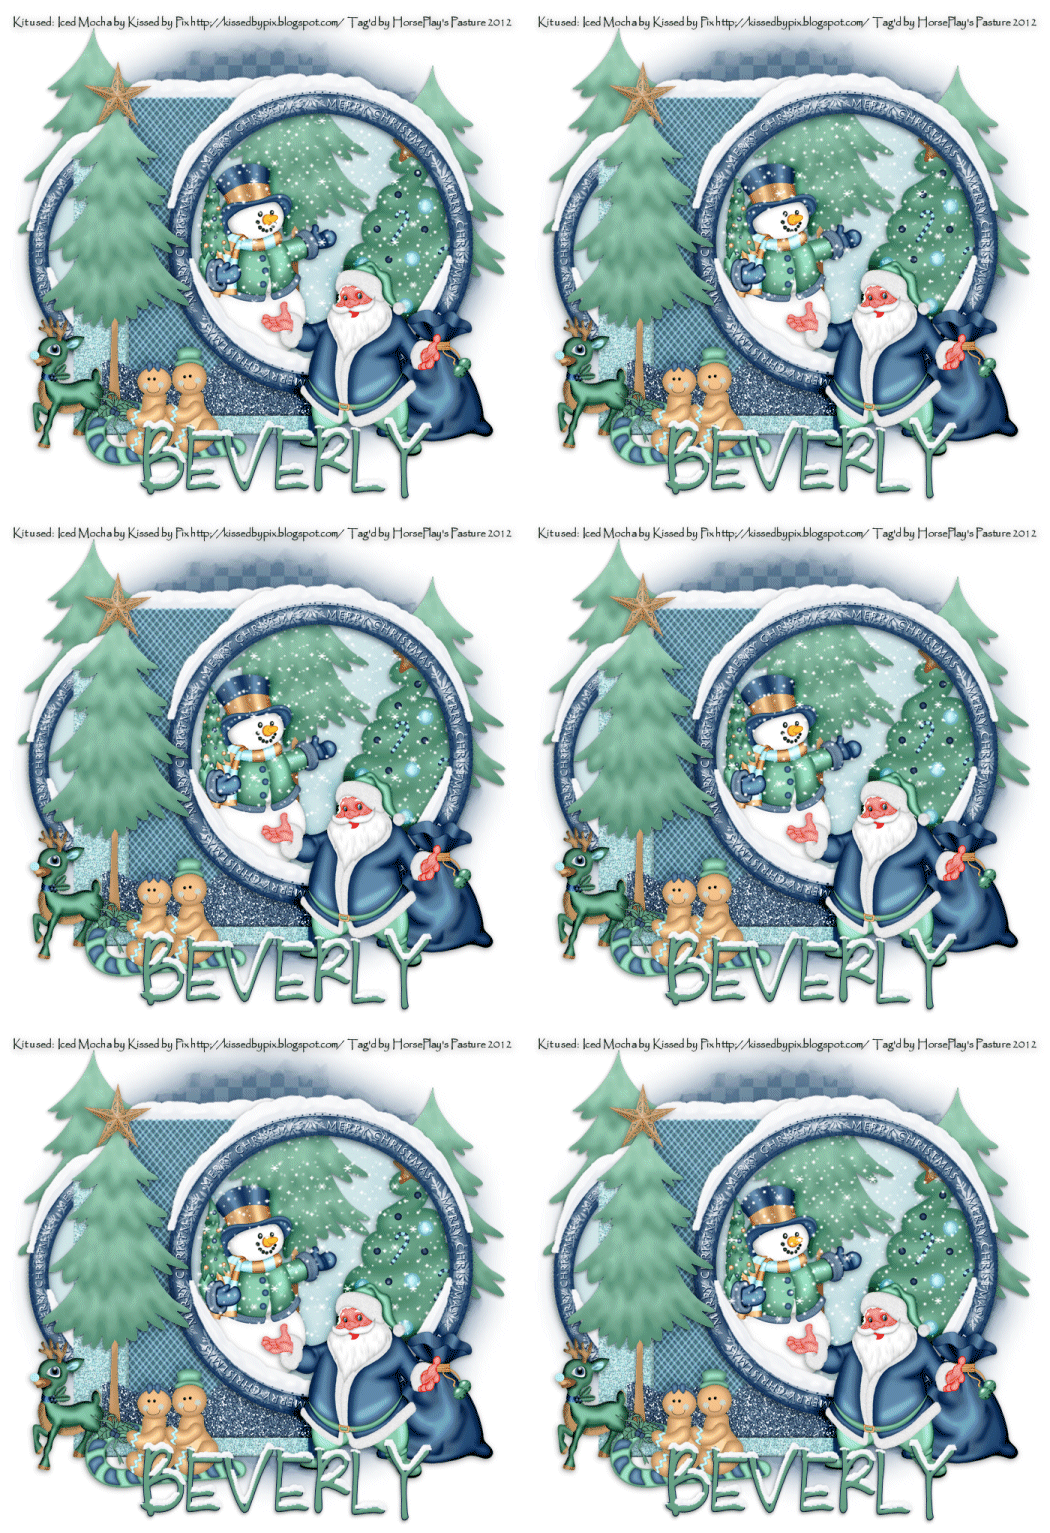
“Iced Mocha” is a tagger size scrap kit created by Pixie of Kissed by
Pix which can be purchased from her store TKO Scraps. You can visit her blog here.
Thank you Pix for a really fantastic holiday kit.
This tutorial was written assuming you have a working knowledge of PSP.
~♥~ Let’s get started ~♥~
Open up a 700 x 700 blank canvas.
Flood fill white.
Copy and paste Frame 3 as a new layer.
Duplicate/Resize 85%
We’ll come back to these frames in a little bit.
New Raster layer.
Make your Selection Tool active set on Rectangle.
Make a rectangle approximately 310 x 360 pixels.
Copy and paste Paper 8a Into Selection.
New Raster layer.
Copy and paste Paper 5 Into Selection.
Deselect.
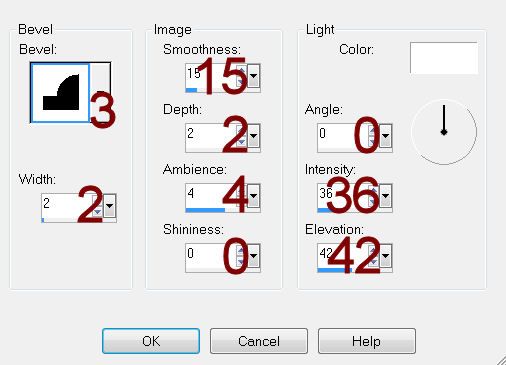
Give each paper layer a slight Inner Bevel:

Move both frames and both paper layers into position – see my tag for
reference.
Highlight the smaller frame.
Click inside of it with your Magic Wand.
New Raster layer below the frame.
Selections/Modify/Expand by 4.
Copy and paste Paper 4A Into Selection.
Deselect.
Use your Target Tool and change the color of the paper to #9fcbd1.
Highlight the frame layer.
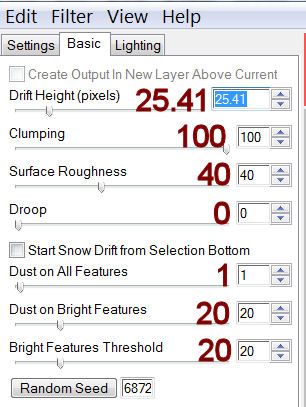
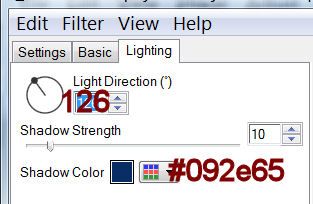
Apply Eyecandy 5 – Nature: Snow Drift –
Settings Tab:
Large, First Flakes
Basic Tab:

Lighting Tab:

Highlight the larger frame:
Repeat the above step
Add the following elements below the larger frame – don’t worry about
what overhangs the frame. We’ll clean
that up in a bit:
Snowman: Resize 60%/Mirror
Tree 3: Resize 70%
Tree 2
Highlight the paper layer that’s below all the elements.
Click anywhere outside of it with your Magic Wand.
Highlight each element that overhangs the frame and tap the delete key.
Deselect.
Apply the snow effect to the front rectangle paper - see my tag for reference.
Apply the snow effect to the front rectangle paper - see my tag for reference.
Add the rest of the elements to your tag. I used:
Tree 2: Duplicate 2x’s
Santa 2: Resize 70%
Ginger Sled: Resize 50%
Deer: Resize 40%
Star 2: Resize 20%
Glitter Edge 1: Free rotate Left
90 degrees/Give it the same slight Inner Bevel
Highlight your white canvas.
New Raster layer.
Select All.
Copy and paste Paper 1a Into Selection.
Deselect.
Apply the mask.
Merge Group.
Crop your image just a little.
Add your copyrights.
Add your name.
Color Pallet:
Foreground: #0a1f48
Background: #68a287
Stroke: 1
Type your name.
Give it the same slight Inner Bevel.
Apply Eyecandy 5: Nature - Snowdrift.
Use the same settings accept on the Basic Tab, lower the Drift Height
to 7.09.
Open up the snow that I provided.
Open up all layers.
Highlight Frame 1 layer.
Copy.
Highlight your working canvas.
Highlight the layer just below the frame.
Paste - your snow layer should appear.
Rename it S1 (short for Snow 1)
Don’t worry about what overhangs the frame. We’ll clean that up in a bit.
Highlight the animated snow layers.
Highlight Frame 2.
Copy
Highlight your working canvas.
Paste
Rename S2.
Continue to copy and paste all 10 snow layers onto your working canvas.
Once you have all snow layers copied and renamed on your working canvas
highlight the paper layer (that belongs to this frame).
Click anywhere outside of it with your Magic Wand.
Highlight each snow layer and tap the delete key.
Deselect.
Keep S1 layer open and close out all other snow layers.
Copy Merge.
Time to Animate:
Open up Animation Shop
Edit/Paste/As New Animation
Back in PSP.
Close out S1.
Open up S2.
Copy Merge
Back in AS.
Edit/Paste/After Current Frame.
Back in PSP.
Close out S2.
Open up S3.
Copy Merge
Back in AS.
Edit/Paste/After Current Frame.
Back in PSP.
Close out S3.
Open up S4.
Copy Merge
Back in AS.
Edit/Paste/After Current Frame.
Back in PSP.
Close out S4.
Open up S5.
Copy Merge
Back in AS.
Edit/Paste/After Current Frame.
Back in PSP.
Close out S5.
Open up S6.
Copy Merge
Back in AS.
Edit/Paste/After Current Frame.
Back in PSP.
Close out S6.
Open up S7.
Copy Merge
Back in AS.
Edit/Paste/After Current Frame.
Back in PSP.
Close out S7.
Open up S8.
Copy Merge
Back in AS.
Edit/Paste/After Current Frame.
Back in PSP.
Close out S8.
Open up S9.
Copy Merge
Back in AS.
Edit/Paste/After Current Frame.
Back in PSP.
Close out S9.
Open up S10.
Copy Merge
Back in AS.
Edit/Paste/After Current Frame.
Animation/Resize Animation:
Percentage of Original checked
Width x Height: 7
OK
View your animation.
If you’re happy with it then save.
Resize all layers 80%.
I hope you enjoyed this tutorial.
I’d love to see your results.
Email me!
Hugs,
Bev
I’d love to see your results.
Email me!
Hugs,
Bev

No comments:
Post a Comment