Supplies
1 tube of choice and 1 Image – I
used the wonderful artwork of Lori Karels which can be purchased from UpYour Art. You must have a license to use.
Font of choice - I used Buffied here
Alika’s “Water Runs Red” Template here
Plug Ins used:
Brush Strokes – Cross Hatch
Greg’s Factory Output Vol. II – Pool Shadow
Supplies which I created for this tutorial here.
These elements and papers are to be used for this tutorial only.
This tutorial was written assuming you have a working knowledge of PSP.
~♥~ Let’s get started ~♥~
Open up the template
Shift + D.
Close out the original.
Delete the top 9 layers.
New Raster layer.
Send to bottom.
Flood fill white.
Color Pallet:
Foreground: #a087aa
Highlight Rect 4 Frame layer.
Make your Target Tool active and change the color to #a087aa
Repeat the above step with:
Circle Frame, Rect 2 Frame, Rect 3 Frame, Rect Frame.
Highlight Rect 4 layer.
Click on it with your Magic Wand.
New Raster layer.
Copy and paste Paper 1 Into Selection.
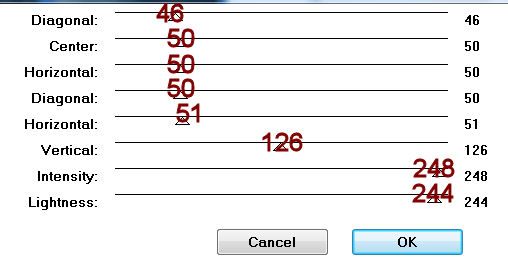
Apply Greg’s Factory Output Vol. II – Pool Shadow:

Copy and paste your tube as a new layer.
Position over the paper layer.
Selections/Invert
Tap the delete key.
Change the Properties to Soft Light.
Deselect.
Delete the template layer.
Highlight Circle layer.
Click on it with your Magic Wand.
New Raster layer.
Copy and paste Paper2 Into Selection.
Copy and paste your tube as a new layer above the paper.
Change the Properties to Burn.
Selections/Invert
Tap the delete key.
Deselect.
Delete the template layer.
Highlight Rect 2 layer.
Click on it with your Magic Wand.
New Raster layer.
Copy and paste your Image Into Selection.
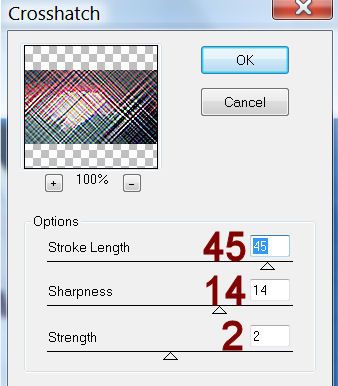
Apply Brush Strokes – Cross Hatch:

Deselect.
Delete the template layer.
Repeat the above step with Rect 3 layer.
Highlight Rect layer.
Click on it with your Magic Wand.
New Raster layer.
Copy and paste Paper 3 Into Selection.
Deselect.
Delete the template layer.
Copy and paste your tube as a new layer.
Add the elements I supplied:
Flower 1: Duplicate
Flower 2: Duplicate 2x’s
Spider Web: Duplicate/Duplicate/Resize 70%
Leaves: Duplicate 2x’s
Highlight your white background.
New Raster layer.
Select All.
Copy and paste Paper 4 Into Selection.
Deselect.
Apply the Mask.
Resize 80%
Merge Group.
Move toward the upper left of your canvas.
Duplicate
Move toward the lower right of your canvas.
Add your credits.
Add your name.
Color Pallet:
Foreground: #a087aa
Background: #000000
Stroke: 1.00
Type your name.
Resize all layers 80%.


No comments:
Post a Comment