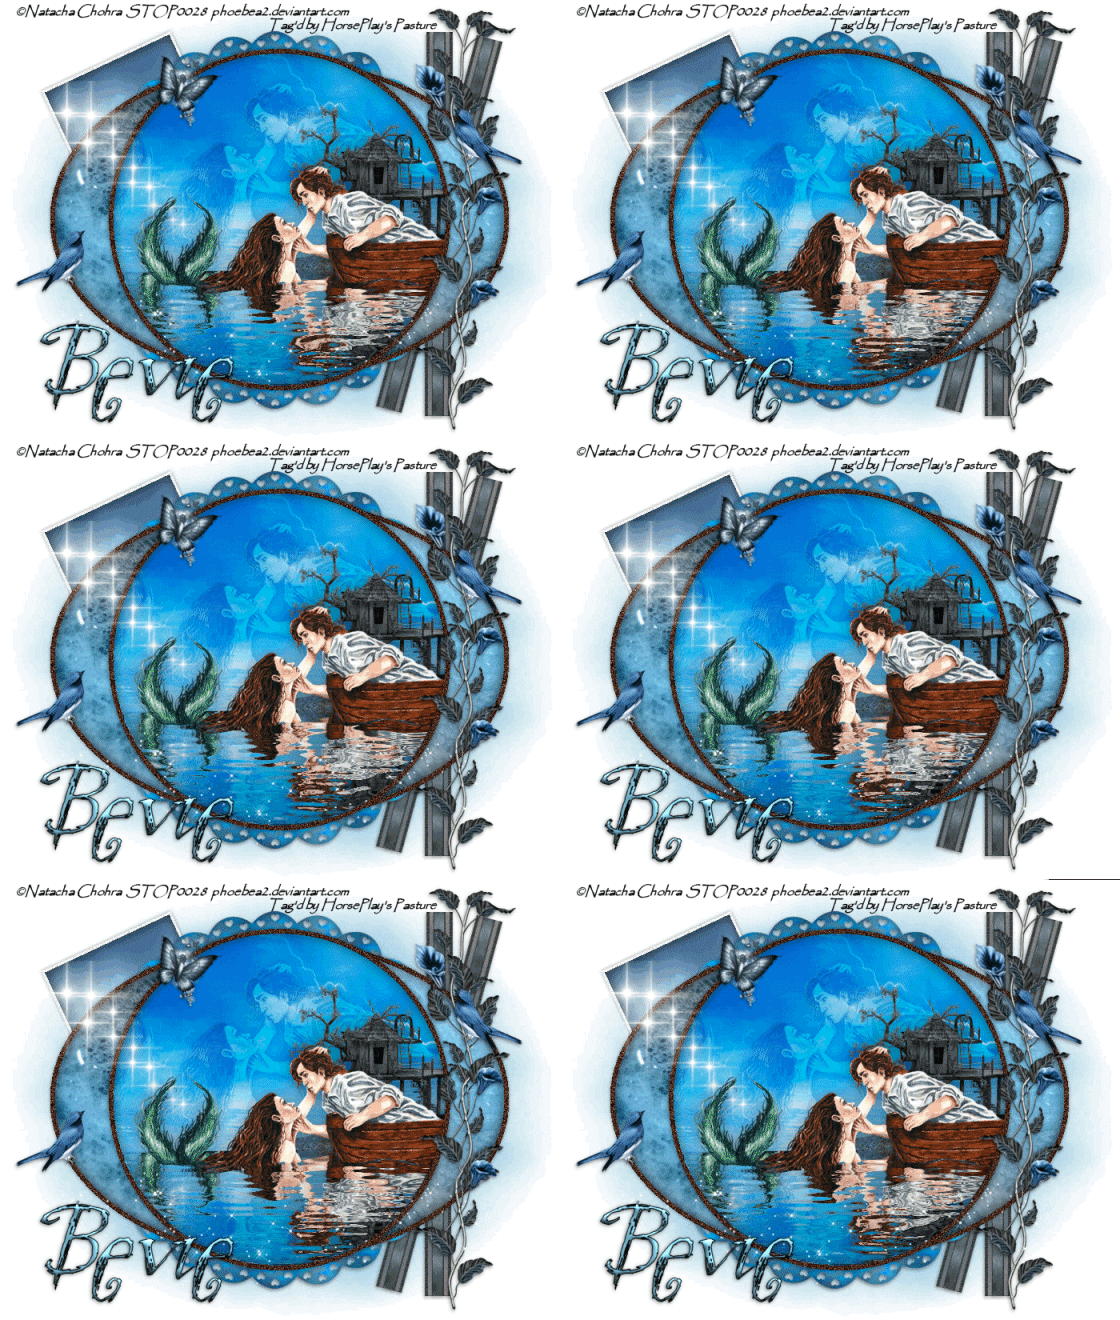
Supplies
1 tube of choice and 1 image – I used the beautiful artwork of Natacha
Chohra which can be purchased from PSP Tube Stop. You must have a license to use.
Font of choice - I used Majestick here
Monti Circular mask here
Toxic Desirez template 134 here
Animation Shop
Sqirlz Water Reflections
“Stargazing” is tagger size scrap kit created by Nette of Nette’s
NightOwl Works and can be purchased from Butterfly Blush Designs. You can visit her blog here.
Thank you Nette for a really beautiful kit.
This tutorial was written assuming you have a working knowledge of PSP.
~♥~ Let’s get started ~♥~
Open up the template.
Shift + D.
Close out the original.
Image/Canvas Size:
700 x 550
OK
Delete the top 8 layers and Pixel Words layer.
From the Elements 2 folder:
Copy and paste SG Ribbon as a new layer.
Resize 40%
Free rotate Left 75 degrees
Move into position over Thin Black Rectangle template layer. It won’t be long enough to cover the whole
template so duplicate the element and move to cover the lower area of the
template.
Delete the template layer.
Paste the ribbon again.
Resize 40%
Free rotate Left 90 degrees
Repeat the above step accept this time position over Thin Pink
Rectangle template layer.
Highlight Pink Rectangle layer.
Click on it with your Magic Wand.
New Raster layer.
Copy and paste Paper 8 Into Selection.
Deselect
Delete the template layer.
Highlight Glitter Oval layer.
Click anywhere outside of it with your Magic Wand.
New Raster layer.
Flood fill with #482817
Adjust/Add Remove Noise/Add Noise:
Gaussian and Monochrome checked
Noise: 40%
OK
Deselect.
Delete the template layer.
Highlight Glitter Circle layer.
Repeat the above step.
Highlight Oval layer.
Click anywhere outside of it with your Magic Wand.
New Raster layer.
Copy and paste Paper 5 Into Selection.
Deselect.
Delete the template layer.
Highlight Green Circle layer.
Click anywhere outside of it with your Magic Wand.
Copy and paste Paper 8 as a new layer.
Resize 75%
Move into position so just the sky area of the paper is within the
circle.
Tap the delete key.
Deselect for now.
We’re going to add the elements and tube within the circle – see my tag
for reference of placement. Don’t worry
about what overhangs the circle. We’ll
clean that up in a bit.
Make your tube image active.
Using your Freehand Selection tool outline the water area:
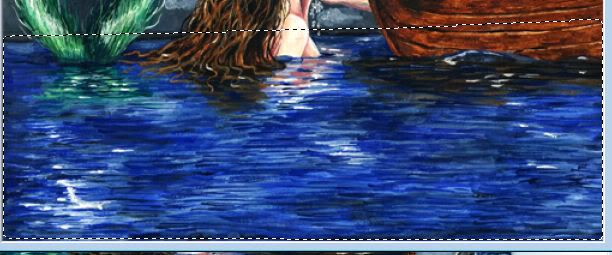
Edit/Copy
Make your working canvas active.
Paste as a new layer and position over the bottom of the.
Copy and paste your tube as a new layer over the water.
From the Elements Folder, copy and paste SG Clouds as a new layer just
over the circle paper layer.
Move it up slightly so that it covers all of the sky area.
Change the Properties to Overlay.
Duplicate/Change the Properties to Burn
Copy and paste your tube as a new layer just over the cloud layer.
Change the Properties to Soft Light.
From the Elements Folder Copy and paste SG Treehouse as a new layer.
Resize 40%
From the Element 2 Folder Copy and paste sg Whitish Sparkles as a new
layer.
Resize 30%
Highlight the circle paper layer.
Click anywhere outside of it with our Magic Wand.
Highlight each element that overhangs the circle layer (accept for the
sparkles layer) and tap the delete key.
Deselect.
From Elements 2 folder copy and paste SG Vine as a new layer.
Resize 50%
Duplicate/Move it down a little to match the vine up so that you create
what looks like a longer vine – see my tag for reference.
Erase the part of the vine that overlaps the other.
Merge Visible both vine layers.
Add your elements. I used:
From the Elements folder:
Fan: Resize 50%/Duplicate/Flip
Butterfly: Resize 15% and
80%/Free rotate Right 15 degrees
Blue Bird: Resize
10%/Duplicate/Mirror
From Elements 2 Folder:
Sparkles
Highlight your white canvas.
New Raster layer.
Select All.
Copy and paste Paper 2 Into Selection.
Deselect.
Apply the mask.
Merge Group.
Use your Target Tool and change the color to #7dbfd8
Add your credits.
Add your name.
Foreground: #080c04
Background: #7dbfd8
Stroke width: 1.00
Type your name.
Give it a slight Inner bevel:
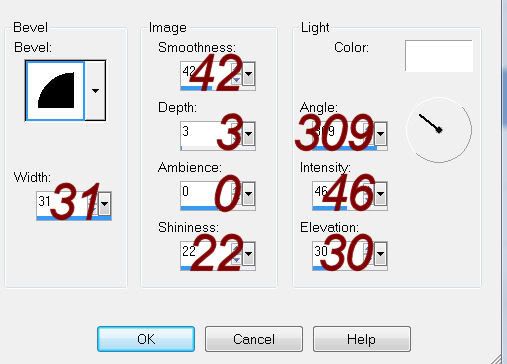
I’m going to try to make this as easy as I can for you to follow if
you’ve never used the Sqirlz Water Reflections before. It’s really quite easy.
In your layers pallet Right Click (on any layer)/View/None.
Starting at the bottom with your white canvas, open up every layer all
the way up to and including the tube layer.
You want to save this as a jpeg.
Name it “For water Animation”
Open up the Sqirlz Water Reflections program.
File/Open/Look for the jpeg you just saved.
Click on the red circle on the right side of the program:
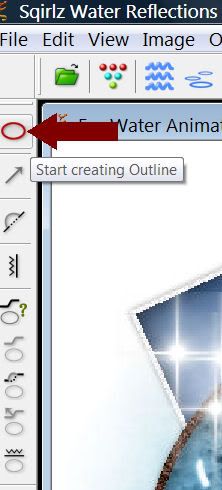
Carefully outline the water area on your image:
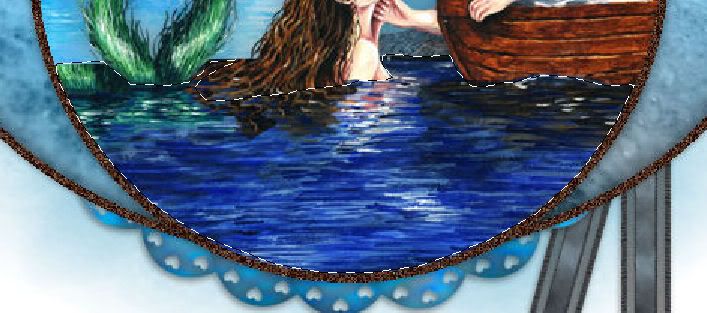
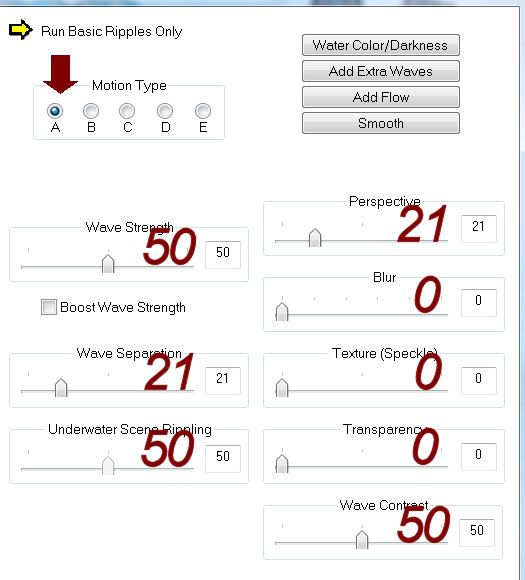
Click on the blue ripple icon (Customize Basic Ripples):

Match your settings to mine and then click on the red x to close the
box out:
Click on the yellow arrow icon to view your animation:

After you’ve viewed your animation then click on the red gif button:

Click on the gif button again.
A small box will appear. Click
OK
A box will appear for you to name your animation – “Your World”
Click OK.
Click OK.
And let the program save your animation.
A box will appear to let you know it’s been saved.
Click OK.
Close your image out.
Close the program out.
Open up Animation Shop.
Open up the animation you just saved.
Ctrl + A to highlight all layers.
Click on the Propagation Paste icon at the top – it looks like 3 papers
with the corners folded over.
Back in PSP.
Start at the very bottom in your layers pallet and click on each eye of
every single layer all the way to the top
- you’re closing out the opened layers and opening up the closed layers.
Edit/Copy Merge
Back in AS.
Ctrl + E and move the elements into position over the animated
image. Once it’s positioned click your
mouse.
View your animation.
If you’re happy then save.
Resize all layers 80%

What a beautiful creation! Love it Bev
ReplyDeleteThanks so much Jess!
ReplyDelete