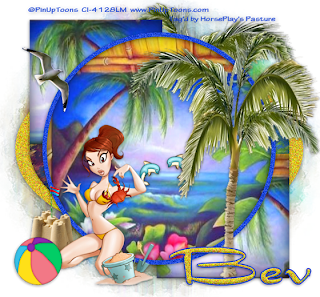
Clicking on the image will allow you to enlarge for bigger view.
Supplies
1 tube of choice - I used the artwork of PinUpToons which can now be purchased from CDO. You must obtain a license to use.
Font of Choice - I used Dragonfly here
Vix Mask 451 here
Scrap Rebellion Template 27 here
Brush Strokes - Sprayed Strokes
Xenofex 1.0 - Shatter
Greg’s Factory Output Vol. II - Pool Shadow
“Seasons” is a massive collaboration put together by many many designers in the scrapping and tagging community to help with the devastation in New Zealand caused by the tragic earthquake. This collaboration is FTU after a donation of $10 USD to the Salavation Army of NZ is made. Please visit Taggers Together for New Zealand to read more on how these talented designers are helping with this cause and to make your donation. This portion of the collaboration was created by DDCreations. Please visit her blog here.
This tutorial was written assuming you have a working knowledge of PSP.
~♥~ Let’s get started ~♥~
Open up the template.
Shift + D.
Close out the original.
Delete the top 5 layers and Blue Strip layer.
Highlight and open up the background layer.
Image/Canvas Size
700 x 650
OK
Flood fill the background layer white.
Highlight White Oval layer.
Select All/Float/Defloat.
New Raster layer.
Flood fill with #e4bb23
Adjust/Add Remove Noise/Add Noise:
Monochrome checked
Noise: 73%
OK
Deselect
Delete the template layer.
Highlight Blue Oval layer.
Click on it with your Magic Wand.
New Raster layer.
Open up Paper 4.
Shift + D.
Close out the original.
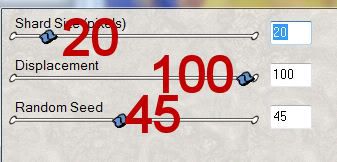
Apply Xenofex 1.0 - Shatter:
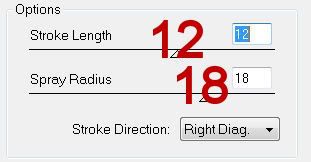
Apply Brush Strokes - Sprayed Strokes:
Copy
Make your working canvas active
Paste Into Selection
Deselect.
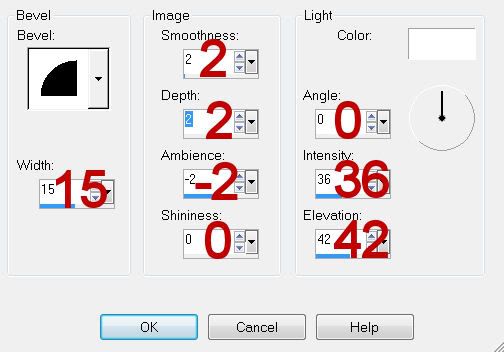
Give it a slight Inner Bevel:
Highlight Top Square layer.
Click on it with your Magic Wand.
Paste Paper 4.
Resize 70%
Choose an area of the paper you want in the boxed area.
Selections/Invert
Tap the delete key.
Delete the template layer.
Give it the same Inner Bevel.
Apply Greg’s Factory Output Vol. II - Pool Shadow:
Use Default settings accept move the Intensity slider to 25.
Highlight Bottom Square layer.
Repeat the above step choosing a different area of the paper.
Highlight Circle layer.
Click on it with your Magic Wand.
New Raster layer.
Paper 4 Into Selection.
Give it the same Inner Bevel.
Deselect.
Delete the template layer.
Highlight Frame layer.
In your layers pallet change the foreground color to #0d3ed9
Make your Target tool active and recolor the frame.
Copy and paste your tube as a new layer.
Add your embellishments. I used:
Seagull: Resize 25%
Palm Tree: Resize 85%/Duplicate/Mirror
Dolphin: Resize 25% and 35%
Sandcastle: Resize 30%
Beach ball: Resize 35%
Highlight your white background.
New Raster layer.
Select All.
Copy and paste Paper 14 Into Selection.
Deselect.
Adjust/Blur/Motion Blur:
Angle: 0
Strength: 97
OK
Apply the mask.
Merge Group.
Add your copyrights.
Add your name.
Choose your colors
Stroke set on 2.
Type your name.
Convert to Raster layer.
Select All/Float/Defloat
Selections/Modify/Contract by 2
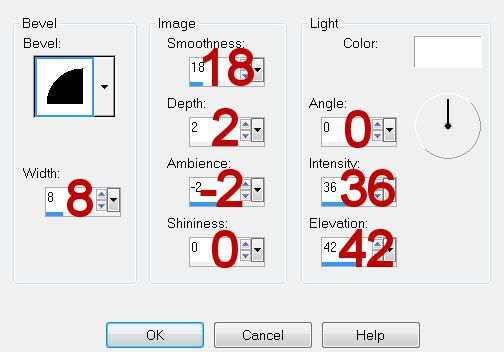
Give it a slight Inner Bevel:
Adjust/Add Remove Noise/Add Noise:
Use same settings.
Deselect.
Resize all layers 80%.
I hope you enjoyed this tutorial.
I’d love to see your results and show it off in my gallery.
Email me!
Hugs,
Bev

No comments:
Post a Comment