Clicking on the image will allow you to enlarge for bigger view.
Supplies
Font of Choice - I used Narnia here
Weescotlass Mask 161 here
“Pink Gothic Love” is a PTU tagger size scrap kit created by Cindy of Puddicat Creations and can be purchased from Butterfly Blush Designs. You can visit her blog here.
Thank you Cindy for a sweet gothic kit!
This tutorial was written assuming you have a working knowledge of PSP.
~♥~ Let’s get started ~♥~
Open up a 700 x 700 blank canvas.
Flood fill white.
Copy and paste Frame 2 as a new layer.
Resize 75%
Free rotate Left 90 degrees.
Click inside of it with your Magic Wand.
Selections/Modify/Expand by 4.
New Raster layer below the frame.
Copy and paste Paper 14 Into Selection.
Copy and paste Swing 1 as a new layer.
Free rotate Left 90 degrees.
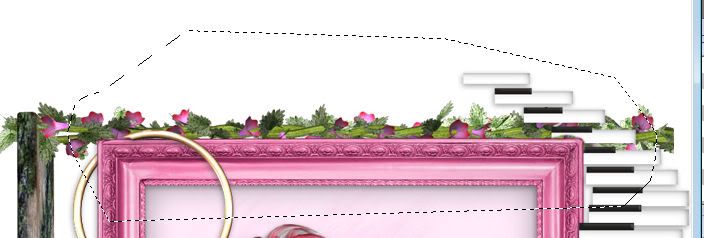
Move into position so the flower line is parallel with the top of the frame.
Use your Freehand Selection Tool to section out the area that’s the length of the frame.

Selections/Invert
Tap the delete key.
Deselect.
Duplicate/Free rotate Left 90 degrees
Position at the left side of the frame.
Duplicate/Mirror
Use your Eraser Tool to erase any part that overlaps on the ends.
Add your embellishments. I used:
Piano Stairs: Resize 80%
Ribbon 1: Resize 60%/Duplicate/Mirror
Keys 1: Resize 80%
Flowers 1: Resize 25%/Flip/Duplicate/Mirror
Pink Skulls 5 (the poser): Resize 75%
Highlight your white background.
New Raster layer.
Select All
Copy and pate Paper 12 Into Selection.
Deselect.
Apply the mask.
Resize 120%
Merge Group.
Add your credits.
Credit for the poser are in a folder of their own.
Add your name.
Resize all layers 80%.
I hope you enjoyed this tutorial.
I’d love to see your results and show it off in my gallery.
Email me!
Hugs,
Bev
Supplies
Font of Choice - I used Narnia here
Weescotlass Mask 161 here
“Pink Gothic Love” is a PTU tagger size scrap kit created by Cindy of Puddicat Creations and can be purchased from Butterfly Blush Designs. You can visit her blog here.
Thank you Cindy for a sweet gothic kit!
This tutorial was written assuming you have a working knowledge of PSP.
~♥~ Let’s get started ~♥~
Open up a 700 x 700 blank canvas.
Flood fill white.
Copy and paste Frame 2 as a new layer.
Resize 75%
Free rotate Left 90 degrees.
Click inside of it with your Magic Wand.
Selections/Modify/Expand by 4.
New Raster layer below the frame.
Copy and paste Paper 14 Into Selection.
Copy and paste Swing 1 as a new layer.
Free rotate Left 90 degrees.
Move into position so the flower line is parallel with the top of the frame.
Use your Freehand Selection Tool to section out the area that’s the length of the frame.

Selections/Invert
Tap the delete key.
Deselect.
Duplicate/Free rotate Left 90 degrees
Position at the left side of the frame.
Duplicate/Mirror
Use your Eraser Tool to erase any part that overlaps on the ends.
Add your embellishments. I used:
Piano Stairs: Resize 80%
Ribbon 1: Resize 60%/Duplicate/Mirror
Keys 1: Resize 80%
Flowers 1: Resize 25%/Flip/Duplicate/Mirror
Pink Skulls 5 (the poser): Resize 75%
Highlight your white background.
New Raster layer.
Select All
Copy and pate Paper 12 Into Selection.
Deselect.
Apply the mask.
Resize 120%
Merge Group.
Add your credits.
Credit for the poser are in a folder of their own.
Add your name.
Resize all layers 80%.
I hope you enjoyed this tutorial.
I’d love to see your results and show it off in my gallery.
Email me!
Hugs,
Bev

OMG hun I totally love it woo hoo thank you so much for my tag too I willl be posting this on my blog.
ReplyDeletewoo hoo big hugs
Cindy
Thank you Cindy. So thrilled you like it!
ReplyDelete