Supplies
Font of Choice - I used Nadall here
Vix Mask 452 here
Snow Animation here
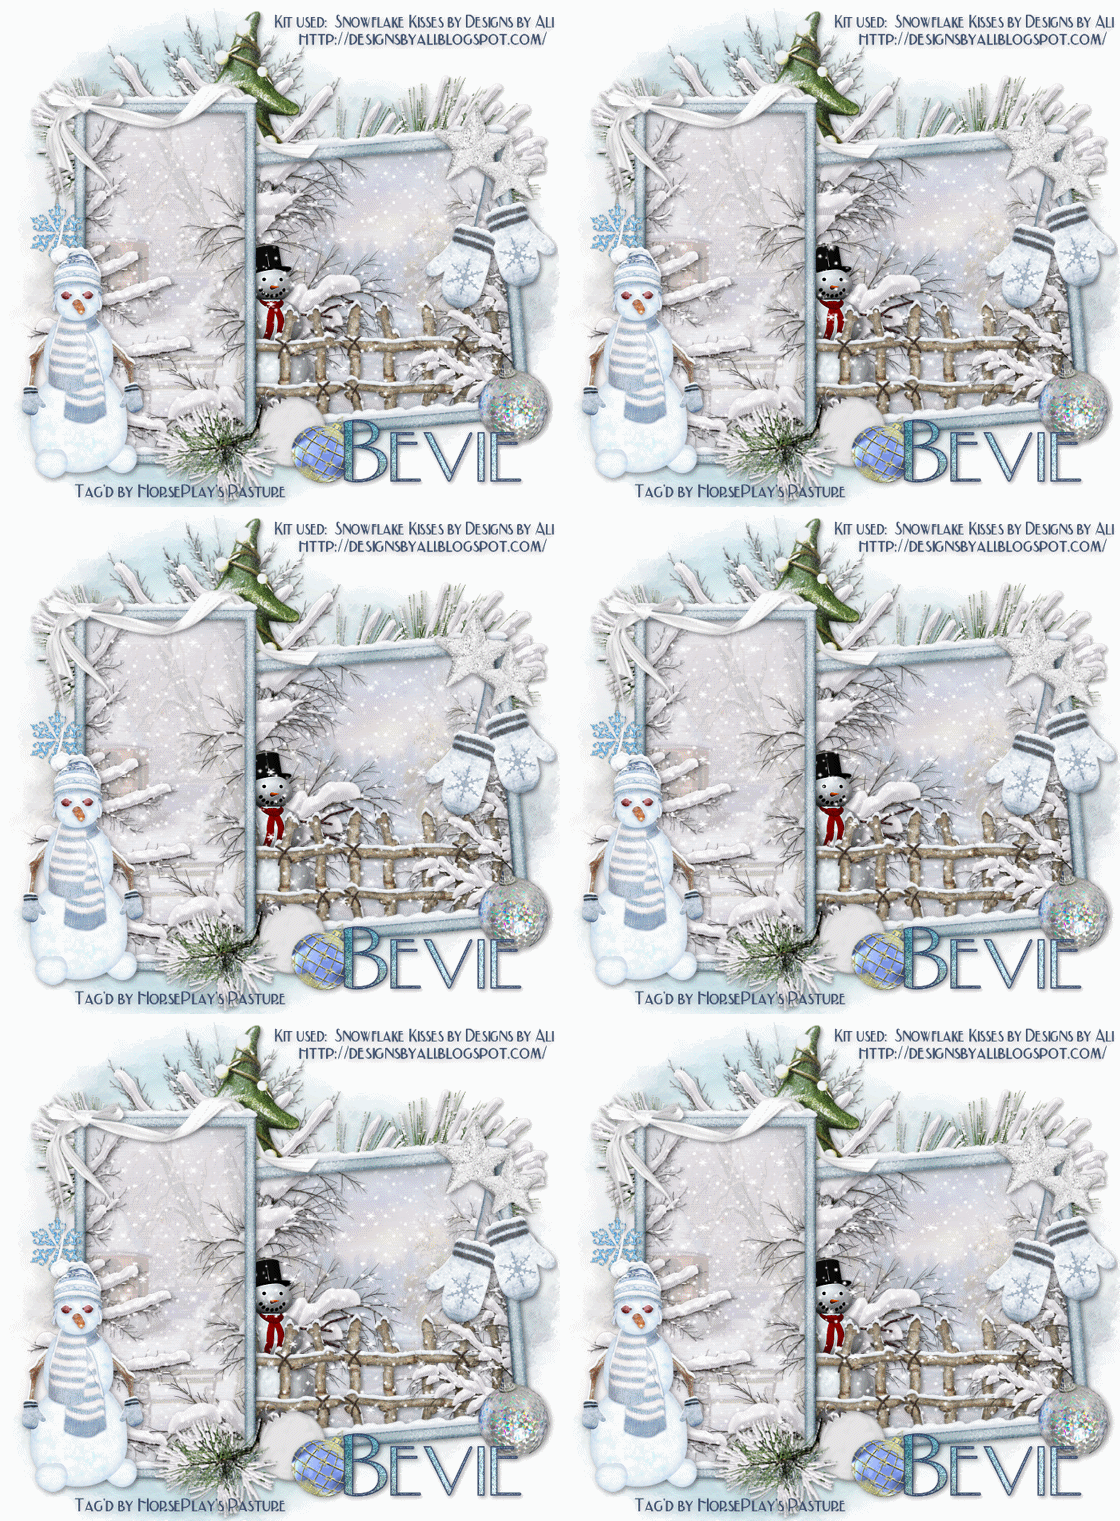
“Snowflake Kisses” is a PTU tagger size scrap kit created by Ali of Designs by Ali and can be purchased from Scraps with Attitude. You can visit her blog here.
Thank you Ali for a breathtaking wintry kit!
This tutorial was written assuming you have a working knowledge of PSP.
~♥~ Let’s get started ~♥~
Open up a blank 700 x 700 canvas.
Flood fill white.
Copy and paste Frame 2 as a new layer.
Resize 50%
Free rotate left 5 degrees.
Copy and paste Frame 1 as a new layer.
Resize 70%
Move both frames into their exact positions.
See my tag for reference.
Highlight Frame 1 layer.
Click inside of it with your Magic Wand.
Copy and paste Paper 6 as a new layer below the frame.
Resize 55%
Move into position.
Selections/Invert
Tap the delete key.
Copy and paste Trees 4 as a new layer below the frame.
Resize 80% - move into position at the left side of the frame so the branch tips are showing - see my tag for reference.
Tap the delete key.
Copy and paste Trees 3 as a new layer below the frame.
Move into position at the right side of the frame so just the branch tips are showing - see my tag for reference.
Tap the delete key.
Deselect.
Open up the animated snow that I provided.
Highlight Frame 1.
Copy
Make your working canvas active.
In your layers pallet highlight the layer that’s just below Frame 1.
Paste - your snow layer should now be just below the frame.
Rename Snow 1
Make the animated snow layers active.
Highlight Frame 2.
Copy.
Make your working canvas active.
Paste - Rename Snow 2. This layer should be just above Snow 1 layer.
Repeat the above step until you have all 10 snow layers pasted beneath the frame.
Highlight the paper layer that belongs to Frame 1.
Click anywhere outside of it with your Magic Wand.
Highlight each of the snow layers and tap the delete key.
Deselect.
Close out all snow layers accept for Snow 1.
Highlight Frame 2 layer.
Click inside of it with your Magic Wand.
Copy and paste Paper 7 as a new layer just below the frame.
Resize 45%
Move into exact position.
Selections/Invert
Tap the delete key.
Copy and paste Trees 3 as a new layer.
Move it into position so the branch peek out from behind the other frame.
Tap the delete key.
Paste the tree again.
Resize 55% - move into position at the right side of the frame so that the branch tips can be seen - see my tag for reference.
Tap the delete key.
Copy and paste Snowman 1 as a new layer just below the frame.
Resize 25% - move into position where you like.
Copy and paste Fence 2 as a new layer just below the frame.
Resize 25%/Duplicate
Position both fence layers so that it looks to be one fence.
Highlight each fence layer and tap the delete key.
Deselect.
You need to apply the snowflake layers in the same manner as you did in Frame 1.
Refer back to the directions.
Add your embellishments. I used:
Mittens 1: Resize 25%
Ribbon 1: Resize 40%/Mirror/Free rotate Left 20 degrees
Silver Star 1: Resize 25% and 50%/Duplicate/Mirror/Resize 80%
Charm 2: Resize 30%
Bauble 3: Resize 25% and 70%/Free rotate left 30 degrees
Bauble 2: Resize 25%/Free rotate right 30 degrees
Bauble 1: Resize 25% and 80%/Mirror
Snow Covered Pine: Resize 25% and 70%/Mirror/Flip/Free rotate Right 40 degrees
Christmas Tree 1: Resize 40%
Trees 4: Resize 70%
Snow Covered Pine 2: Resize 50% (place behind the frame)/Duplicate/Mirror/Resize 50%
Highlight your white background.
New Raster layer.
Copy and paste Paper 16 Into Selection.
Deselect.
Apply the mask.
Merge Group.
Duplicate/Flip
Highlight the original mask.
Duplicate/Move to the right a bit.
Add your credits.
Add your name.
Resize all layers 80%.
Be sure you have both Snow 1 layers open. All other snow layers closed out.
Copy Merge.
~Time to Animate~
Open up Animation Shop
Edit/Paste/As New Animation
Go back into PSP.
Close out both Snow 1 layers.
Open up both Snow 2 layers.
Copy Merge.
Carry into AS
Edit/Paste/After Current Frame.
Back into PSP.
Close out both Snow 2 layers.
Open up both Snow 3 layers.
Copy Merge.
Carry into AS.
Edit/Paste/After Current Frame.
Continue copying the snow layers, carrying and pasting them into AS.
Once you’ve done this to all 10 snow layers view your image.
If you’re happy with it then save.
I hope you enjoyed this tutorial.
I’d love to see your results and show it off in my gallery.
Email me!
Hugs,
Bev

No comments:
Post a Comment