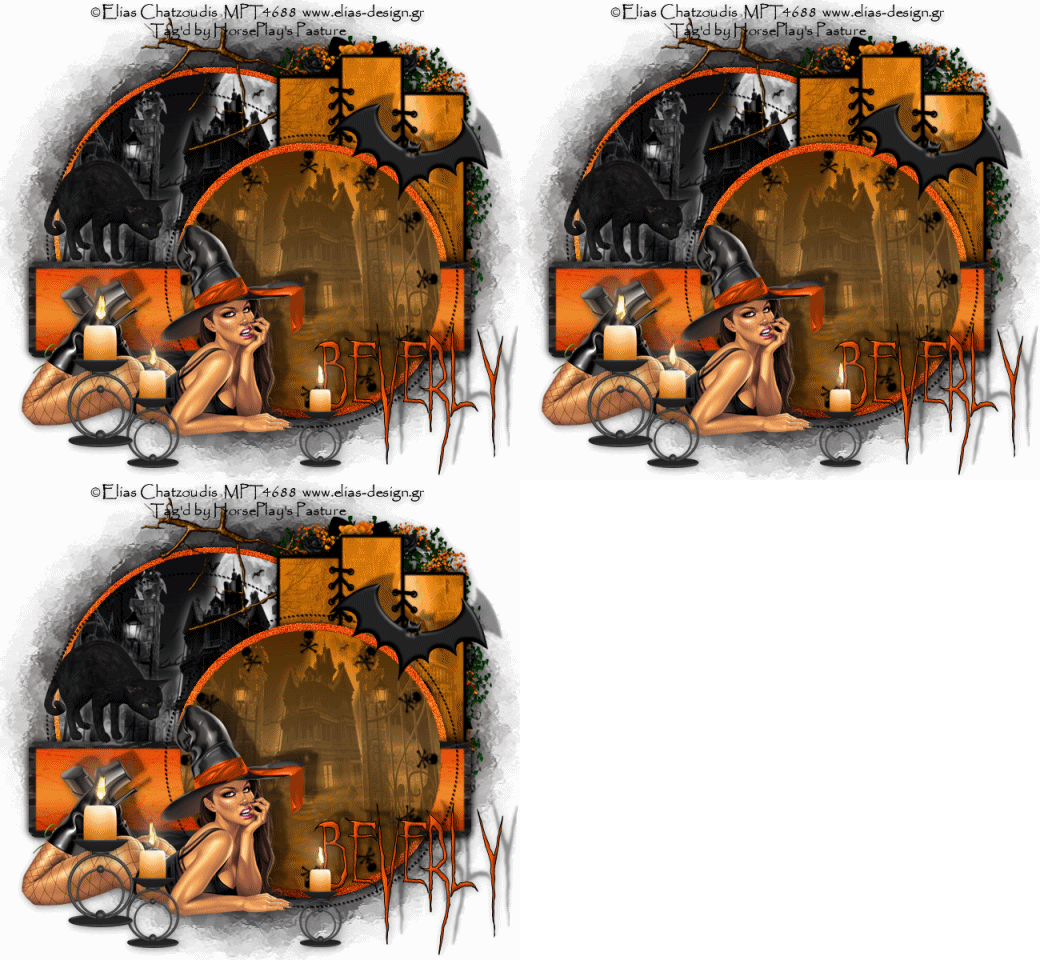
Supplies
1 tube of your choice - I used the artwork of Elias Chatzoudis and can be purchased at MPT
Font of Choice - I used Ghastly Panic here
Denz Designs Template 156 here
Vix Mask 451 here
Mura Meister - Copies
Eyecandy 5: Nature - Fire
Animation Shop
“Naughty Pumpkin” is a PTU tagger size scrap kit created by Treasure by Terry and can be purchased at Butterfly Blush Designs. You can visit her blog here.
Thank you Terry for such a fabulous kit!
This tutorial was written assuming you have a working knowledge of PSP.
~♥~ Let’s get started ~♥~
Open up the template.
Shift + D.
Close out the original.
Resize all layers 110%
Image/Canvas Size
650 X 600
Highlight the background layer.
Flood fill white.
Delete the credit layer, black hearts, and red hearts layers.
Highlight Black Circle with Gradient Glow layer.
Use your Magic Wand and click on it.
New Raster layer.
Copy and paste Paper 1 Into Selection
Deselect.
Delete the template layer.
Adjust/Add Remove Noise/Add Noise:
Gaussian and Monochrome checked
Noise: 33%
OK
Highlight White Circle with Gradient Glow layer.
Repeat the above step using the same paper.
Highlight Black Circle layer.
Click on it with your Magic Wand.
New Raster layer.
Copy and paste Paper 6 Into Selection.
Deselect.
Delete the template layer.
Highlight Dotted Outline 2 layer.
Select All/Float/Defloat
New Raster layer.
Flood fill with the color black.
Deselect.
Delete the template layer.
Highlight Dotted Outline 1 layer.
Repeat the above step using the same color.
Highlight 3 Black Strips with Gradient Glow layer.
Click on it with your Magic Wand.
New Raster layer.
Flood fill with the color black.
Deselect.
Delete the template layer.
Highlight 3 Black Strips layer.
Click on each one with your Magic Wand.
New Raster layer.
Copy and paste Paper 9 Into Selection.
Deselect.
Delete the template layer.
Highlight Red Strip with Gradient Glow layer.
Click on it with your Magic Wand.
New Raster layer.
Copy and paste Paper 3 Into Selection.
Deselect.
Delete the template layer.
Highlight Red Strip layer.
Click on it with your Magic Wand.
New Raster layer.
Copy and paste Paper 1 Into Selection.
Deselect.
Delete the template layer.
Highlight White Circle layer.
Click on it with your Magic Wand.
New Raster layer.
Copy and paste Paper 5 Into Selection.
Deselect.
Delete the template layer.
Copy and paste Skull 2 as a new layer.
Resize25% and 50%
Apply Mura Meister - copies:
Change it to Encircle - use default settings.
OK
Copy
Highlight the front circle paper.
Click on it with our Magic Wand.
New Raster layer.
Paste Into Selection.
Deselect.
Resize 97%.
You can delete the original circle of skulls layer.
Copy and paste your tube as a new layer.
Give it an exaggerated drop shadow.
Add your embellishments. I used:
Cat 1: Resize 50%/Give white drop shadow/Give black exaggerated drop shadow on a layer of its own
Arch: Resize 90%
Laces 1: Resize 50%
Branch 2: Resize 85%
Bat: Resize 60%
Candles 4:
Resize 60%
Duplicate/Resize 80%
Duplicate/Resize 80%
You should now have 3 candles.
Give each a drop shadow on a layer of its own.
Use your eraser tool and erase the drop shadow the flames of each candle.
Merge Visible all candles and their shadows.
Duplicate twice for a total of 3 candle layers.
Rename them C1, C2, and C3.
Zoom in and use your Freehand Selection Tool to outline the flame of each candle.
Highlight C1 layer.
Apply Eyecandy 5 - Nature: Fire
Settings Tab:
Choose: Small, Candle
On the Basic Tab:
Default Settings accept change the Column Length to 35.00
OK
Highlight C2 layer.
Apply fire affect again accept hit the random seed button once.
Highlight C3 layer.
Repeat the above step.
Close out C2 and C3 layers.
Highlight your white background.
Select All.
Copy and paste a paper of choice Into Selection.
Deselect.
Apply the mask.
Merge Group.
Add your credits.
Add your name (be sure it’s below the candles in your layers pallet)
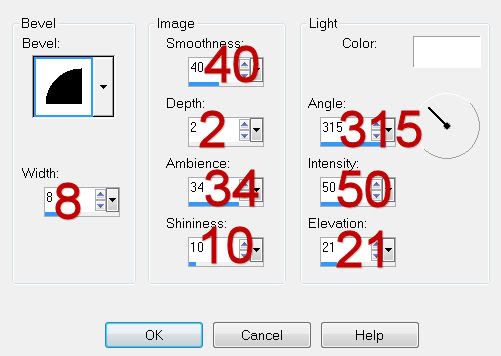
Give it an inner bevel:

Repeat the inner bevel.
Give it a black drop shadow.
Give it the same exaggerated drop shadow you used on the cat on a layer of its own.
Resize all layers 80%.
Copy Merge
~Time to Animate~
Edit/Paste/As New Animation
Back in PSP.
Close out C1 layer.
Open up C2 layer.
Copy Merge.
Carry into AS.
Edit/Paste/After Current Frame.
Back in PSP.
Close out C2 layer.
Open up C3 layer.
Copy Merge
Carry Into AS
Edit/Paste/After Current Frame.
Ctrl + A - to highlight all frames.
Animation/Frame Properties:
Change the Display time to 21
OK
View your Animation.
If you’re happy then save.
I hope you enjoyed this tutorial.
I’d love to see your results and show it off in my gallery.
Email me!
Hugs,
Bev

No comments:
Post a Comment