Supplies
2 tubes of choice - I used the artwork of Keith Garvey at MPT
Font of Choice - I used Al Sandra here
Gem Mask 204 here
My Template 94 here
Animation Shop
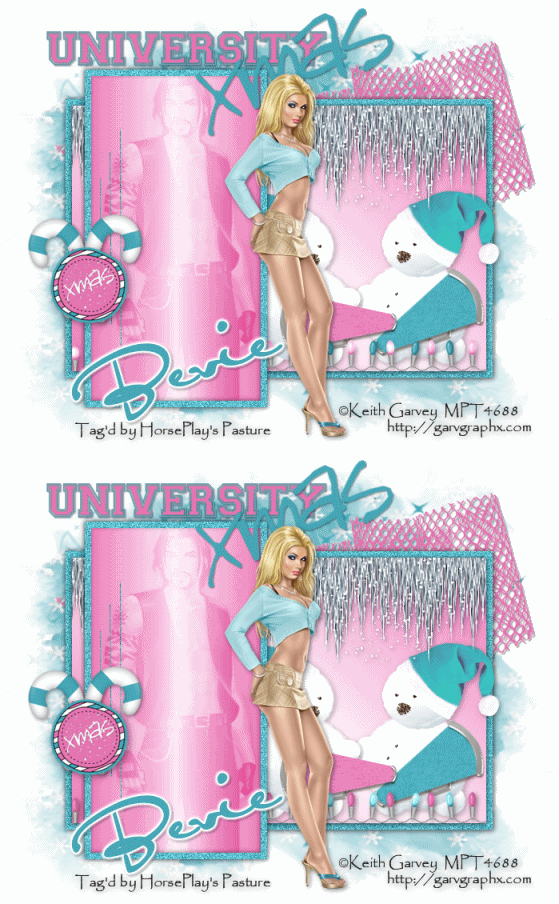
“University Xmas” is a PTU tagger size scrap kit created by Missy of Scraps with Attitude and can be purchased from her store Scraps with Attitude. You can visit her blog here.
Thank you Missy for a fun and energetic holiday kit!
This tutorial was written assuming you have a working knowledge of PSP.
~♥~ Let’s get started ~♥~
Open up the template.
Shift + D.
Close out the original.
Image/Canvas Size
700 x 600
Flood fill the background layer white.
Delete the top 3 layers and Stitches Layer.
Highlight Large Rec Back layer.
Click on it with your Magic Wand.
New Raster layer.
Flood fill with #45a6b6.
Adjust/Add Remove Noise/Add Noise:
Gaussian and Monochrome checked
Noise: 60%
OK
Deselect.
Highlight Large Rect layer.
Select All/Float/Defloat
New Raster layer.
Flood fill with a gradient of choice.
Copy and paste 44 as a new layer.
Resize 40%
Adjust/Sharpness/Sharpen More
Move into position in the upper right corner of your gradient layer.
Duplicate/Move to fit in the opposite corner.
Merge Down.
Selections/Invert
Tap the delete key.
DO NOT DESELECT.
Copy and paste 41 as a new layer.
Resize 40%
Move into position at the bottom right corner of the gradient layer so that the bulbs that stick up are sitting along the bottom edge of the gradient layer - be sure the bulb doesn’t go over the side edge.
Duplicate/move to the left side - again be sure the bulb doesn’t go over the edge.
Erase any of the overlap that you see.
Merge Down.
Tap the delete key.
Deselect.
Delete the template layer.
Duplicate the merged bulb layer.
Rename them Bulb 1 and Bulb 2
Highlight Bulb 1 layer.
Make your Lighten/Darken Tool active and lighten all the pink bulbs.
Close the layer out.
Highlight Blub 2 layer.
Lighten all the blue bulbs.
Close this layer out.
Reopen Bulb 1 layer.
Highlight Vertical Rectangle layer.
Select All/Float/Defloat
New Raster layer.
Flood fill this layer using the same gradient colors just change the angle so that it’s different.
Copy and pasteyour tube as a new layer over the gradient layer.
Selections/Invert
Tap the delete key.
Deselect.
Delete the template layer.
Change the Properties of the tube layer to Soft Light.
Highlight Vertical Rec Frame layer.
Click on it with your Magic Wand.
New Raster layer.
Flood fill with #45a6b6.
Add the same noise.
Deselect.
Delete the template layer.
Copy and paste your tube as a new layer.
Add your embellishments. I used:
19: Resize 50%
21: Resize 40%/Free rotate Left 20 degrees
56: Resize 80%
49: Resize 30%/Duplicate/Mirror
9: Resize 35%
10: Resize 25%/Mirror/Free rotate Left 30 degrees
30: Resize 25% and 80%/Free rotate Left 20 Degrees/Duplicate/Mirror
67: Resize 25% and 59%/Free rotate Left 20 degrees
Highlight your white background.
Select All.
New Raster layer.
Copy and paste a paper of choice Into Selection.
Deselect.
Apply the mask.
Merge Group.
Add your credits.
Add your name.
Resize all layers 80%.
Copy Merge
~Time to Animate~
Open up Animation Shop.
Edit/Paste/As New Animation
Back into PSP.
Copy Merge.
Carry into AS.
Edit/Paste/After Current Frame
Ctrl + A to highlight both frames.
Animation/Frame Properties:
Change the number to 20
OK
View your animation.
If you’re happy then save.
I hope you enjoyed this tutorial.
I’d love to see your results and show it off in my gallery.
Email me!
Hugs,
Bev

No comments:
Post a Comment