Supplies
2 tubes of choice - I’m using the wonderful artwork of Keith Garvey here
Font of Choice - I’m using Piano Light here
Artmama’s Mask 2 here
Divine Intentions Template 271 here
DSB Flux - Bright Noise
Tramages - Starmaker
“Butterflies” is a PTU tagger size scrap kit created by Lynne of Baby Cakes Scraps and can be purchased at Kreative Kreations Korner. You can visit her blog here.
Thank you so much Lynne for another beautiful kit!
This tutorial was written assuming you have a working knowledge of PSP.
~♥~ Let’s get started ~♥~
Open up the template.
Shift + D.
Close out the original.
Resize all layers 90%
Image/Canvas Size
700 X 650
OK
Flood fill the background layer white.
Highlight Oval layer.
Use your Magic Wand and click on it.
New Raster layer.
Copy and paste a paper of choice Into Selection.
Deselect.
Choose a dark color from the paper and using your Target Tool color the template layer.
Highlight Rectangle 1 layer.
Use your Magic Wand and click on it.
New Raster layer.
Copy and paste a paper of choice Into Selection.
Deselect.
Using your Target Tool again, color the template layer.
Highlight Rectangle 2 layer.
Use your Magic Wand and click on it.
New Raster layer.
Flood fill with white.
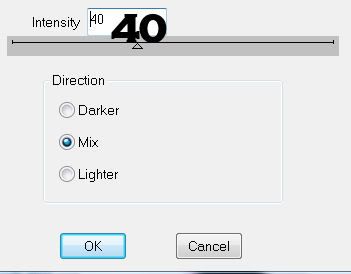
Apply DSB Flux - Bright Noise:
Highlight Rectangle 3 Layer.
Using your Magic Wand click it.
New Raster layer.
Copy and paste a paper of choice Into Selection.
Deselect.
Delete the template layer.
Highlight Circle layer.
Using your Magic Wand click it.
New Raster layer.
Copy and paste a paper of choice Into Selection.
Deselect.
Delete the template layer.
Highlight Circle Half layer.
Using your Magic Wand click it.
New Raster layer.
Copy and paste a paper of choice Into Selection.
Deselect.
Delete the template layer.
Highlight Small Circle layer.
Select All/Float/Defloat
New Raster layer.
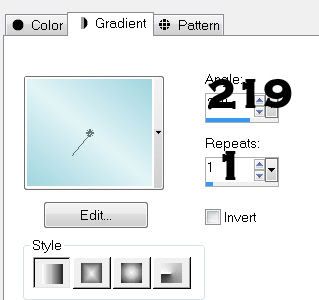
Flood fill with a gradient made of matching colors to the paper.
Highlight Small Circle 2 layer.
Select All/Float/Defloat
New Raster layer.
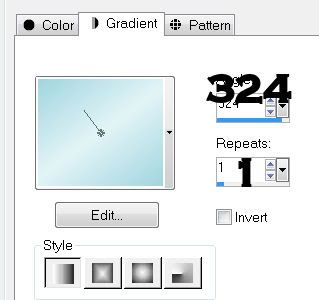
Flood fill with a gradient made of matching colors to the paper.
Merge Visible both small circle layers.
Highlight Circle Frame layer.
Using your Target Tool again, colorize.
Repeat the above step with Circle Frame 2 layer.
Highlight Thin Rectangle layer.
Flood fill with any gradient of your choice.
I just changed Angle and Repeats to zero.
Highlight Stars layer.
You can colorize using your Target Tool
Or
Select All/Float/Defloat
New Raster layer.
Flood fill with a color of choice.
Apply DSB Flux - Bright Noise:
Same Settings.
In order to get the right effect from Tramages - Starmaker you must follow this next step.
Copy and paste as a new layer the tube you want to have in the small circles.
Move it into position below the small circle - you must do all your resizing to it now.
Once you have it resized as you like:
Edit/Copy
Edit/Paste as New Image
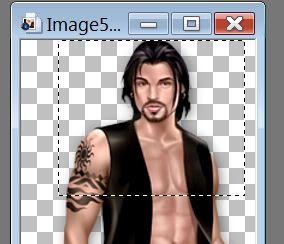
Using your Selection Tool select the part of the tube that will go below the frame. See the example of mine.
Edit/Copy
Make your working canvas active.
Edit/Paste as New Raster.
Delete your other tube - you no longer need it.
You should now just have the headshot of your tube as the only tube layer on your working canvas.
Duplicate.
Move the duplicated tube into position below the other circle frame.
Highlight the small circles layer.
Select All/Float/Defloat
Selections/Invert
Highlight each of the tube layers and tap the delete key.
Change the Properties on both tube layers to Soft Light.
Merge Visible with the circles layer.
Apply Tramages - Starmaker
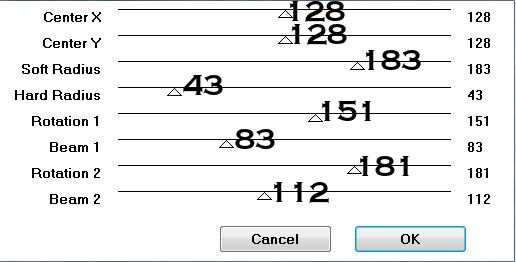
Copy and paste your tube as a new layer.
Move it into position.
Duplicate
Highlight the circle layer.
Select All/Float/Defloat
Selections/Invert
Highlight the original tube layer and tap the delete key.
Highlight the Duplicate layer and use your Eraser Tool to erase any that overhangs the bottom of the circle.
Add your embellishments. I used:
Staple: Resize 25%. Duplicate/Free rotate Left 30 degrees.
Stitched Ribbon: Resize 35% Use your Pick Tool to move the sides in slightly
Branch: Resize 50%
Glass Bfly: Resize 25%
Blue Clipped: Resize 40% Free rotate right 120 degrees
Bow: Resize 25%
Baby’s Breath: Resize 70% Duplicate/Resize 80%
Lace FL 2: Resize 65%
Sheer Bfly 2: Resize 25%
Shere Bfly: Resize 30%
Highlight your white background.
New Raster layer.
Select All.
Copy and paste a paper of choice Into Selection.
Deselect.
Apply the Mask.
Merge Group.
Duplicate.
Merge Down.
Duplicate.
Add your copyrights.
Add your name.
Give it a slight inner bevel:
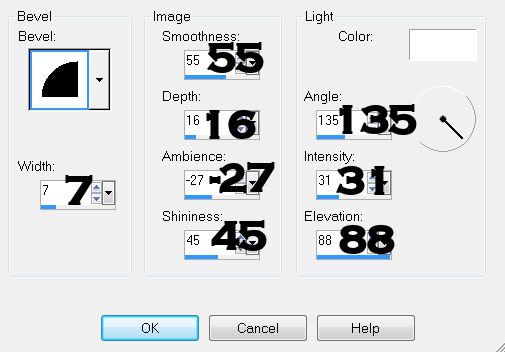
Resize all layers 80%.
I hope you enjoyed this tutorial.
I’d love to see your results and show it off in my gallery.
Email me!
Hugs,
Bev


No comments:
Post a Comment