 Clickingon the image will enlarge to full view.
Supplies
1 tube of choice - I’m using the artwork of Jennifer Janesko which you can purchase here
Font of Choice - Balsam here
Weescotlass Mask 44 here
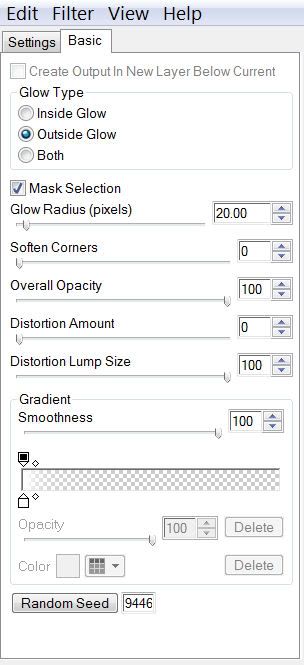
Eyecandy 5: Impact - Gradient Glow
“Spun Sugar” is a PTU tagger size kit designed by Lynne of Baby Cakes Scraps. It can be purchased at Aussie Scrap Designs.
This kit is packed with such delicate and beautiful elements!!
Thank you so much Lynne!
This tutorial was written assuming you have working knowledge of PSP.
~♥~ Let’s get started ~♥~
Open up a 700 X 700 blank canvas.
Flood fill white.
Copy and paste Heart Frame 2 as a new layer.
Use your Magic Wand and click inside of it.
Selections/Modify/Expand by 2.
Copy and paste a paper of choice as a new layer below the frame.
Selections/Invert.
Hit the delete key.
Copy and paste your tube as a new layer below the frame.
Tap the delete key.
New Raster Layer above your tube.
Effects/3D Effects/Cutout
Vertical and Horizontal: 10
Opacity: 25
Blur: 35
Color: Black
Repeat the above step accept change the Vertical and Horizontal numbers to -10.
Add your embellishments. I used:
Branch 2: Resize 60% Free rotate left 45 degrees.
Duplicate/Mirror/Flip
Feather: Resize 35%
Bird: Resize 55%
Gloves: Resize 40%
Swirls: Resize 60%
Butterfly: Resize 20%
Highlight your white canvas.
New Raster Layer.
Select All.
Copy and paste a paper of choice Into Selection.
(Or you can flood fill with a color of your choice)
Deselect.
Apply the mask.
Merge Group.
Add your copyrights.
Add your name.
I used Eyecandy 5: Impact/Gradient Glow

Resize all layers 85%.
I hope you enjoyed this tutorial.
I’d love to see your results and show it off in my Show Arena.
Email me!
I’d love to see your results and show it off in my Show Arena.
Email me!
Hugs,
Bev

No comments:
Post a Comment