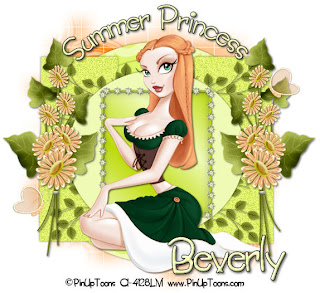
Clicking on the image will enlarge to full view.
Supplies
1 tube of choice - I’m using the artwork of PinUpToons which you can purchase here
Font of Choice - I’m using FanciHand here
WSL Mask 84 here
Dezigns by Ali Template 55 here
“Shades of Melon” is a taggers size scrap kit created by Scraps by Rags and can be purchased here. You can visit her blog here.
Thank you Rags for such a summery kit!
This tutorial was written assuming you have working knowledge of PSP.
~♥~ Let’s get started ~♥~
Open up the template. Shift +D. Close out the original.
Delete the DBA layer.
New Raster Layer. Send to bottom.
Image/Canvas size
750 X 700 pixels.
OK
Flood Fill white.
Highlight Circle 1 layer.
Select All/Float/Defloat
Copy and paste a paper of choice as a new layer.
Selections/Invert
Hit the delete key.
Deselect.
Delete the template layer.
Highlight Circle 2 layer.
Select All/Float/Defloat
New Raster layer.
Flood fill with a dark color from the Circle 1 layer.
Deselect.
Delete the template layer.
Highlight Circle 3 layer and repeat the above step accept flood fill with a light color from the Circle 1 layer.
Highlight Back Frames layer.
Select All/Flloat/Defloat
New Raster layer.
Flood fill with the light color you just used.
Adjust/Add RemoveNoise/Add Noise:
Gaussian and Monochrome checked
Noise: 35%
OK
Highlight Middle Rectangle Frame layer.
Select All/Float/Defloat
New Raster layer.
Flood fill with a gradient made from the dark and light colors you just used.
Deselect.
Delete template layer.
Highlight Frame 1 layer.
Select All/Float/Defloat
New Raster layer.
Flood fill with the dark color
Deselect.
Delete Template layer.
Copy and paste a Flower String of your choice.
Resize 30%.
Move it to cover the top of the frame. Erase the one diamond that’s overhanging.
Duplicate and move to cover the bottom of the frame.
Paste as new layer again. Resize again.
Free rotate 90 degrees and move to cover one side of the frame.
Duplicate and move to cover the other side of the frame.
Add your embellishments. I used:
Foliage
Flower Bunch: Resize 80%
Bling Fly: Resize 25%
In your color pallet change the foreground to #00000.
Close out your background pallet.
Using your Ellipse tool, make a circle that’s a little bigger than your largest circle.
Objects/Aligns/Center in Canvas
Move your cursor at the top of the circle until you see a rocking A.
Click your mouse and a text box will appear.
Type in SUMMER PRINCESS or whatever you like.
Click on the + next to Vector Circle.
Close out the New Ellipse layer.
Right click on the Vector 1 layer.
Convert to Raster layer.
Add an inner bevel:
Bevel: 2
Width: 6
Smoothness: 5
Depth: 5
Ambience: 13
Shininess: 12
Color: white
Angle: 315
Intensity: 30
Elevation: 50
OK
Add your copyrights.
Add your name. Give it the same inner bevel.
Highlight your white canvas.
New Raster layer.
Select All.
Copy and paste a paper of choice Into Selection.
Deselect.
Apply the mask.
Merge Group.
OK
Resize all layers 85%.
I hope you enjoyed this tutorial.
Hugs,
Bev

No comments:
Post a Comment