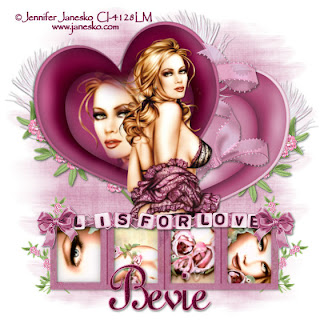
Clicking on the image will enlarge to full view
Supplies Needed
4 tubes or images of choice and 1 tube. I'm using the artwork of Jennifer Janesko which you can purchase here
Font of choice - I'm using Gessele Regular here
Weescotlass Mask 260 here
Eyecandy 5: Impact – Optional
DSB Flux: Bright Noise - Optional
"L is for Love" PTU scrap kit created by Monica’s Sweet Addiction and can be found in her store Pink Krush. You can visit her blog here.
Thank you so much, Monica for a beautiful kit!
The possibilities for tags with this kit is endless!!!
This tutorial was written assuming you have working knowledge of PSP.
~♥~ Let’s get started ~♥~
Open up a blank canvas 700 X 700. Flood Fill white. Copy and paste Element 12 as a new layer. Use your Selection Tool and outline the inside heart. Copy and pate your tube as a new layer. Resize to enlarge if need be, trying to center the face in the inner heart. Selections/Modify/Feather.
Number of Pixels: 52.
OK
Selections/Invert. Hit your delete key until your tube is feathered nicely inside the heart. Deselect. Merge down. Free rotate left 15 degrees.
Copy and paste Element 13 as anew layer. Change the color to one that matches your tube. Free rotate right 15 degrees and move behind the other heart.
Copy and pate Element 3 as a new layer. Free rotate left 15 degrees and move behind the heart with the feathered tube. Duplicate/Mirror/Resize 90%. Move behind the other heart.
Copy and pate Element 23 as a new layer. Image/Mirror. Free rotate left 83 degrees. Resize 50%. Move behind the feathered heart layer. Dulicate/Mirror. Move behind the other heart.
Copy and paste Element 33 as a new layer. Resize 75%. Use your Magic Wand and click inside each square. Selections/Modify/Expand by 6. Copy and paste a paper of choice beneath the frame. Resize the paper 75%. Selections/Invert. Hit the delete key.
Copy and paste a tube or image of choice into each square. Merge visible the frame, paper, and tubes.
Copy and paste your tube as a new layer.
Move all layers into position where you like.
Add your elements.
I used:
Element 23: Resize 30%
Element 30: Resize 25%
Element 1: colorize to match your tube
Element 20
Add your copyrights.
Add your name.
I applied DSB Flux/Bright Noise
Intensity: 36
Mix
OK
EyeCandy 5: Impact
Gradient Glow
Outside Glow
Mask Selection checked
Glow Radius: 5
Soft Corners: 0
Overall Opacity: 100
Distortion Amount: 0
Distortion Lump Size: 100
Smoothness: 46
Choose your color
Ok
I hope you enjoyed this tutorial.
I’d love to see your results.
Email me!
Hugs,
Bev

No comments:
Post a Comment